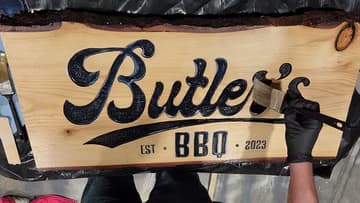
How to Make a Wooden Sign (Hand Routed, No CNC)
Source: PatriotDIY • Full tutorial: www.craftingstepbystep.com/woodworking-crafts/how-to-make-a-wooden-sign
- Difficulty
- Medium
- Hands-on time
- About 3 hours
- Wait time
- 4 hours
- Cost
- About $25 to $50
- Makes
- 1 wooden sign

Tools
- plunge router
- engraving, straight and detail router bits
- propane or MAP gas torch
- belt sander or orbital sander
- pencil
- paint brushes
- drill or screwdriver
Materials
- wood board or live edge slab
- graphite transfer paper
- painter's tape
- satin black spray paint
- 80 and 220 grit sandpaper
- clear shellac
- water-based polycrylic
- D-ring hangers
Steps
1. Print and Position the Lettering on the Wooden Sign Board
Design your lettering on the computer and save it as a PDF. Use the poster setting in the print options to print it at full size across several pages, then tape the pages together and trim them.
Tip: Leave at least an inch of margin around the words. Crowded edges look cramped.
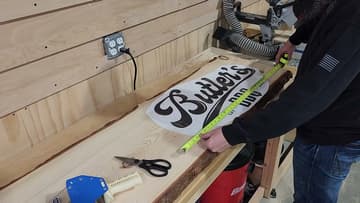
2. Trace the Letters Onto the Wooden Sign With Graphite Paper
Lift the loose side of the template and slide graphite transfer paper underneath, dark side down. Tape it down as you go so nothing moves.
Tip: Lift a corner partway through to check the lines are dark enough.
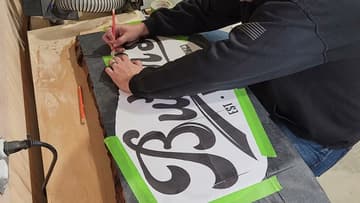
3. Route the Letter Outlines Into the Wooden Sign
Fit a small profile engraving bit in your router. Set the depth to about 1/4 inch.
Tip: Move slowly on tight curves. Several light passes beat one fast one.
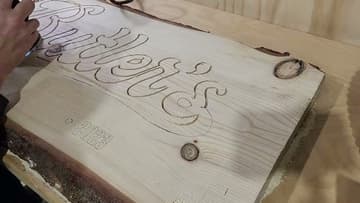
4. Clear Out the Wooden Sign's Letters With a Straight Bit
Swap to a 1/4 inch straight bit or a spiral up cut bit, set to the same depth. Route out all the wood inside each outline.
Tip: Keep both hands on the router and let the bit stop before you lift it.
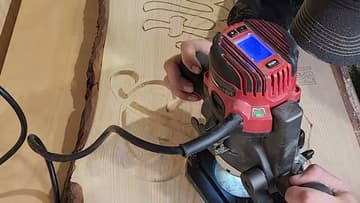
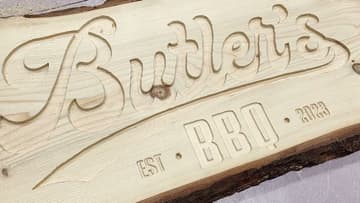
5. Carve the Small Letters and Clean Up the Wooden Sign
For small text, switch to a detail carver bit. It has a finer tip that fits tight spaces.
Tip: Blow the dust out of the letters so you can see the edges clearly.
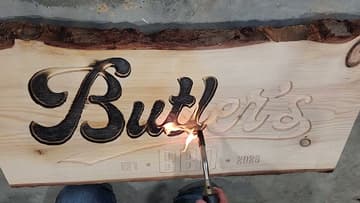
6. Char the Wooden Sign's Letters With a Torch
This step is optional, but it gives a deep, textured look. Hold a propane or MAP gas torch close to the wood and char the inside of the letters until they turn black and crackly.
Tip: Do this outdoors or with good ventilation, and never leave the torch lit.
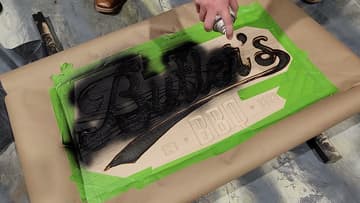
7. Spray Paint Inside the Wooden Sign's Letters
The torch will miss small letters and tight edges. To even it all out, tape off the bark and edges with painter's tape and paper.
Tip: Two light coats cover better than one heavy one and will not run.
8. Sand the Paint Off the Face of the Wooden Sign
Once the paint is dry, sand the face of the sign. A belt sander with 80 grit removes the paint quickly.
Tip: Keep the sander moving and flat so you do not round over the letter edges.
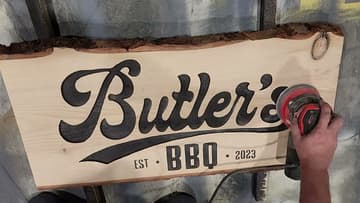
9. Brush Shellac Over the Wooden Sign
Brush on a coat of clear shellac. It seals the wood and brings out a warm, rich colour in the pine.
Tip: Shellac dries fast. Work in long strokes and do not go back over tacky spots.
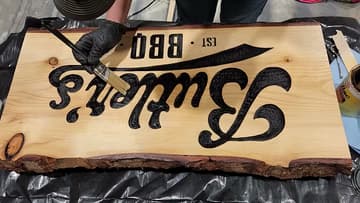
10. Seal the Wooden Sign With Polycrylic
Brush on a water-based polycrylic in semi-gloss. It looks milky in the can but dries crystal clear.
Tip: A spray clear coat is easier to get down into the letters if you have it.