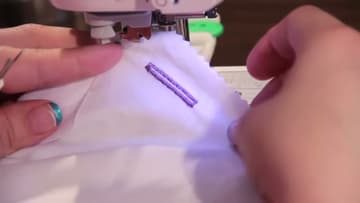
How to Sew a Buttonhole That Fits Your Button Exactly
Source: Sewing Parts Online • Full tutorial: www.craftingstepbystep.com/sewing/how-to-sew-a-buttonhole
- Difficulty
- Easy
- Hands-on time
- About 20 minutes
- Cost
- About $8 to $15
- Makes
- 1 finished buttonhole

Tools
- sewing machine
- automatic buttonhole foot
- seam ripper
- fabric marking pen
- small scissors
- iron
- straight pins
Materials
- fabric
- buttons
- all-purpose thread
- fusible interfacing
- tear-away stabilizer
- topstitch machine needle
- machine embroidery thread
Steps
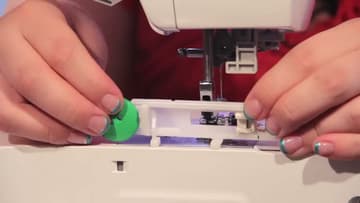
1. Clamp Your Button Into the Back of the Buttonhole Foot
Pull the sliding tray at the back of the buttonhole foot open and drop your button in, then push the tray closed until it grips. A large button pushes the tray wide open.
Tip: Use the button that is going on the garment. A lookalike from the button jar is how you end up cutting a hole your button will not go through.
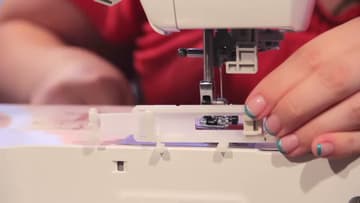
2. Slide the Buttonhole Foot Under the Presser Bar
Take your regular presser foot off the way you normally would, then lay the buttonhole foot on the bed and slide it under the presser bar. Line the bar up over the little groove in the shank so it drops straight into place.
Tip: If it will not seat, the bar is probably sitting on the edge of the shank instead of in the groove. Lift, nudge the foot back a hair and try again.
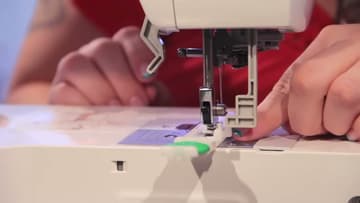
3. Pull the Buttonhole Lever Down Behind the Needle
Look behind the needle bar for a slim lever hanging off the machine head. Pull it down as far as it goes, then push it back so it rests behind the white tab on top of the foot.
Tip: A buttonhole that never turns around means this lever was up, or was not sitting behind the tab. It is the single most common buttonhole mistake.
4. Line the Fabric Up Under the Buttonhole Foot
Slide the fabric under the foot with your mark where you want the buttonhole to start, and drop the needle there by hand so you can see it land. The rest of the hole stitches back away from that point.
Tip: Think of the needle as marking the front end of the hole, not the center of it. That one shift stops buttonholes landing half an inch low all the way down a placket.
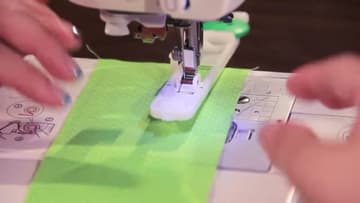
5. Let the Machine Stitch the Buttonhole in One Pass
Select the buttonhole stitch, hold the tail of the top thread out of the way and start the machine. It runs down one side in a tight satin stitch, lays a bar tack across the end, comes back up the other side and finishes the second bar tack.
Tip: Run at a moderate, even speed rather than flat out. A satin bead stitched too fast comes out thin and gappy.
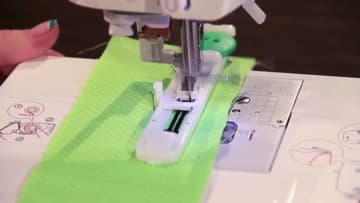
6. Check the Finished Buttonhole Before You Move the Fabric
The machine stops on its own. Raise the needle, lift the presser foot and pull the fabric back so you can look at the hole.
Tip: Sewing several buttonholes? Do not lift the lever between them. The machine holds the size in memory and repeats it exactly.
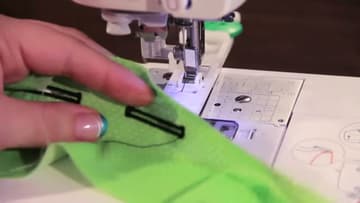
7. Cut the Buttonhole Open With a Seam Ripper
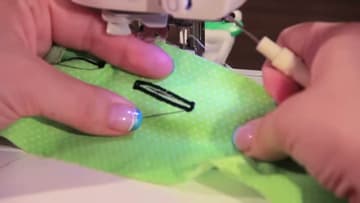
Push the point of the seam ripper through the fabric just inside one bar tack, then run it toward the middle of the hole. Turn the work around and do the same from the other end so the two cuts meet in the center.
Tip: Lay a pin across the buttonhole just inside each bar tack before you cut. If the ripper runs, it hits the pin instead of your stitching.
8. Sew a Buttonhole on Knit Fabric With a Topstitch Needle
The same foot handles knits, it just needs help. Double the knit over or back it with a tear-away stabilizer so it cannot stretch while the bead builds up.
Tip: Test on a doubled scrap of the same knit. Single-layer jersey will ripple no matter how careful you are.