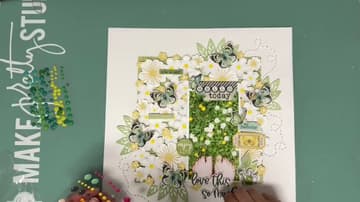
How to Make a Flower Meadow Scrapbook Layout
Source: Hip Kit Club • Full tutorial: www.craftingstepbystep.com/scrapbooking/how-to-make-a-flower-meadow-scrapbook-layout
- Difficulty
- Medium
- Hands-on time
- About 1 hour
- Cost
- About $10 to $20
- Makes
- 1 scrapbook layout, 8 by 8 inches

Tools
- Die-cutting machine
- Metal flower and leaf die sets
- Small sharp scissors
- Tweezers
- Paper trimmer
- Piercing tool
- Sewing needle
Materials
- White cardstock
- Green and yellow cardstock
- Patterned paper
- Yellow marker
- Liquid glue
- Foam adhesive
- Thread
- Stickers and chipboard embellishments
- Enamel dots
Steps
1. Pull the Kit and Lock Your Palette
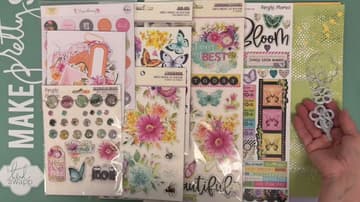
Anke pulls the March 2023 Hip Kits plus the May 2026 cardstock kit, then narrows the whole page down to white, yellow and green. That restriction is doing more than it looks.
Tip: Pick your photo before you pick the palette. Here the photo is grass and white clover, which is exactly why the meadow works.
2. Die-Cut the Flowers and Leaves
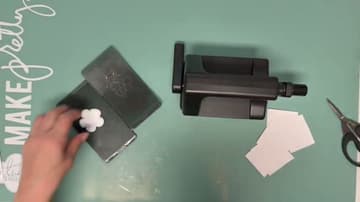
Leaves get cut from the spring green cardstock in the cardstock kit. Flowers come from plain white cardstock using the Dainty Blooms and Leaves die set.
Tip: Stack two or three sheets of cardstock on the plate at once. Most flower dies cut through several layers cleanly and it halves the passes.
3. Build the Flowers Up Off the Page
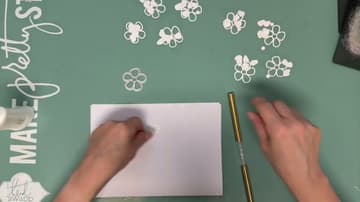
The die set cuts an outer flower and separate inner petal pieces. Glue a small circle of white cardstock behind the outer flower first, then glue the inner pieces onto that circle.
Tip: Use a fine-tip liquid glue rather than a tape runner here. The circles are small and a tape runner will lift the edges.
4. Colour the Centres With a Yellow Marker
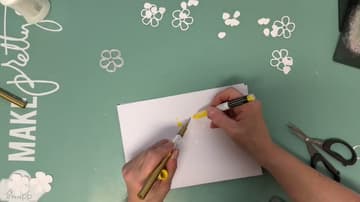
Once the flowers are assembled, colour the centres in with a yellow marker rather than cutting them from yellow card. Doing it at this stage means you can run through the whole batch in one pass.
Tip: Test the marker on an offcut first. Some alcohol markers bleed on thin cardstock and the yellow creeps out onto the petals.
5. Bend the Petals for Dimension
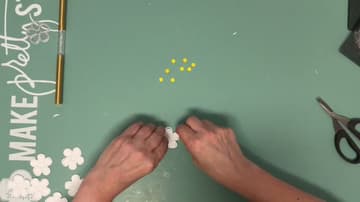
Curl each petal upward between your fingers, then drop the yellow centre into place. This is the step that separates a flat sheet of die cuts from something that catches light and throws small shadows.
Tip: Rolling the petal over the edge of a bone folder or a pen barrel gives a softer curve than fingers alone.
6. Fussy Cut the Butterflies
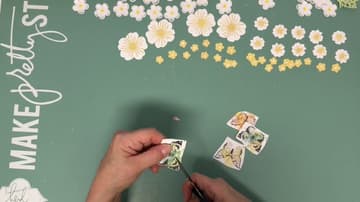
The butterflies are cut by hand out of the patterned paper rather than punched or died. Small sharp scissors and a pair of tweezers make this far less fiddly than holding the paper in your fingers.
Tip: Leave the antennae attached to a sliver of background paper if cutting around them keeps snapping them off.
7. Glue Down the 8 by 8 Base Panel
Trim the patterned base paper to 8 by 8 inches and glue it centred on the layout, leaving a white border all the way round. That border is not wasted space.
Tip: Sort the finished flowers into a muffin tin or shallow dishes by size before you start placing. Anke does, and it makes the arranging step much faster.
8. Build the Meadow
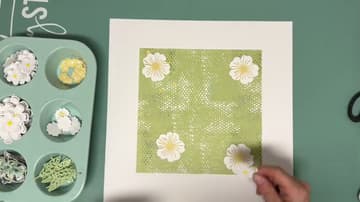
Arrange everything dry before committing any glue. Anke works the largest blooms in first, fills between them with the smaller flowers and yellow buds, then tucks leaves in at the edges so they break past the square.
Tip: Leave the gap for your photo now, not later. Building the meadow first and cutting into it afterwards is how pages get wrecked.
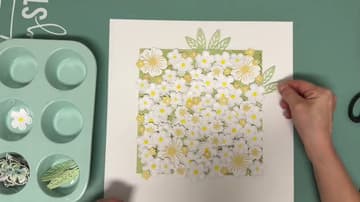
9. Set the Photo In and Start Embellishing
Drop the photo into the gap you left. Because the flowers were arranged around it, the picture sits inside the meadow rather than on top of it, and the page reads as one thing instead of two.
Tip: Worth stealing: glue flat stickers onto white cardstock and cut them out again. They behave like die cuts and sit much better on a dimensional background.
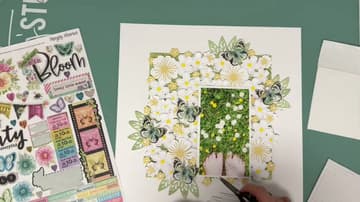
10. Stitch the Butterfly Trails and Finish
Pierce a line of holes looping between the butterflies, then hand stitch along it. The trail gives the eye a path around the page and adds a thread texture nothing else on the layout has.
Tip: Pierce from the front with the page on a foam mat, and mark the curve in pencil first. Holes are permanent.