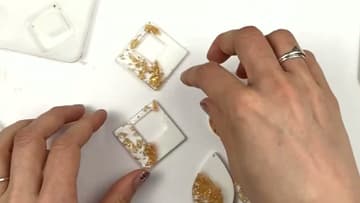
How to Make Resin Earrings: Beginner DIY in 9 Easy Steps
Source: Dezy Jewelry • Full tutorial: www.craftingstepbystep.com/resin-art/how-to-make-resin-earrings
- Difficulty
- Easy
- Hands-on time
- About 45 minutes
- Wait time
- 24 hours
- Cost
- About $12 to $20
- Makes
- 1 pair of earrings

Tools
- silicone earring molds (teardrop, square, diamond)
- mixing cups
- wooden stir sticks or popsicle sticks
- jewelry pliers (round nose and flat nose)
- small heat torch or lighter
- nitrile gloves
- respirator mask with chemical filter
Materials
- two-part epoxy resin (1:1 ratio)
- white acrylic paint
- gold mica powder
- loose gold foil flakes
- earring hooks
- jump rings
- newspaper or parchment to protect the workspace
Steps
1. Gather Materials and Set Up Safely
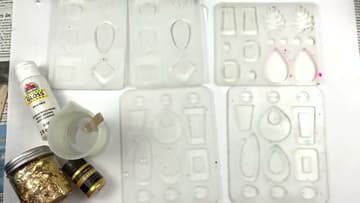
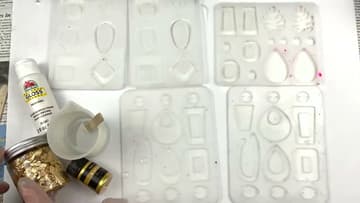
Lay everything out on a newspaper or parchment-covered surface before you mix. You need two-part epoxy resin (parts A and B), silicone earring molds in your favorite shapes, white acrylic paint, gold mica powder, loose gold foil flakes, mixing cups, wooden stir sticks, jewelry pliers, earring hooks, and jump rings.
Tip: If your mask irritates your face, buy a full silicone respirator with replaceable cartridges.
2. Mix the Epoxy Resin
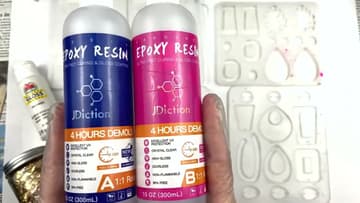
Measure equal parts of resin A (the resin itself) and resin B (the hardener) into a clean mixing cup. The 1:1 ratio is what makes the chemistry work.
Tip: Warm both bottles in a bowl of warm tap water for five minutes before measuring. Warm resin pours thinner, mixes faster, and releases bubbles more easily than cold resin.
3. Divide Resin Into Color Cups
Split the mixed resin into three smaller cups. You want roughly 50 percent of the batch in one cup for the white side, 50 percent in a second cup for the clear-with-foil side, and a very small amount - less than 1 percent - in a third tiny cup for the gold accent line that divides the two halves.
Tip: Use tiny silicone cups instead of paper. Cured resin pops out of silicone with a flex, so you can rinse and reuse the cups for the next pour instead of throwing them away.
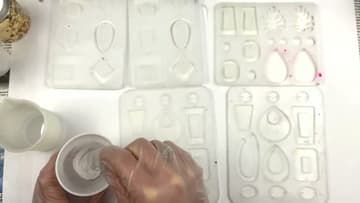
4. Tint the White Cup
Shake your acrylic paint bottle thoroughly before opening - settled paint gives uneven color. Drop two or three drops into the first cup of resin and stir gently.
Tip: Acrylic-based paint mixes cleanly with epoxy. Avoid oil paints and water-based craft inks - the water content can wreck the cure.
5. Add Gold Foil to the Clear Cup
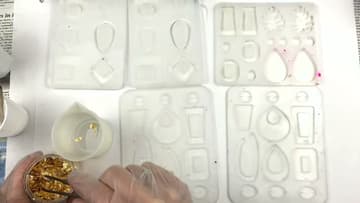
Drop a small pinch of loose gold foil flakes into the second cup of clear resin. Tease them apart with the stir stick if they came out in clumps.
Tip: Save the leftover foil flakes - they keep indefinitely in a sealed jar. The same jar will outlast three or four earring projects.
6. Mix the Gold Mica Accent
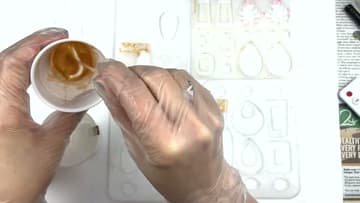
Sprinkle a pinch of gold mica powder into the tiny third cup. Stir until the resin looks like solid liquid metal - no clear epoxy showing through, no streaks of mica.
Tip: Buy a rainbow mica powder set the first time you shop. It costs a few dollars more than a single jar and unlocks every color story you want to try next month.
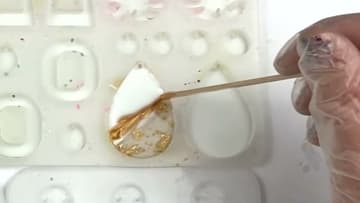
7. Pour the Layered Design Into the Mold
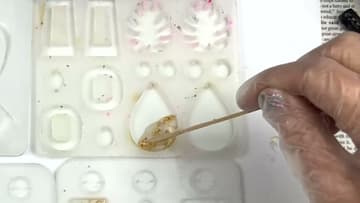
Pour the clear-with-foil resin into the bottom of each mold cavity at a diagonal angle - covering about a third to half of the cavity. Then pour the white resin to fill most of the rest of the cavity, leaving a small ribbon of empty space between the white and the foil section.
Tip: Keep the mold flat on the table. Tilting the mold while pouring lets the colors run together and lose their crisp border.
8. Drop the Gold Accent Line and Pop Bubbles
Take the tiny cup of gold mica resin and dribble one thin line across the border between the white and the clear-foil halves. The line spreads on its own as the resin settles - you don't need to drag it.
Tip: Hold the torch six inches above the surface and keep it moving. Holding the flame in one spot scorches the resin yellow.
9. Cure, Demold, and Attach Hooks
Leave the mold flat on a clean, level surface, dust-free, for the full cure time on your resin's instructions. Fast-cure resins like JDiction demold in four hours, but a full 24-hour cure gives a harder, glossier finish.
Tip: If demolded edges feel slightly sharp, run them lightly across fine sandpaper (600 grit or higher) for a smooth finish. Less than 30 seconds per earring.