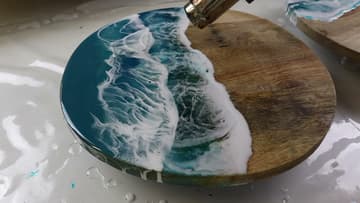
How to Make a Resin Ocean Wave Painting
Source: sheri vegas • Full tutorial: www.craftingstepbystep.com/resin-art/how-to-make-a-resin-ocean-wave-painting
- Difficulty
- Medium
- Hands-on time
- About 1 hour 15 minutes
- Wait time
- 48 hours
- Cost
- About $25 to $50
- Makes
- 1 resin wave board

Tools
- heat gun or hair dryer
- silicone mixing cups
- craft sticks
- nitrile gloves
- respirator for organic vapors
- plastic drop cloth
Materials
- art epoxy resin
- teal and blue resin pigments
- titanium white resin pigment
- round wood board or panel
Steps
1. Pour the Blue Resin Ocean Onto the Wood Round
Mix your resin and split it into cups. Tint each one a different shade of teal and blue, from deep to light.
Tip: Prop the board on cups so drips can run off the edges.
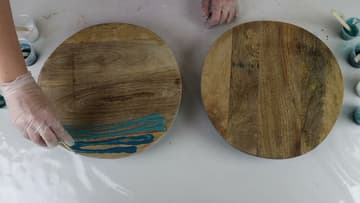
2. Spread the Resin Colors Into an Ocean Gradient
Use a craft stick to push the colors together and spread them up to a wavy shoreline. Blend the edges where the shades meet so the water fades from deep to shallow.
Tip: A gloved finger is handy for pushing resin right to the board edge.
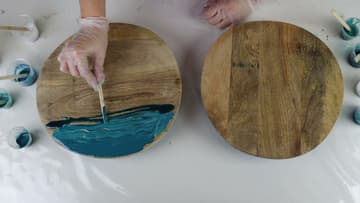
3. Pour a Clear Resin Line Along the Shoreline
Pour a line of clear, untinted resin right along the edge where the colors stop. This is the step most people skip.
Tip: A thin, even line is enough. You are making a barrier, not a puddle.
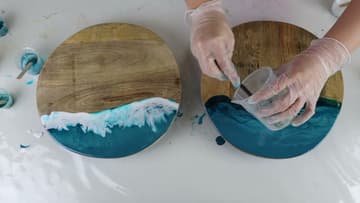
4. Drizzle a Thin Titanium White Resin Line
Mix titanium white pigment into a small cup of resin. Drizzle a thin line of it on top of the clear barrier, following the shoreline.
Tip: Titanium white is heavy, and the weight is what makes the lace.
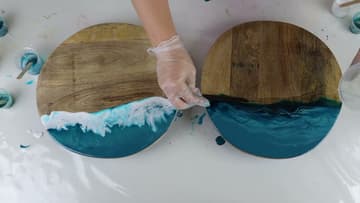
5. Wait for the Resin to Thicken Before the Waves
Give the resin 15 to 20 minutes after mixing. Resin keeps flowing for 30 to 40 minutes, so if you blow the white out too early, your cells stretch and fade as the resin moves.
Tip: Set a timer the moment you finish mixing so you know where you are.
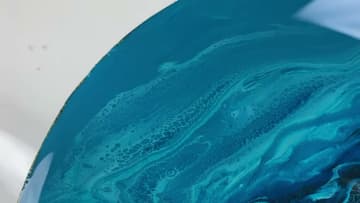
6. Blow the White Resin Across Once With a Heat Gun
Hold the heat gun a few inches above the white line and sweep it slowly across the whole shoreline in one pass. The air pushes the white down over the blue and the heat thins it, so it stretches and breaks into lace.
Tip: A hair dryer on low works too, without the heat.
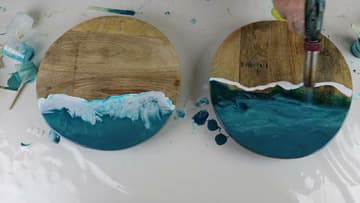
7. Check the First Resin Wave for Lacing
Step back and look. You should see a bright foam line with fine lacy cells trailing behind it into the teal water.
Tip: Cover the piece with a box to keep dust off while it cures.
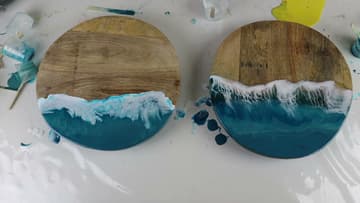
8. Pour a Second Resin Wave in a New Layer
Once the first wave has set, you can add another out in deeper water. Pour a new thin line of clear resin where you want the second wave, then drizzle titanium white on top of it.
Tip: Space the waves unevenly. Real surf never lines up neatly.
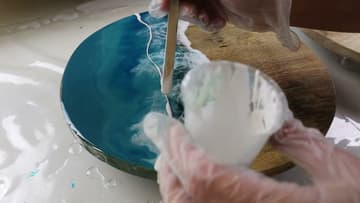
9. Blow Out the Second Resin Wave and Let It Cure
Wait a few minutes, warm the white with a little heat, then sweep the heat gun across the new line once. A fresh band of lacy foam rolls toward the shore and layers over the first wave.
Tip: Less is more. Overworking a wave is the fastest way to lose its lace.