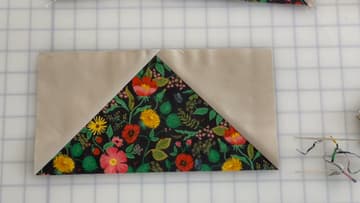
How to Make Flying Geese 4 at a Time
Source: Suzy Quilts • Full tutorial: www.craftingstepbystep.com/quilting/how-to-make-flying-geese
- Difficulty
- Medium
- Hands-on time
- About 45 minutes
- Cost
- About $5 to $12
- Makes
- a set of 4 flying geese quilt blocks

Tools
- Sewing machine
- 1/4-inch patchwork foot
- Rotary cutter
- Self-healing cutting mat
- 6 x 24 quilting ruler
- 6 x 12 quilting ruler for trimming
- Iron
- Seam ripper
Materials
- Cotton quilting fabric for the geese, one large square
- Background cotton fabric, four small squares
- 50 wt cotton piecing thread
- Glass head pins
- Water-soluble fabric marker
- Spray starch
Steps
1. Lay Two Background Squares on Opposite Corners of the Large Print Square
Put the large print square right side up on the cutting mat. Suzy sets hers on point, as a diamond, which makes the diagonal easier to see.
Tip: Starch the background fabric and press it before you cut the squares.
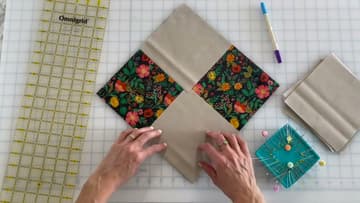
2. Draw a Diagonal Line Corner to Corner Across Both Background Squares
Lay a long quilting ruler from one corner of the background squares to the opposite corner, straight through the point where the two of them meet, and draw a line along it with a fabric marker. One line, corner to corner, running across both squares.
Tip: Use a marker that disappears with water or heat and test it on a scrap of the same fabric. On a dark print a chalk pencil shows up better than ink and brushes straight off.
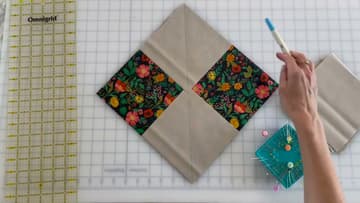
3. Pin Both Background Squares on Either Side of the Drawn Line
Push four pins in, two on each side of the drawn line, well clear of where the needle is going to run. On a square this size the two layers will creep apart otherwise, and creeping is where an uneven goose comes from.
Tip: Glass head pins survive the iron. Plastic heads melt onto the fabric the first time you forget one, which is a stain that does not come out.
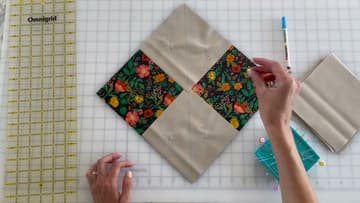
4. Sew a Scant Quarter Inch Seam Down Each Side of the Drawn Line
Run one seam a scant quarter inch to the left of the line and a second one a scant quarter inch to the right. Two separate passes, both from edge to edge.
Tip: The fabric will look a little rippled coming off the machine. That is the bias moving and it presses out. Do not go back and unpick it.
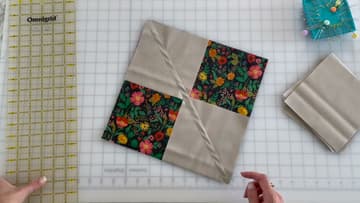
5. Cut the Square Apart Along the Drawn Line With a Rotary Cutter
Lay the ruler so its edge sits right on the drawn line, hold it down firmly, and run the rotary cutter along it in one pass. You are cutting between the two seams you just sewed, which splits the square into two identical halves.
Tip: Walk your holding hand up the ruler as the blade passes it. Keeping it planted at the bottom is how the ruler pivots halfway through the cut and takes a curve out of your line.
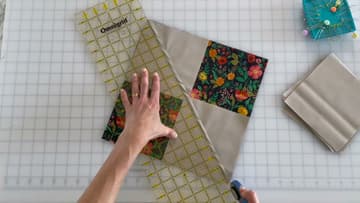
6. Press Both Halves Open Into Heart Shaped Units
Take both halves to the iron and press the background triangles open, away from the print. What you get is a shape most quilters call a heart: one big print triangle with two background ears standing up at the top.
Tip: Press to the side, toward the background, and all four of your finished geese will have their seam allowances lying the same way.
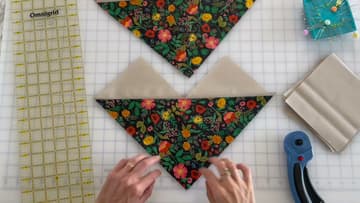
7. Lay the Third Background Square Over the Center of the Heart Unit
Take a heart unit and lay one of your two remaining background squares right side down over the middle of it, with its corners matching the notch between the two ears. Do the same with the second heart and the last background square.
Tip: Check the corners against the unit underneath before you mark anything.
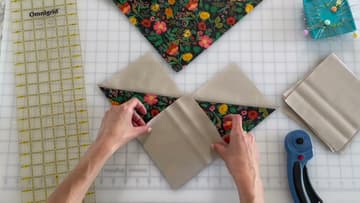
8. Sew Both Sides of the New Line, Then Cut Between the Two Seams
Same two passes as before. A scant quarter inch down one side of the new line, a scant quarter inch down the other, nothing on the line.
Tip: Chain piece both units through the machine without cutting the thread between them.
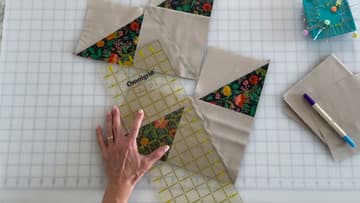
9. Press Open and Count Four Flying Geese Units
Press each of the four open, background away from the print, and lay them out together. Four flying geese, all the same size, all from five squares of fabric.
Tip: Lay all four side by side and look along them. If one is visibly shorter than the other three, its seam was wider.
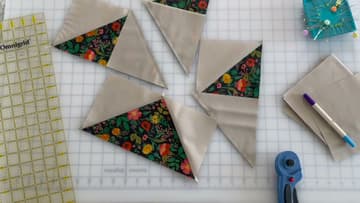
10. Line the Quilting Ruler Up on the Flying Geese Unit Before You Trim
Work out the unfinished size first. It is the finished size plus half an inch, so a 5 by 10 inch finished goose trims to 5 1/2 by 10 1/2 inches.
Tip: A 6 by 12 inch ruler is easier to steer around a goose than a long 6 by 24. If the long one is all you have it works, it just hangs off the mat and wants to slide.
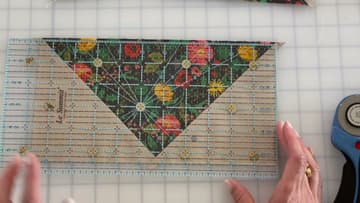
11. Check the Quarter Inch of Background Above the Flying Geese Point
Before you cut the top edge, look for a quarter inch of background fabric above the tip of the goose. That strip becomes the seam allowance when the unit gets sewn into a block.
Tip: Trim all four units in one sitting while the ruler placement is still in your hands.