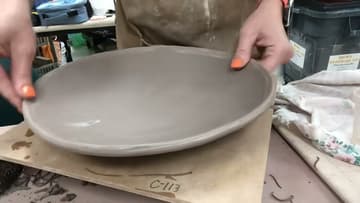
How to Make a Slab Pottery Dish
Source: KaransPotsAndGlass • Full tutorial: www.craftingstepbystep.com/pottery/how-to-make-a-slab-pottery-dish
- Difficulty
- Medium
- Hands-on time
- About 1 hour 30 minutes
- Wait time
- 4 hours
- Cost
- About $3 to $10
- Makes
- 1 dish

Tools
- rolling pin or slab roller
- rubber rib
- needle tool
- scoring tool
- soft brush
- thick foam pad
- hump or drape mold
- surform
- notched rib
Materials
- stoneware or earthenware clay
- slip
- construction paper for a template
Steps
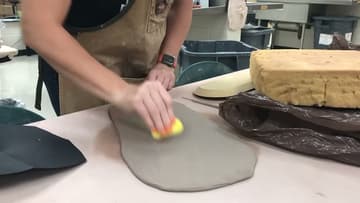
1. Rib the Rolled Clay Slab Smooth
Roll a slab of clay to an even 1/4 inch thick. Karan rolls hers off camera with a slab roller, but a rolling pin and two guide sticks work.
Tip: Rib both sides if you can. Compression on both faces keeps the slab flat.
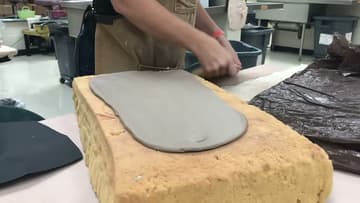
2. Lay the Clay Slab on Thick Foam
Move the slab onto a thick piece of foam rubber, smooth side down. The foam acts as a soft bed.
Tip: An old couch cushion or a stack of folded towels works if you have no foam.
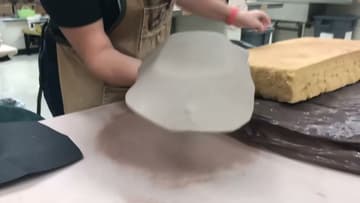
3. Press the Slab Onto an Oval Hump Mold and Flip It
Set the oval mold upside down on the slab and press it down into the foam. Then slide a hand under the foam and flip the whole thing over, so the mold is on the bottom and the slab drapes over the top.
Tip: Work quickly while the slab is soft. Stiff clay creases when it bends.
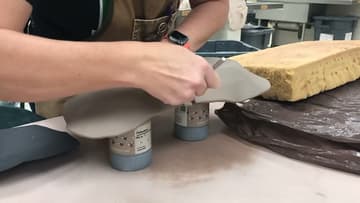
4. Trim the Slab Around the Bottom Edge of the Mold
Prop a narrow mold on something tall, like two jars, so the extra clay hangs free. Run a needle tool around the bottom edge of the mold to cut the excess away.
Tip: Keep the trimmings in a bag. They make the foot ring and handles.
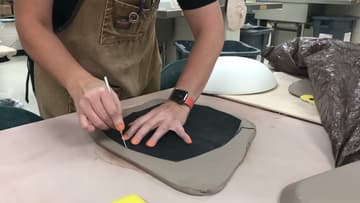
5. Cut a Square Slab Dish Shape From a Paper Template
For a square dish, fold a piece of construction paper in quarters and cut a rounded corner. Unfold it and you have a symmetrical rounded square.
Tip: Save the template. A set of four matching dishes makes a good gift.
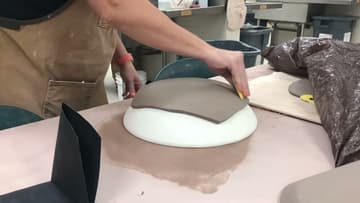
6. Drape the Clay Slab Over a Plaster Hump Mold
Lift the cut slab and center it on top of the plaster dome. Let it settle over the curve, then rib it down gently so it hugs the mold all over.
Tip: Plaster pulls water out of the clay, so check it sooner than you would on wood.
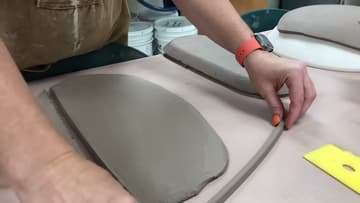
7. Cut Tapered Clay Strips for the Foot Ring
Karan made a foot maker from a block of wood with two nails in it, one straight and one angled. Drag it along a slab to cut a strip that is thicker on one side.
Tip: GR Pottery Forms sells a ready-made foot maker if you do not want to build one.
8. Score, Slip and Attach the Foot Ring to the Slab Dish
Mark where the foot will go on the leather hard base. Score that track and the thick side of each strip, add slip, then press the strips on.
Tip: Echo the dish shape. A square dish gets a squarish foot, an oval gets an oval.
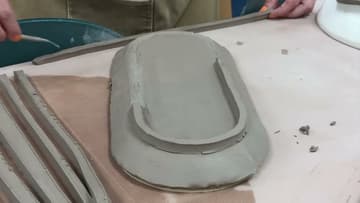
9. Shape the Slab Dish Rim With a Notched Rib
Once the dish is fully leather hard, lift it off the mold and turn it right side up. Shave any uneven spots on the rim with a surform and begin to round the edge.
Tip: Cut a notch in an old gift card to make your own notched rib.
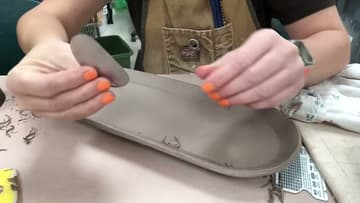
10. Smooth and Compress the Slab Dish Rim With Wet Fingers
Dip your fingers in water and run them around the rim, pinching lightly as you go. This compresses the clay and leaves a smooth, finished edge.
Tip: Use only a little water. Too much softens the rim and it can slump.