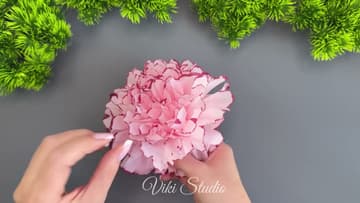
How to Make Tissue Paper Flowers (Easy 5-Minute Craft)
Source: VIKI Studio Origami • Full tutorial: www.craftingstepbystep.com/paper-crafts/how-to-make-tissue-paper-flowers
- Difficulty
- Easy
- Hands-on time
- About 15 minutes
- Cost
- About $2 to $4
- Makes
- 1 tissue paper flower

Tools
- sharp scissors
- pink or color brush marker (optional, for tinted edges)
Materials
- tissue paper sheets (4-8 per flower)
- floral wire or pipe cleaner / chenille stem
- ribbon (optional, for stems)
Steps
1. Stack 4-8 Sheets of Tissue Paper
Pick out 4-8 sheets of tissue paper in the color you want. Four sheets gives you a smaller, daintier flower.
Tip: Cheap tissue paper from the dollar store works great - the thinner the sheets, the easier they are to fluff and separate at the end.
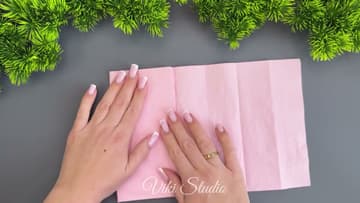
2. Accordion-Fold the Stack
This is the only fold that matters. Fold the stack over on itself in roughly 1-inch wide pleats, like an accordion or a paper fan.
Tip: If the sheets shift while you're folding, that's fine. Press the whole stack flat against the table with one hand while you fold with the other.
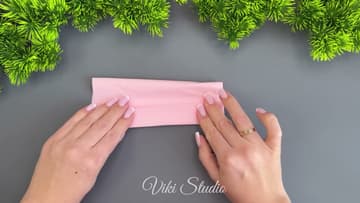
3. Tie the Center With Floral Wire
Find the middle of the folded strip and wrap a piece of floral wire or a pipe cleaner around it. Twist the wire tight enough that the pleats can't slide, but not so tight that you tear the tissue.
Tip: If you're making a wall of flowers, leave 6-8 inches of wire on each one.
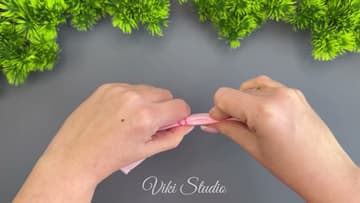
4. Round the Ends Into Petal Shapes
With the folded stack still flat, take a sharp pair of scissors and round off both ends. The shape you cut becomes the petal shape, so think about what you want: a soft curve for round, peony-style petals, a pointed cut for spiky chrysanthemum petals, or a scalloped cut for ruffled carnations.
Tip: Cut a little deeper than you think you need to.
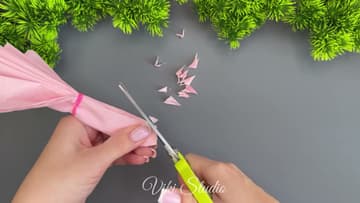
5. Tint the Petal Edges (Optional)
This is the trick that takes the flower from cute to gorgeous. Take a watercolor brush marker in a darker shade than your tissue (burgundy for pink, deep gold for yellow, navy for blue) and run the tip lightly along the cut edges of the folded stack.
Tip: Tombow Dual Brush Pens or Crayola Super Tips both work well. Avoid permanent markers - they don't blend into the tissue and they smell strong.
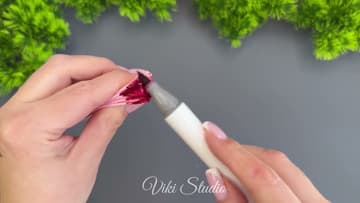
6. Fan the Folds Open
Hold the wire-tied center between your fingers and gently spread the two halves of the folded strip apart. The accordion pleats fan out into a half-circle on each side of the tie, like a bow tie made of tissue.
Tip: If the wire feels loose after fanning, give it one more twist. The petals pull on the center as they open, and a loose tie can come undone halfway through fluffing.
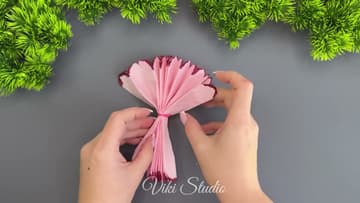
7. Separate and Fluff Each Layer Toward the Center
This is where the flower comes to life. Start with the top layer of tissue and gently pull it up toward the center of the flower.
Tip: If a layer tears while you're separating it, don't panic - the tear disappears once the petals are fluffed. Just keep going.
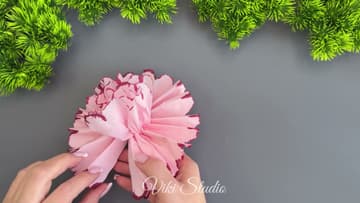
8. Shape the Finished Flower
Once every layer is fluffed, use both hands to round the whole bloom into a sphere. Press lightly from the sides to push stray petals into place, then puff the center up so it sits higher than the outer petals.
Tip: Tissue paper flowers store flat. If you're making a bunch for a party, stack the finished blooms in a box with a sheet of tissue between each one.