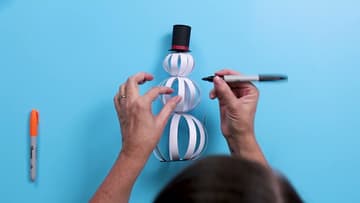
How to Make Paper Snowmen
Source: The Crafty Blog Stalker • Full tutorial: www.craftingstepbystep.com/paper-crafts/how-to-make-paper-snowmen
- Difficulty
- Easy
- Hands-on time
- About 45 minutes
- Cost
- About $5 to $10
- Makes
- 1 paper snowman

Tools
- paper trimmer
- scissors
- pencil
- Crop-A-Dile or 1/8-inch hole punch
Materials
- white cardstock
- black cardstock
- red or patterned paper scraps
- brass paper fasteners
- double-sided tape runner
- glue dots
- black and orange Sharpie markers
- printable snowman template
Steps
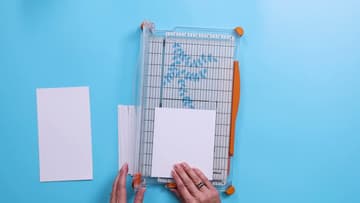
1. Cut White Cardstock Into Half-Inch Paper Strips for the Snowman
Trim a sheet of white cardstock to 6 1/4 inches, then slice it into half-inch strips until you have eight. Turn the paper and do the same at 4 3/4 inches for another eight.
Tip: Keep each length in its own pile. Mixing them up is the easiest way to end up with a lopsided ball.
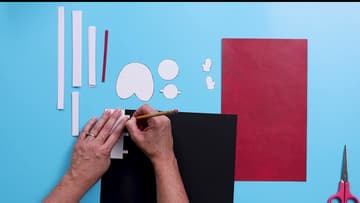
2. Trace the Top Hat, Boots and Mittens Templates Onto Black Cardstock
Cut the shapes off the bottom of the instruction sheet and snip them apart. Lay them on black cardstock and trace round each one with a pencil: the hat rectangle with tabs, the brim, the hat top and the boots.
Tip: Fold the red paper in half before you trace the mittens and you cut two at once.
3. Roll the Black Cardstock Top Hat Into a Tube With Tape
Pull the hat rectangle over the edge of a table a few times so it starts to curl. Run double-sided tape along one short edge and roll it into a tube, tabs at the bottom.
Tip: Plain glue works here too if you have no tape runner. Hold the seam for a minute while it grabs.
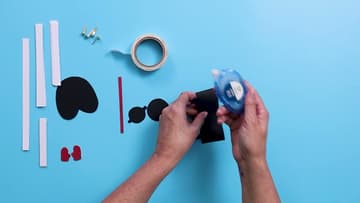
4. Glue the Brim and Top Onto the Paper Top Hat
Fold the little tabs at the bottom of the tube inward and put a glue dot on each one. Centre the tube on the large black circle and press the tabs down to make the brim.
Tip: The hat top is the fiddly bit. If it will not stay, leave it off. Nobody looks inside a snowman's hat.
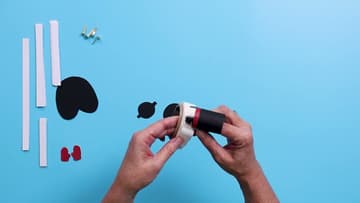
5. Punch Holes in the Paper Strip Stacks With a Crop-A-Dile
Punch a 1/8 inch hole at the centre mark on the long arm strip. Stack each pile of strips with the edges lined up and punch a hole through both ends of every stack.
Tip: This is the step to give to an adult. The punch needs a firm squeeze through a full stack.
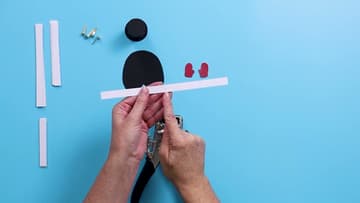
6. Curl the Arm Strip and Stick Red Paper Mittens on Each End
Curl the long arm strip over the table edge the way you did the hat. Put a glue dot on each mitten and press one onto each end of the strip.
Tip: Lay the mitten onto the glue dot while the dot is still on its backing. It sticks much better.
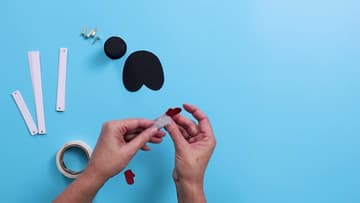
7. Join the Snowman Paper Strips With Brass Paper Fasteners
Push a brad through the holes at one end of the bottom stack and on through the next stack up, so the balls share a fastener where they meet. Keep going up the snowman.
Tip: Lay the pieces out in snowman order before you start. It is much easier to see which hole goes where.
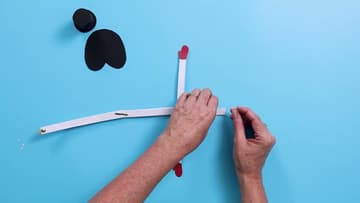
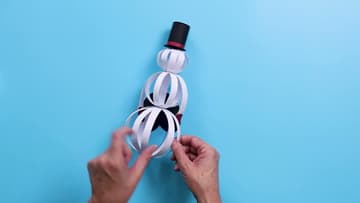
8. Fan the Paper Strips Apart Into Round Snowman Balls
Start at the bottom. Take about half the strips in that section and rotate them round the fastener, then pull the rest apart.
Tip: The head is the hardest, because short strips want to stick together. Separate them one by one.

9. Add the Top Hat and Stand the Paper Snowman on His Boots
Put a glue dot on each side of the top fastener and press the hat on. Stick glue dots on the boots a little out from the centre, with the mitten thumbs facing front.
Tip: Space the bottom strips evenly before they touch the boots. Once they are glued they will not move.
10. Draw a Face and Buttons on the Finished Paper Snowman
Use a black Sharpie to dot on buttons down the middle ball, plus two eyes and a smile on the head. An orange marker makes the carrot nose.
Tip: Draw on the strip that faces front, the same side as the thumbs, so the face lines up with the mittens.