How to Make Paper Rosettes (Accordion-Fold Medallions)
Source: Sarah Loves to Stamp with Sarah Naber • Full tutorial: www.craftingstepbystep.com/paper-crafts/how-to-make-paper-rosettes
- Difficulty
- Easy
- Hands-on time
- About 45 minutes
- Cost
- About $8 to $15
- Makes
- a set of about 3 paper rosettes
Tools
- scoring board or rosette scoring die
- bone folder
- paper trimmer
- hot glue gun
- scissors
Materials
- patterned cardstock or heavy scrapbook paper
- glue dots or hot glue sticks
- double-sided tape
- chipboard circle for the center (optional)
- rhinestones or buttons for the center (optional)
Steps
1. Cut and Score Your Cardstock Strips
For one rosette about 4 inches across, cut two strips of patterned cardstock that measure 2 inches by 12 inches. Run each strip through a scoring board or a rosette scoring die so it picks up evenly spaced score lines all the way down.
Tip: Watch this step Heavier paper holds a crisp pleat better than thin printer paper, so reach for cardstock or double-sided scrapbook paper.
2. Fold Each Strip into an Accordion
Take a scored strip and fold it back and forth along the lines, alternating mountain and valley folds. Run a bone folder or your fingernail along each crease so the pleats stay sharp and stack up into a tight little bundle.
Tip: Watch this step Crease each fold twice with the bone folder. The sharper the pleat, the more the finished rosette looks like a pleated fan instead of a soft ruffle.
3. Glue Each Strip into a Half Fan
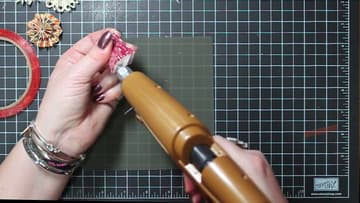
Bring the two short ends of one accordion strip together and glue them so the pleats fan out into a half circle. Sarah runs the end pleat across the tip of a hot glue gun, then presses the two ends into each other and holds until the glue grabs.
Tip: Watch this step Glue dots work here too if you would rather skip the hot glue. Use two per seam so the join does not pop under tension.
4. Join the Halves into a Full Circle
Set the two half fans next to each other so their open edges meet. Glue those edges together and the pleats close into a complete circle.
Tip: Watch this step If the two seams land in obvious spots, plan for a center embellishment to sit over one of them and hide it.
5. Flatten the Center into a Medallion
Here is the tip that makes the whole thing work. Push the center of the ring in so every pleat meets at one point and the rosette lies flat like a medallion.
Tip: Watch this step Glue a small chipboard or cardstock circle to the back to lock every pleat down at once. It doubles as a mount for pinning the rosette to a backdrop.
6. Add a Center and Style Your Rosettes
Cover the middle where the pleats meet with a punched paper circle, a rhinestone, or a button glued right over the hole. This hides the center point and gives the rosette a finished focal detail.
Tip: Watch this step Mix scales for a decorated backdrop: a few big rosettes anchor the arrangement while small ones fill the gaps between them.