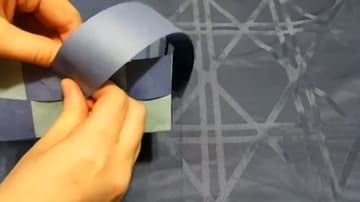
How to Make a Woven Paper Easter Basket
Source: Cramahe Library • Full tutorial: www.craftingstepbystep.com/paper-crafts/how-to-make-a-woven-paper-easter-basket
- Difficulty
- Easy

Tools
- scissors
- ruler
- pencil
Materials
- construction paper in two colours
- glue stick
- 2 brass paper fasteners (brads)
Steps
1. Weave the First Paper Strip Through the Basket Base Strips
Cut both colours of construction paper the long way into 1 inch strips. Lay four strips of one colour side by side on the table, close together but not overlapping.
Tip: A ruler and pencil line on each sheet keeps the strips the same width, and the weave stays square.
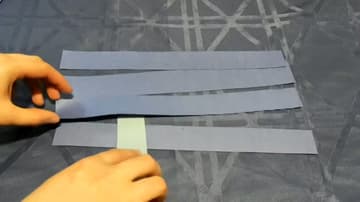
2. Weave the Second Paper Strip in the Opposite Pattern
Take another strip of the second colour and lay it beside the first one. This time do the opposite: under the first strip, over the second, under the third and over the fourth.
Tip: If two squares of the same colour sit side by side, that strip went the same way as the last one.
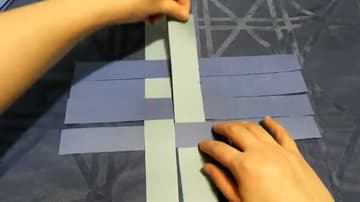
3. Finish the Woven Checkerboard Base of the Paper Basket
Weave the third strip like the first one, starting over. Weave the fourth like the second, starting under.
Tip: Dab glue under the four corner squares. They are the ones that slip when you fold the sides up.
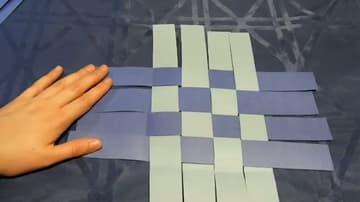
4. Fold Up the Strip Ends on All Four Sides of the Basket Base
Fold each loose strip end straight up along the edge of the woven square. Work all the way around the base, one side at a time, and press a firm crease into every fold.
Tip: Run a fingernail along each fold. A sharp crease gives you straight walls.
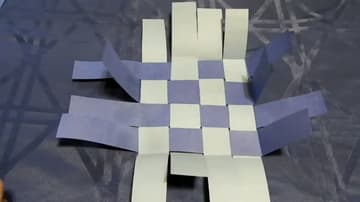
5. Weave the First Wall Strip Through the Upright Ends
Pick a strip in the colour opposite to the uprights on the side you are working on. Weave it through the uprights low against the base: under the first, over the second, under the third and over the fourth.
Tip: Keep the glue stick close. A quick swipe at each crossing is all it needs.
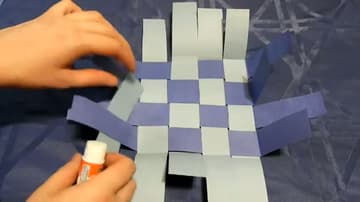
6. Fold the Corner Tab and Trim the Extra Wall Strip
When the strip reaches the end of the wall, make a small fold at the corner so it can join the next side. Cut off the extra length with scissors.
Tip: Fold the corner tab inward so the outside of the basket stays tidy.
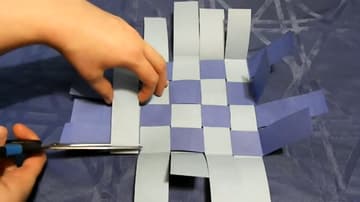
7. Weave the Next Basket Wall in the Opposite Colour
Move to the next side and use the other colour of paper. Look at the wall you finished and note which colour it ended on at the corner.
Tip: Lift the basket and look at each corner as you go. It is easier to fix one now than at the end.
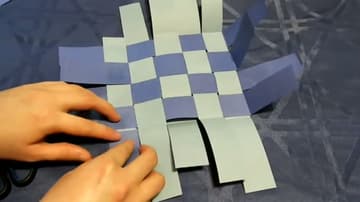
8. Weave the Top Row of the Woven Paper Basket Walls
With the bottom row done all the way around, weave a second row on top of it. This time go the opposite way from the row below.
Tip: Hold the basket in one hand while you weave. It keeps the walls upright and the rows even.
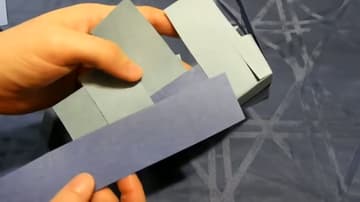
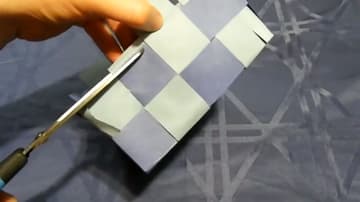
9. Trim the Upright Strips Level Along the Top of the Basket
Take your scissors and snip off the ends of the uprights that stick up past the top row. Go all the way around the basket until the rim is a neat straight line.
Tip: Cut a hair above the top row, not into it, so the woven strip stays whole.
10. Attach the Paper Strip Handle to the Basket With Brads
Take a leftover strip for the handle and arch it over the basket from one side to the other. Push a brad through one end of the handle, leaving a little paper past the hole so it does not tear.
Tip: Use a sharp pencil to poke a starter hole, and the brad goes through without crumpling the wall.