How to Make a Paper Spinner: Easy Origami Fidget Spinner
Source: Easy Origami and Crafts • Full tutorial: www.craftingstepbystep.com/paper-crafts/how-to-make-a-paper-spinner
- Difficulty
- Medium
- Hands-on time
- About 15 minutes
- Makes
- 1 paper spinner

Tools
- bone folder (optional)
Materials
- 15 cm (6 inch) square origami paper
Steps
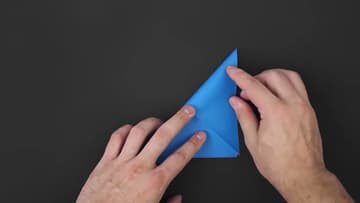
1. Fold the Paper Spinner Square on Both Diagonals
Lay a 15 cm square of origami paper colored side down. Bring one corner across to the opposite corner to make a triangle, line up the edges, and crease firmly.
Tip: Run a thumbnail along each crease to set it.
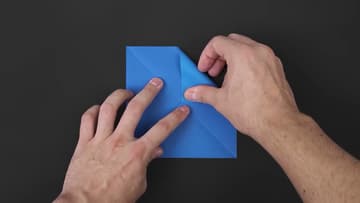
2. Fold Each Corner of the Paper Spinner to the Center
Using the X as a guide, fold the top right corner in so its tip touches the center point. Crease it well.
Tip: Accurate corners here make the collapse much easier later.
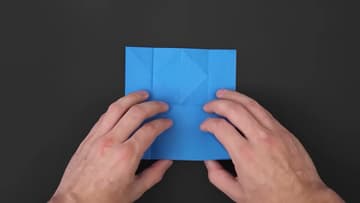
3. Crease the Paper Spinner Into Vertical Fourths
Turn the paper over. Fold it in half from side to side, crease and unfold.
Tip: Crease these folds firmly. They become the pinwheel walls.

4. Crease the Paper Spinner Into Horizontal Fourths
Repeat the same three folds the other way. Fold the square in half from top to bottom, crease and unfold.
Tip: Press the creases with both hands to flatten the grid.
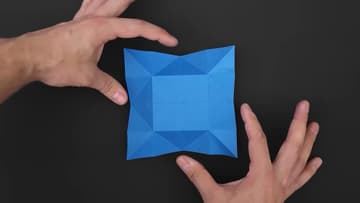
5. Collapse the Paper Spinner Into a Pinwheel Base
Pinch each corner closed along its small diagonal crease, so the corners stand up a little. This makes the next move easier.
Tip: Square up the edges and press the base flat before moving on.
6. Fold the Small Squares on the Paper Spinner Base
Turn the base over and rotate it so a flap points up. Fold the small square at the top in to the middle, crease it well and unfold.
Tip: Pay close attention to which corner you fold. The next step uses it.
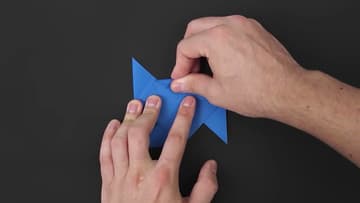
7. Shape the Center Triangle of the Paper Spinner
Lower the right corner you creased last and close that side along the existing line. The middle of the paper turns into a triangle.
Tip: Go slowly. This is the trickiest move in the model.

8. Lock Each Arm of the Paper Spinner
Look for the extra paper sticking out beside one arm. Instead of gluing it, fold it along a diagonal so it tucks against the arm and locks that part in place.
Tip: A dot of glue is fine if a lock keeps springing open.

9. Fold the Paper Spinner Arm Corners Straight
Take the corner at the tip of one arm and fold it down so it runs straight along the edge of the center triangle. Crease it firmly, then unfold.
Tip: Keep all three folds the same size so the spinner stays balanced.

10. Open the Petals and Spin the Paper Spinner
Using the creases from the last step, open the tip of each arm into a small curved petal. The petals catch air the way sails do.
Tip: Pinch as lightly as you can. A tight grip stops the spin.