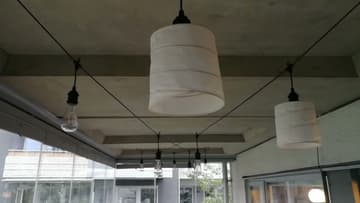
How to Make a Paper Lantern
Source: Brinkman Crafts • Full tutorial: www.craftingstepbystep.com/paper-crafts/how-to-make-a-paper-lantern
- Difficulty
- Medium
- Hands-on time
- About 1 hour
- Wait time
- 2 hours
- Cost
- About $10 to $20
- Makes
- 1 paper lantern

Tools
- Round bin or tub to use as a mould
- Spring clips
- Small sharp scissors
- Flat paintbrush
- Cutting mat
Materials
- Rattan cane, about 2 mm
- Japanese tissue paper
- PVA wood glue
- Masking tape
- Linen thread
Steps
1. Lift the inner tub out of a bin to use as the lantern mould
Erik uses the inner container of a pedal bin. It is straight sided, rigid and exactly the diameter he was after.
Tip: A slight taper on the mould is a help, not a problem, since it makes demoulding easier.
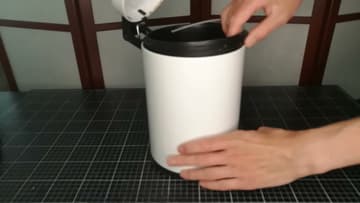
2. Wrap rattan cane around the mould and clip the ends
Start the cane at one end of the mould and spiral it around, keeping the rings roughly evenly spaced. Four or five rings across the height is plenty.
Tip: If the cane feels brittle, soak it in warm water for ten minutes first. Dry cane snaps at the tight radius of a small mould.
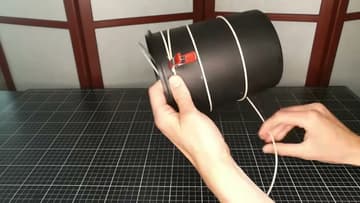
3. Tape the rattan rings to the mould with masking tape
Tear thin strips of masking tape and bridge each cane ring to the mould. Erik puts a strip every few inches around the circumference.
Tip: Low tack painter tape releases more kindly than standard masking tape. Press it down only as firmly as it takes to hold the ring still.
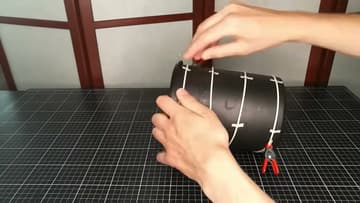
4. Bind the cut rattan ends with linen thread
Cut both ends of the cane on a long diagonal so they overlap without leaving a bump. Hold the overlap closed and wrap linen thread around it several times, then tie it off.
Tip: A dab of the diluted glue over the binding once it is tied locks the knot and stops the thread creeping along the cane.
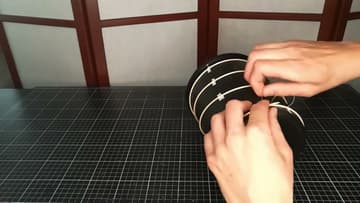
5. Brush diluted wood glue over the rattan frame
Thin the wood glue with water until it brushes on easily. Paint it along every cane ring, all the way around the mould.
Tip: Three parts glue to one part water is a sound starting mix. Too thin and the paper will not grab the cane; too thick and the tissue puckers.
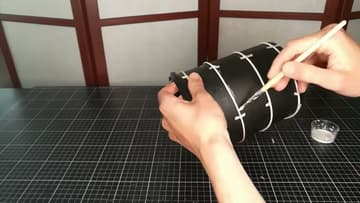
6. Wrap tissue paper around the frame and press it into the rattan
Cut the paper oversized, taller than the frame and long enough to overlap itself. Lay it on and roll the mould across it, pressing the paper down onto each glued ring as you go.
Tip: Press with the flat of your fingers rather than the tips. A fingernail through wet tissue leaves a hole you cannot patch invisibly.
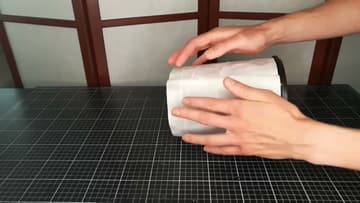
7. Push the rattan loose and slide the paper lantern off the mould
This is the nervous part. Work around the lantern nudging the cane a couple of millimetres at a time, breaking the grip of the tape ring by ring.
Tip: If a ring will not budge, slide a butter knife under the tape instead of forcing the cane. The cane will crack before the tape gives.
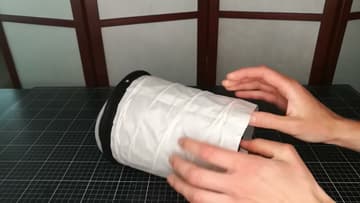
8. Fold the trimmed paper edge back over the rattan rim
Trim the overhanging paper at both ends so only a couple of millimetres stand proud of the top and bottom cane rings. Wet that narrow strip with the same diluted glue, then fold it back over the ring and press it against the inside.
Tip: Use small sharp scissors and turn the lantern rather than your hand. Cutting a curve on a cylinder is far easier when the work is what moves.
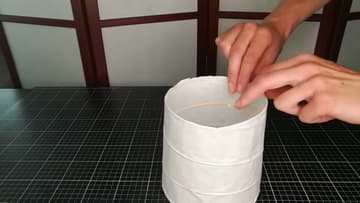
9. Glue a paper ceiling with a reinforced hole onto the lantern
Cut a disc of paper a little larger than the top of the lantern and make a hole in the middle sized to your light fitting. Glue a second patch of paper around that hole underneath so it cannot tear under load.
Tip: Cut the hole undersized and open it out in small increments until the fitting is a snug push fit. A loose hole lets the lantern hang crooked.
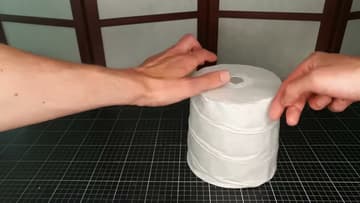
10. Hang the finished paper lantern over the light bulb
Push the paper collar over the fitting so the lantern hangs straight. Erik's pendants use a decorative bulb cover that the hole grips neatly.
Tip: Fit an LED bulb, never a filament or halogen one. Paper and heat do not mix, and an LED runs cool enough to live inside a shade this size.