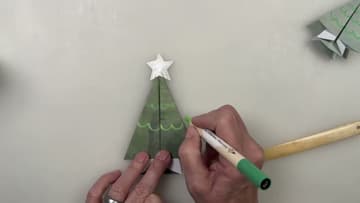
How to Make a Paper Christmas Tree
Source: Create with Karen Elaine • Full tutorial: www.craftingstepbystep.com/paper-crafts/how-to-make-a-paper-christmas-tree
- Difficulty
- Medium
- Hands-on time
- About 45 minutes
- Cost
- About $5 to $12
- Makes
- 1 paper christmas tree

Tools
- bone folder
- scissors
- star paper punch
Materials
- 6 inch origami paper
- silver or gold paper
- craft glue
- acrylic paint markers
Steps
1. Fold the Square of Origami Paper Corner to Corner Into a Triangle
Lay the paper colour side up. Fold one corner over to the opposite corner to make a triangle and crease it hard.
Tip: Line the points up exactly before you crease. A small miss here turns into a lopsided tree later.
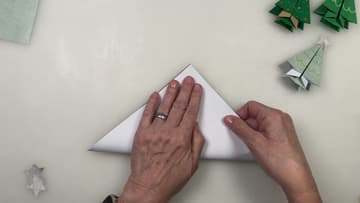
2. Turn the Origami Paper Over and Fold It in Half Both Ways
Flip the sheet so the colour side is down. Fold it in half like a book, making sure the edges meet, and crease.
Tip: These two folds go the opposite way to the diagonals. That is what lets the paper collapse in the next step.
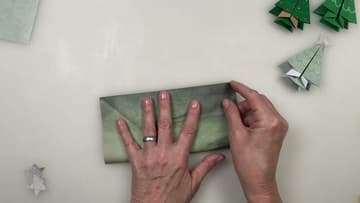
3. Collapse the Creased Paper Into an Origami Square Base
Pick the paper up and push the sides in along the creases you made. It folds down into a smaller square with two flaps on each side.
Tip: If it will not collapse, one of the creases is going the wrong way. Refold it in the other direction and try again.
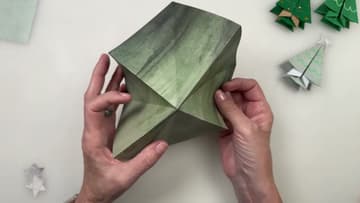
4. Fold the Square Base Edges to the Center Line Twice
Take the folded edge on one side of the top layer and fold it in to the center line. Do the same on the other side.
Tip: A bone folder is worth having for this step. Fingers alone leave soft creases that make step five harder.
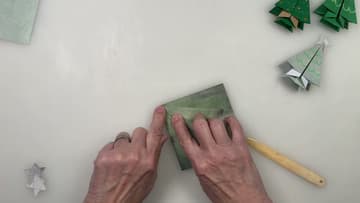
5. Open the Layers and Tuck the Valley Fold Inside to Pleat the Paper Christmas Tree
Open one side back up. Using the creases already there, fold the outer section over and tuck it in between the layers, then lay it flat.
Tip: Do not make new creases here. If the paper resists, you are fighting the existing folds. Open it and look again.
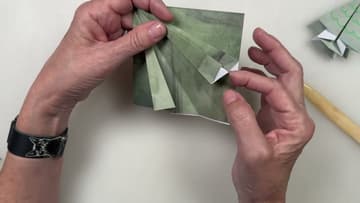
6. Repeat the Center Folds and Tucks on the Back of the Origami Tree
Turn the tree over. Fold both edges to the center, then fold them to the center again, the same as the front.
Tip: The back is easier than the front because your hands already know the move.
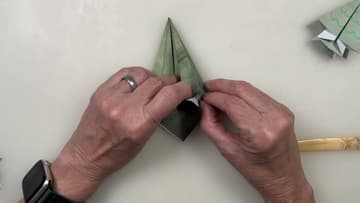
7. Fold the Bottom Point Up to Make the Paper Tree Trunk
Fold the bottom layer up so it runs straight across and crease it. Repeat on the other side so the two little corners meet at a point.
Tip: Get this line as level as you can. A crooked fold here shows as a leaning trunk.
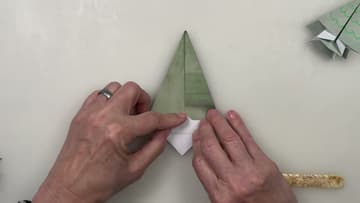
8. Fold the Extra Paper Up and Tuck It Inside to Form the Tree Base
There is still some loose paper below the tree. Fold that raw section up until it lines up with the bottom of the tree, crease it, then reverse the fold and tuck it inside.
Tip: Open the two feet to the same angle before you stand it up.
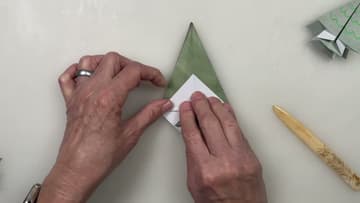
9. Glue a Paper Star to the Top of the Origami Christmas Tree
Cut two small stars from silver or gold paper, or punch them out. Put a little glue on the back of one star and press it behind the tip of the tree so it sticks out the top.
Tip: Use a glue with a fine tip. A thin line holds and does not soak through the paper.
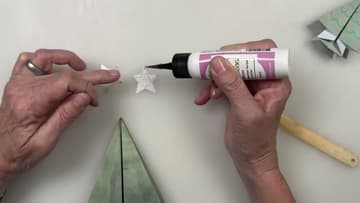
10. Draw a Scalloped Garland on the Paper Christmas Tree With a Marker
Take a green marker and draw rows of small scallops across the tree, using the pleats as your guide. Karen does three little curves per row.
Tip: Acrylic paint markers show up on dark green paper far better than felt tips.