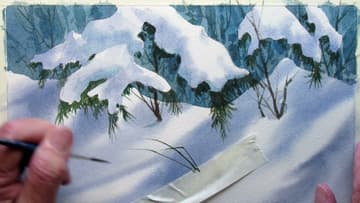
How to Paint Snow in Watercolor: Snowy Evergreen Branches
Source: Grant Fuller • Full tutorial: www.craftingstepbystep.com/painting/how-to-paint-snow
- Difficulty
- Easy
- Hands-on time
- About 1 hour
- Wait time
- 30 minutes
- Cost
- About $2 to $6
- Makes
- 1 small watercolor painting

Tools
- 1 inch flat brush
- round brushes (size 4 to 10)
- liner or rigger brush
- pencil
- water jar
- paper towels
- board to tape paper to
Materials
- 140 lb cold press watercolor paper
- ultramarine blue watercolor
- burnt sienna watercolor
- phthalo blue watercolor
- masking tape
Steps
1. Wet the Watercolor Paper Over the Snow Sketch
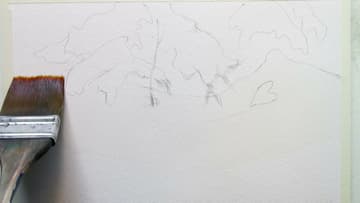
Lightly pencil the shapes of the snow clumps, a few branches and the curve of the snowbank. Keep the lines faint.
Tip: Tilt the paper toward the light. A dull patch means it is drying, so rewet it.
2. Lay Diagonal Blue Shadows Across the Wet Snow Slope
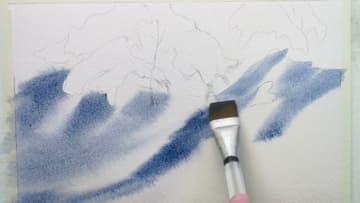
Mix ultramarine blue with a small touch of burnt sienna. With the flat brush, lay long strokes on an angle across the slope.
Tip: Pull every stroke in the same direction so the shadows agree on where the light comes from.
3. Shape the Curve of the Snowbank Shadows
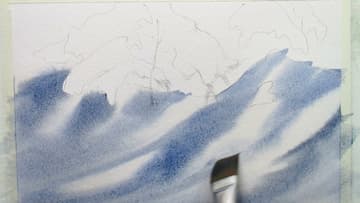
While the paint is still damp, tidy the shapes. Grant rounds off a corner that looked too sharp and keeps the top edge of the slope as one smooth curve.
Tip: Use a hair dryer on low, held well back, if you are short on time.
4. Wet Each Snow Clump on the Branches and Drop in Shadow
Now work smaller. Wet one snow clump at a time with a round brush, staying inside its pencil line.
Tip: Size 8 or 10 round brush with a good point is ideal for these clumps.
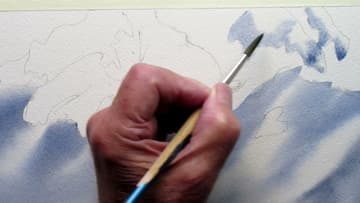
5. Shade the Left Side of Every Snow Clump
Carry on across all the snow shapes, always shading the same side. If the paint dries a little too fast and leaves a hard edge, run a damp brush along it to soften.
Tip: Leave a few tiny unpainted gaps inside the clumps. They sparkle like sun on snow.
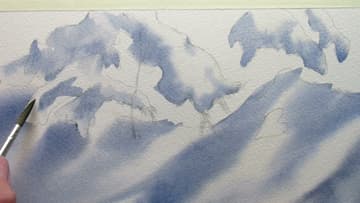
6. Paint a Dark Background Around the White Snow Shapes
Switch to phthalo blue with burnt sienna for a dark, slightly green midtone. On dry paper, cut around the tops of the snow clumps with a sharp edge.
Tip: Light to dark, always. Dark painted first gives you a double edge you cannot fix.
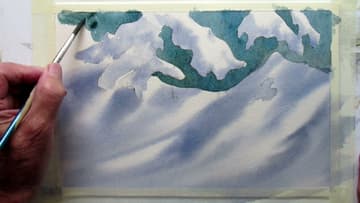
7. Add Background Tree Trunks to the Snowy Forest
Using the same dark mix, draw a few trunks and twigs into the background while it is still workable. Paint around some lighter stumps too.
Tip: Keep these shapes vague. Detail in the far background pulls the eye away from the snow.
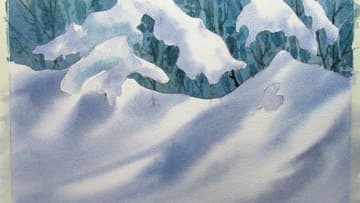
8. Paint Evergreen Needles Under the Snow on the Branches
Mix a dark green from burnt sienna and phthalo blue. With the tip of a small round brush, flick short needle strokes along the underside of each snow clump, as if the branch is poking out from under the snow.
Tip: Flick from the branch outward with a quick wrist. Slow strokes look stiff.
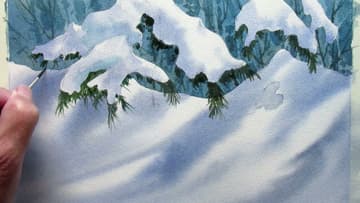
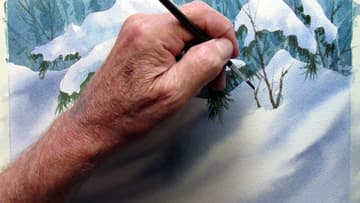
9. Add Twigs and Weeds Sticking Out of the Snow
With a liner or rigger brush and a brown mix, paint a few bare twigs rising out of the snowbank. They are handy for hiding small blemishes in the snow too.
Tip: Let the twig bases sink into a little blue shadow so they look planted, not floating.
10. Mask a Snow Ridge and Paint Grass Poking Through
Grant scrubs out a little paint with a damp brush to make a light ridge. Once it is dry, he lays a strip of masking tape along it, twisted slightly so the line curves.
Tip: Press the tape lightly and only on dry paper, or it can lift the surface.