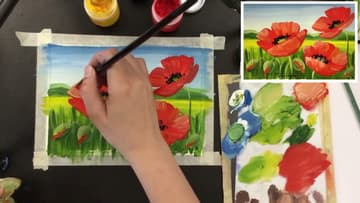
How to Paint Poppies in Acrylics (Step by Step)
Source: PaintyKat - painting lessons with soul • Full tutorial: www.craftingstepbystep.com/painting/how-to-paint-poppies
- Difficulty
- Easy
- Hands-on time
- About 1 hour
- Wait time
- 30 minutes
- Cost
- About $12 to $20
- Makes
- 1 poppies painting

Tools
- flat acrylic brush
- round acrylic brush
- filbert brush
- paint palette
- water cup
- paper towel
Materials
- acrylic paint (cadmium red, black, green, yellow, white)
- canvas or canvas board
- masking tape
- palette knife
Steps
1. Sketch the Poppies
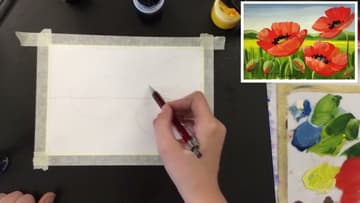
Tape your paper down on all four sides first. The tape holds it flat and gives you that clean white border once you peel it off at the end.
Tip: Watch this step Stagger the three flower heads at different heights so they do not sit in a straight row. An uneven cluster looks more like a real patch of poppies.
2. Paint the Sky
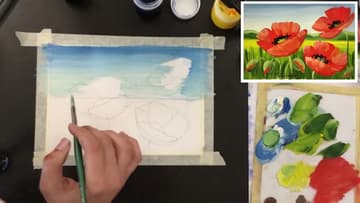
Start at the very top with a flat brush loaded with blue and a touch of white. Pull it side to side in long horizontal strokes, and as you work down toward the horizon, add a little more white so the sky lightens near the field.
Tip: Watch this step A flat brush covers the sky faster and leaves fewer streaks than a round one. Reload often so you never drag a dry, patchy stroke across the blue.
3. Paint the Hills and Field
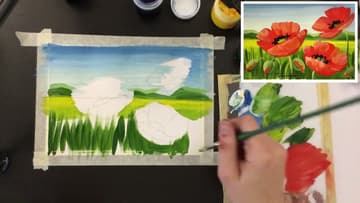
Below the horizon, lay in a row of low green hills. Keep them muted and a touch grey-green so they read as distance.
Tip: Watch this step Add a little of the sky blue into the far hills. Distant greens carry a hint of blue in real life, and it makes them sit back behind the field.
4. Add the Grass
Now bring the foreground forward. Switch to a smaller round brush and flick upward strokes of green from the bottom edge of the paper.
Tip: Watch this step Flick the brush upward and lift off at the top of each stroke. That taper gives the blade a pointed tip instead of a blunt club end.
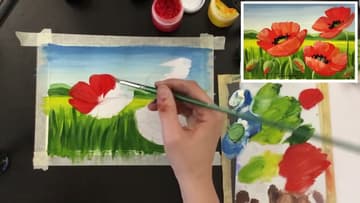
5. Block In the Red Poppies
Time for the color everyone came for. Fill each poppy shape with flat red - a cadmium or bright warm red - so all three heads sit as bold masses against the green background.
Tip: Watch this step If the red looks thin or streaky over the green, let the first coat dry and lay a second one. Red is a weak coverer and often needs two passes to sing.
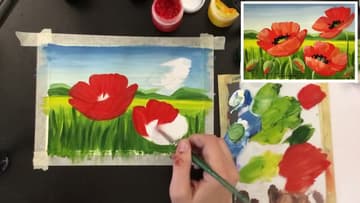
6. Shape the Petals with Light and Shadow
This is where the poppies come alive. Drop a darker red - or a hint of blue mixed into the red - into the creases between petals and wherever one petal tucks behind another.
Tip: Watch this step Follow the curve of the petal with your brush, not straight across it. Strokes that echo the petal shape read as folds rather than flat stripes of color.
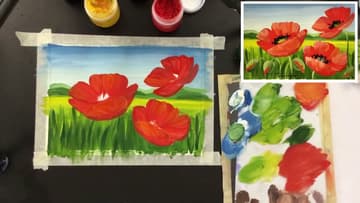
7. Add the Black Centers
Every poppy needs its dark heart. Dab a small green-yellow circle right in the center of each open flower to sit as the seed pod.
Tip: Watch this step Use just the very tip of the brush and barely any pressure. The stamens should be little dots and dashes, not solid blobs, so a light touch matters here.
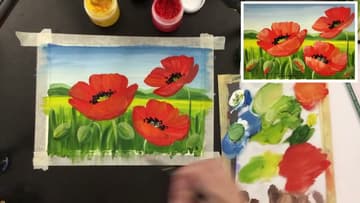
8. Paint Buds and Final Details
Fill out the patch with a couple of closed poppy buds down in the grass - a small red tip peeking out of a green casing on a slim stem. They add a story to the scene, showing the flowers at different stages.
Tip: Watch this step Peel the tape slowly and at a low angle, pulling it back on itself. Ripping it straight up can lift a strip of paint or tear the paper edge.