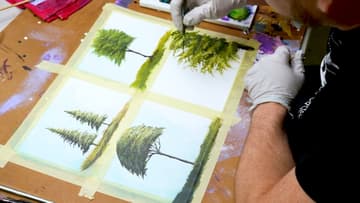
How to Paint a Tree: 5 Acrylic Tree Techniques
Source: Wild Creates • Full tutorial: www.craftingstepbystep.com/painting/how-to-paint-a-tree
- Difficulty
- Easy
- Hands-on time
- About 45 minutes
- Cost
- About $10 to $18
- Makes
- 1 tree study painting
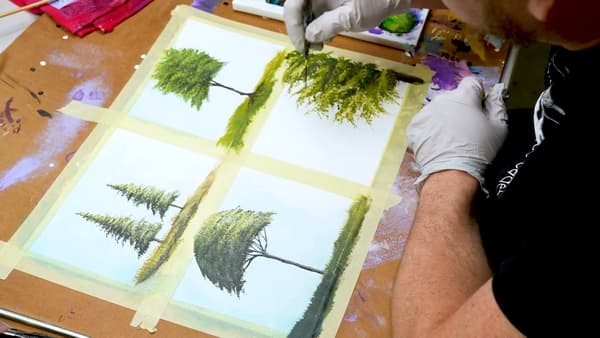
Tools
- Stretched canvas or watercolor paper
- Fan brush (size 4 or 6)
- Small round brush
- Palette
- Water cup
- Paper towels
- Painter's tape
Materials
- Dark sap green acrylic
- Mid-tone green acrylic
- Yellow acrylic
- Burnt umber or dark brown acrylic
- Titanium white acrylic
- Painter's tape (for masking sections)
Steps
1. Set Up Your Palette and Brushes
The fan brush is the workhorse for all four trees. Get one in size 4 or 6.
Tip: Don't dilute your acrylic too much for trees. The thick paint loaded onto the fan brush is what creates the natural texture - watery paint just smears.

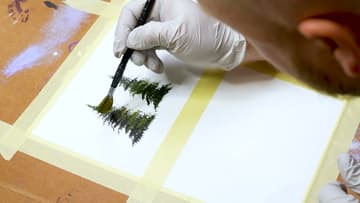
2. Paint a Pine Tree (Zigzag Method)
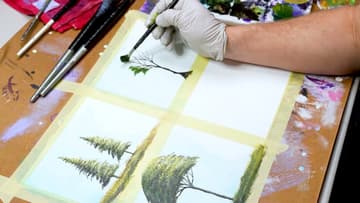
Load the fan brush with dark sap green. Working from the SIDE of the brush (not flat-on), dab in a downward triangle zigzag motion - widest at the bottom, narrowing to a point at the top.
Tip: Don't be afraid to make the tree patchy. Real pines have gaps where light shows through - a perfectly filled triangle reads as fake.
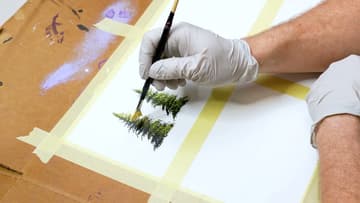
3. Add Mid-Tones and Highlights
With a clean fan brush, mix a mid-tone color - green plus a touch of yellow gives you a marbled lighter green. Use the same zigzag motion over the dark base, focusing on the side of the tree facing your light source.
Tip: Leave the mid-tone color marbled on your palette. Don't fully mix the green and yellow - the variation in color shows seasonal change in the tree.
4. Paint a Leafy or Slim Canopy Tree
For a deciduous tree, use the corner of the fan brush to dab clusters of leaves in a rough oval shape. Build with darks first, then mid-tones, then highlights on the light-facing side.
5. Paint a Side-Leaning Tree (Off-Center)
The last tree leans in from the side of the canvas. Start the trunk near the edge, curving back toward the painting.
Tip: Once you've painted all four, leave them taped overnight. Pull the painter's tape carefully when dry - the clean white borders make each tree look like a tiny finished study.