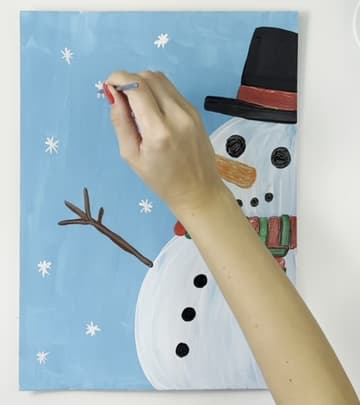
How to Paint a Snowman (Easy Acrylic Painting for Beginners)
Source: Quick and Easy Paintings • Full tutorial: www.craftingstepbystep.com/painting/how-to-paint-a-snowman
- Difficulty
- Easy
- Hands-on time
- About 45 minutes
- Cost
- About $2 to $5
- Makes
- 1 painting

Tools
- large flat brush
- medium brush
- small round brush
- paint palette
- cup of water
- paper towels
Materials
- acrylic paint: white, black, light blue, green, red, orange, brown
- canvas panel or heavy mixed media paper
Steps
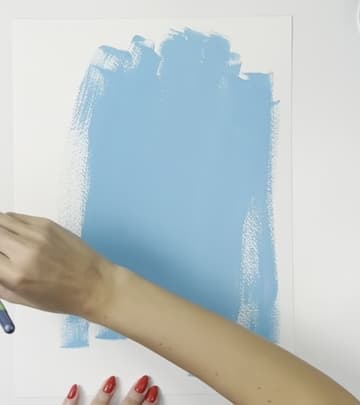
1. Paint the Snowman Background Light Blue
Start with a large brush and light blue paint. Cover the whole sheet, working in long strokes from top to bottom.
Tip: A hair dryer on low dries the background in a couple of minutes.
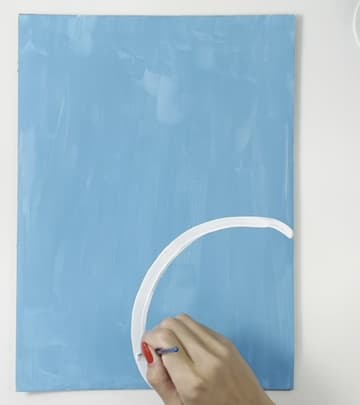
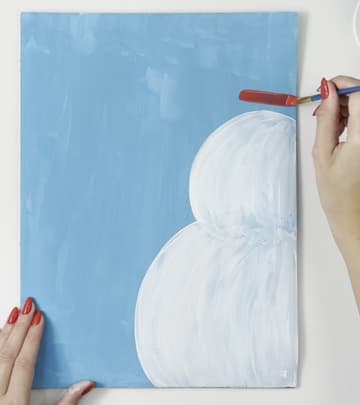
2. Outline the Snowman's Body Circle in White
Switch to a medium brush and white paint. In the bottom right corner, paint the curved outline of a large circle that runs off the right side and the bottom of the paper.
Tip: Sketch the circles lightly in pencil first if you feel unsure.
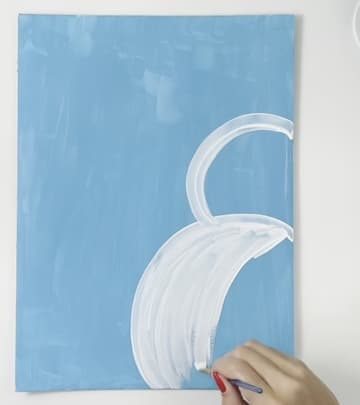
3. Fill In the Snowman's Head and Body
Fill both shapes in with white paint. Use curved strokes that follow the round shape; they give the snowman a soft, snowy texture.
Tip: Load the brush well. Thin white paint looks pale blue on top of blue.
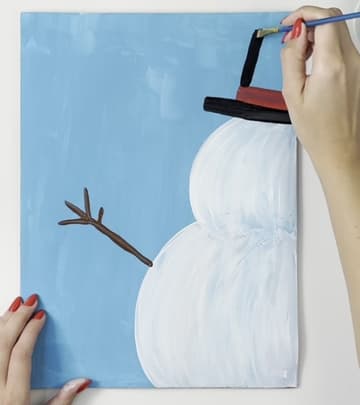
4. Add the Hat Band and the Snowman's Stick Arm
Wipe your brush and dip it in red. Paint a straight red line above the snowman's head; this becomes the hat band.
Tip: Paint the twig fingers with quick flicks so they taper to a point.
5. Paint the Snowman's Black Top Hat
With black paint, paint a longer line right below the red band for the hat brim. Then outline a square shape above the red band for the crown of the hat.
Tip: Use the brush edge for crisp straight lines on the hat.
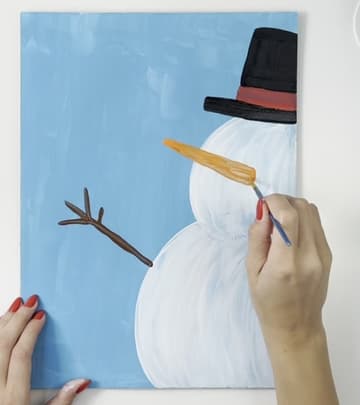
6. Paint the Snowman's Carrot Nose
Switch to a small brush and orange paint. Paint a long, thin triangle pointing out to the left from the middle of the face.
Tip: Add a few thin darker orange lines later for carrot ridges.
7. Paint the Snowman's Eyes and Smile
Wipe the small brush and pick up black paint. Paint two circles above the carrot for eyes, then fill them in.
Tip: Dab the dots with the tip of the brush instead of drawing them.
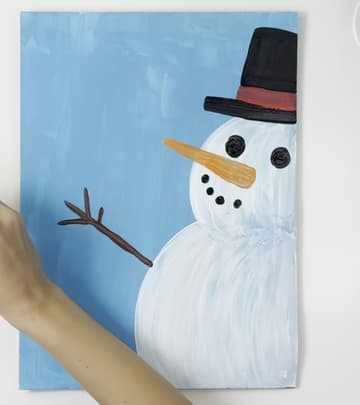
8. Dot Three Buttons Down the Snowman
Still with black paint and the small brush, add three round buttons down the middle of the body. Start a little below where the head meets the body and space them evenly toward the bottom.
Tip: Make the buttons a touch bigger than the smile dots.
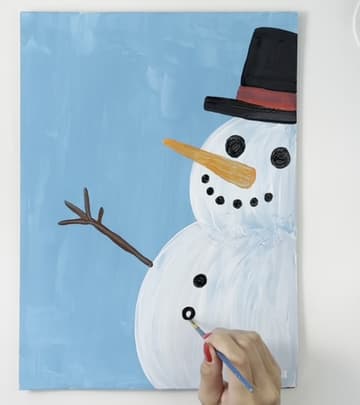
9. Paint the Snowman's Red and Green Scarf
With a medium brush and red, paint straight vertical lines at equal distances across the neck, then a couple of horizontal red lines below for the hanging end. Wash the brush, dip it in green and fill the spaces between the red lines.
Tip: Clean the brush well between red and green or they turn brown.
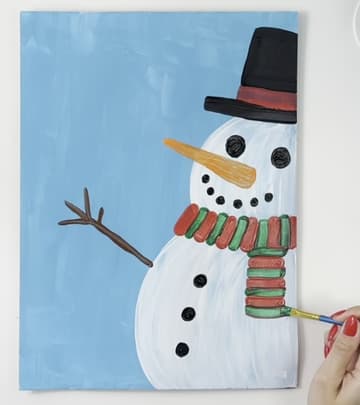
10. Add Snowflakes to the Snowman Painting
Wash the small brush and dip it in white. Paint small snowflakes across the blue sky, then tiny white dots between them.
Tip: The tiny white dots in the eyes make the snowman look alive.