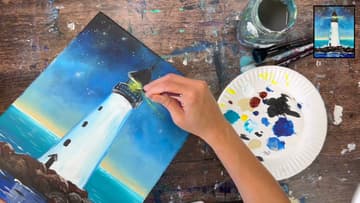
How to Paint a Lighthouse in Acrylics
Source: Tracie Kiernan • Full tutorial: www.craftingstepbystep.com/painting/how-to-paint-a-lighthouse
- Difficulty
- Medium
- Hands-on time
- About 2 hours 30 minutes
- Cost
- About $15 to $25
- Makes
- 1 lighthouse painting

Tools
- 3/4 inch flat wash brush
- Blender brush
- Round detail brush
- Toothbrush
- Ruler
- Painters tape
Materials
- Stretched canvas
- Mars black acrylic
- Titanium white acrylic
- Turquoise acrylic
- Dark blue acrylic
- Yellow acrylic
Steps
1. Block In the Sky
Tape the canvas edges, then load a 3/4 inch flat with Mars black and work it across the very top of the canvas. The sky is darkest right at the top and lightens as it comes down, so keep the heaviest black up high.
Tip: Tap the brush dry after loading it in water. A wet brush floods the black and you lose control of the gradient.
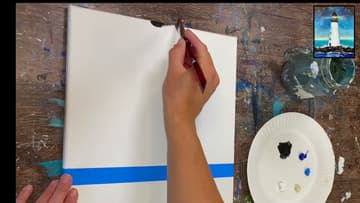
2. Blend the Sky Down
Switch to a dry blender brush and work the black downward in short strokes so it fades toward the horizon. No need to rinse between passes - you are moving paint that is already on the canvas rather than adding more.
Tip: Do not over-blend. If you keep going, every colour merges into one flat tone and the sky goes dead.
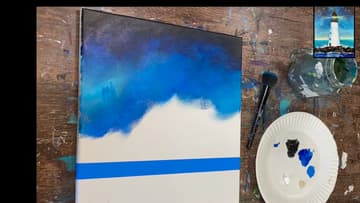
3. Add the Horizon Glow
Lay a warm glow along the horizon line using horizontal strokes, then blend upward into the darker sky. Keep some variety in the colours up there.
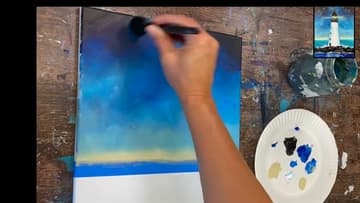
4. Lay In the Turquoise Water
Mix equal parts turquoise and white and run horizontal strokes just under the horizon line, getting as close to it as you can. Where the turquoise meets the dark blue below, work that transition zone extra.
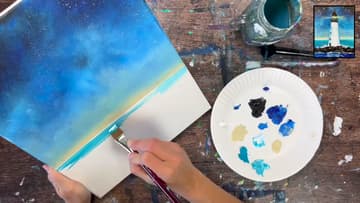
5. Sketch the Rocks and Tower
Draw a rough rock line across the lower third, letting a few rocks peek up above it. Then find the centre of the canvas, measure about seven inches up from the horizon and sketch the tapered tower with a ruler.
Tip: A wider base and narrower top is what makes it read as a lighthouse rather than a chimney.
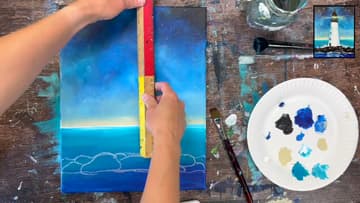
6. Paint the Tower White
With fresh water and a 3/4 inch flat in titanium white, fill the tower with a solid coat. Then outline one edge in blue and blend it in toward the centre using the full width of the brush, so the tower turns rather than sitting flat.
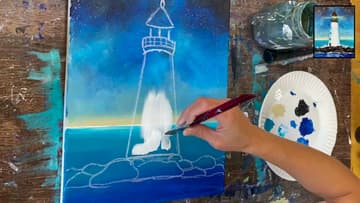
7. Add the Lantern Room and Windows
Paint the black lantern room at the top, then a thin railing line and evenly spaced vertical bars. Add a small rectangular door at the base and three windows up the tower, keeping the shapes loose and slightly abstract.
Tip: Highlight the black while it is still wet - a little white blends in to grey and stops it looking like a flat silhouette.
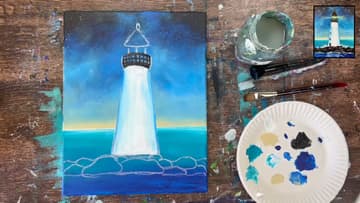
8. Paint the Rocks
Outline each rock individually before you fill anything in, even though they will all end up black. Once they are solid, add a touch of light colour to the right side of each one and blend it gradually.
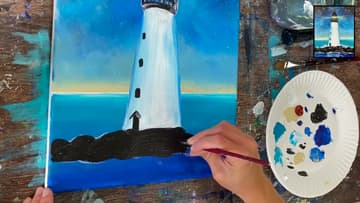
9. Add the Water Reflection
Load white on the flat brush and wipe most of it off - you want to see the water through the layer. Drag a thin reflection directly under the tower, then add horizontal lines.
Tip: That spacing change is what creates distance in the water. Even lines flatten it out.
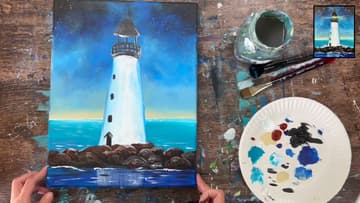
10. Stars and Light Beams
Flick a toothbrush loaded with white to spatter stars across the sky, smearing a few into a glow and leaving others as plain dots. Finally, dry-brush the beams outward from the lantern room.
Tip: If the beams look solid, there is too much paint on the brush. They should feel like light, not lines.