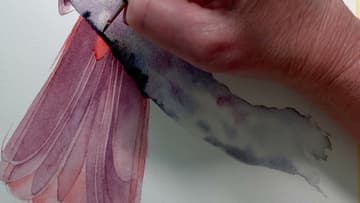
How to Paint a Cardinal in Watercolor (Tips for Painting Red)
Source: Louise De Masi • Full tutorial: www.craftingstepbystep.com/painting/how-to-paint-a-cardinal
- Difficulty
- Medium
- Hands-on time
- About 2 hours
- Cost
- About $3 to $8
- Makes
- 1 painting

Tools
- medium round watercolor brush
- small round brush
- liner brush
- palette
- mechanical pencil
- grey watercolor pencil
- hair dryer
- paper towel
Materials
- Scarlet Lake watercolor
- French Ultramarine watercolor
- Indian Yellow watercolor
- Burnt Sienna watercolor
- Lamp Black watercolor
- heavy cold press watercolor paper
Steps
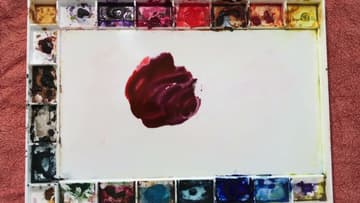
1. Mix an Earthy Violet for the Cardinal's Wing and Tail
Look at a cardinal photo and you will see a dull, pale violet on the wing and tail. Mix it from Scarlet Lake and French Ultramarine.
Tip: Test the mix on scrap paper. It dries lighter than it looks wet.
2. Wash Scarlet Lake Into the Cardinal's Head Around the Eyes
Wet the head area with clean water, including over the beak and the black mask, but leave the eyes dry. Touch a little violet along the wing edge and the side of the head.
Tip: Dry eyes keep a clean white highlight without masking fluid.
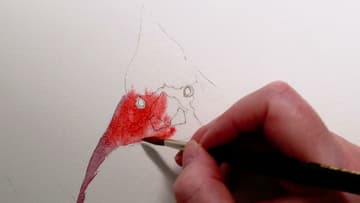
3. Pull Red Strokes Up Into the Cardinal Crest
While the head is still wet, pick up thicker Scarlet Lake with less water and drop it into the darker areas. Then take a liner brush loaded with pure pigment, almost straight from the tube, and flick long directional strokes up into the crest.
Tip: Work quickly. Once the wash starts to dry, stop adding paint.
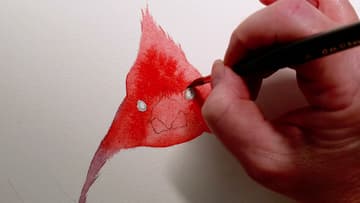
4. Paint the Cardinal Body in One Wet Wash
Wet the body and paint it in with Scarlet Lake in one go. Louise treats this as her only chance, because going back later could lift the red and make a mess.
Tip: Paint over the toes. It gives a cleaner edge along the branch.
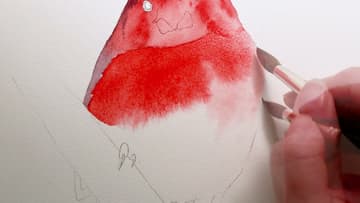
5. Drop Indian Yellow Into the Cardinal's Breast
While the body is still wet, pick up a little Indian Yellow and touch it into the lighter side of the breast. It mixes with the red on the paper into a warm orange glow.
Tip: A little yellow goes a long way. Add it in small dabs.
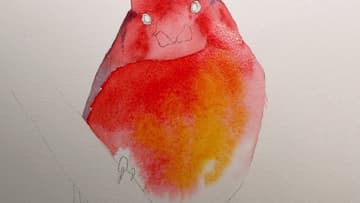
6. Paint the Cardinal Tail With the Violet Mix
Once the body is dry, paint the tail on dry paper with the violet mix thinned slightly with water. Paint the bottom of the small wing feathers too.
Tip: Dry paper gives the tail crisp outer edges.
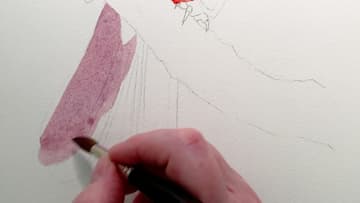
7. Add Feather Detail to the Side of the Cardinal Head
Now add a few details on dry paper. Use a small brush and Scarlet Lake to suggest feathers on the side of the face, then soften the edges with a damp brush.
Tip: Soften every hard edge right away with a clean damp brush.
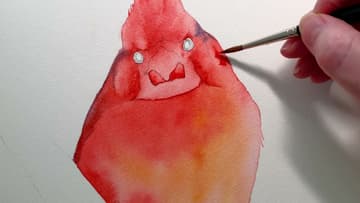
8. Paint the Black Mask Around the Cardinal's Beak
Paint the black feathers around the beak with watered-down Lamp Black on dry paper. Dry it with a hair dryer, rewet it with water and add darker black in places, leaving some of the lighter layer showing.
Tip: Never start black at full strength. Build it in two passes.
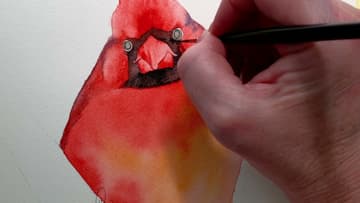
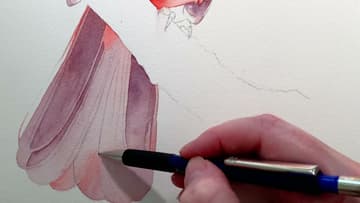
9. Draw the Tail Feathers Before Darkening Them
With a pencil, draw lines on the dry tail to separate the feathers. Then wet each feather section with water and drop in the violet mix, darker at the top and fading out toward the bottom.
Tip: Do one feather at a time so neighboring sections do not bleed.
10. Paint the Branch and Shadow Under the Cardinal Tail
Wet the branch and paint it with a grey mixed from Burnt Sienna and French Ultramarine, leaving some white paper showing. Drop in violet and darker grey along the bottom edge to round it.
Tip: Curve the branch a little. It looks softer than a straight line.