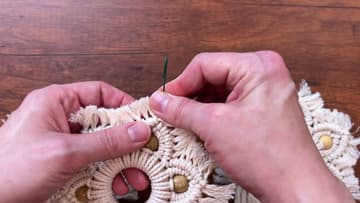
How to Make a Macrame Snowflake Ornament
Source: Marching North • Full tutorial: www.craftingstepbystep.com/macrame/how-to-make-a-macrame-snowflake
- Difficulty
- Easy
- Hands-on time
- About 1 hour 15 minutes
- Cost
- About $2 to $5
- Makes
- 1 snowflake ornament

Tools
- sharp scissors
- macrame comb
- macrame board and T pins (or tape)
- large eye needle (optional)
Materials
- 2 mm cotton macrame cord
- 2 inch wooden ring
- 6 wooden beads with large holes
- ornament hook
Steps
1. Cut the Cotton Cords for the Macrame Snowflake
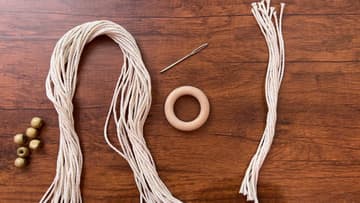
Gather 2 mm cotton cord, a 2 inch wooden ring, six wooden beads and sharp scissors. Cut 24 pieces at 20 inches long and 12 pieces at 10 inches long.
Tip: Cut a few spare cords. If a knot goes wrong, you can swap one in without measuring again.
2. Attach the Long Cords to the Wooden Ring With Lark's Head Knots
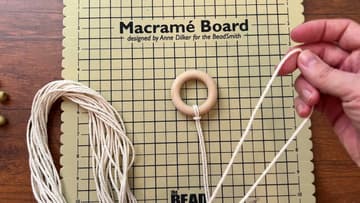
Fold one 20 inch cord in half. Push the loop under the ring, bring the two ends over and through the loop, and pull it snug.
Tip: Slide the knots around the ring so they are spaced evenly before you pin it.
3. Thread a Wooden Bead Onto the Snowflake Cords
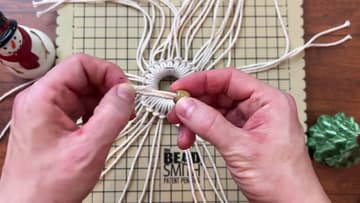
Pick two neighbouring center cords and slide a wooden bead up them until it sits against the ring. If the hole is tight, twist the two cord ends together and feed them through, or use a large eye needle.
Tip: Put a bead on every fourth pair of cords now, all six, so you can see where each point goes.
4. Tie the First Double Half Hitch Knots Beside the Bead
Take the cord to the left of the bead as your filler cord. Hold it angled down to the right.
Tip: Keep the filler cord taut. A slack filler cord makes lumpy knots.
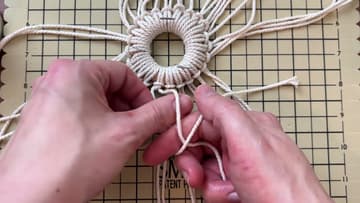
5. Add a Short Cord to the Snowflake With a Cow Hitch
Fold one 10 inch cord in half. Attach it to the filler cord with a cow hitch, which is a lark's head turned the other way, so it blends in with the knots.
Tip: The short cords add fringe and fill out the points. Do not skip them.
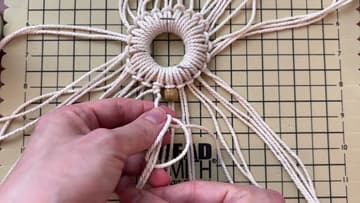
6. Repeat the First Knot Row Around All Six Snowflake Beads
Count four cords from the first bead and add the next bead. Keep counting four and adding beads until all six are on.
Tip: Rotate the board as you go so you always tie in the same comfortable direction.
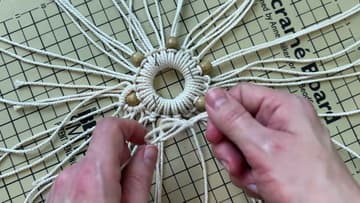
7. Tie the Second Row of Knots to Form Each Snowflake Point
Between each pair of points there are two unused center cords. The right one of the left pair and the left one of the right pair become filler cords.
Tip: Crystal ties the closing knot the opposite way from the first row. It gives each tip a neat finish.
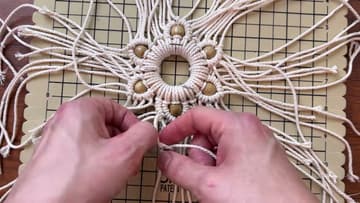
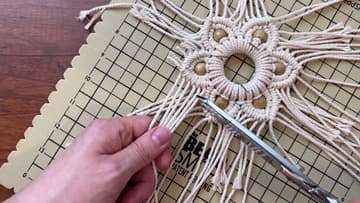
8. Trim the Loose Cords Around the Macrame Snowflake
With all six points done, cut the extra cord. Follow the angle of each side of the point and leave about half an inch of fringe.
Tip: Cut a little long at first. You can always trim more after combing.
9. Comb Out the Fringe on the Macrame Snowflake
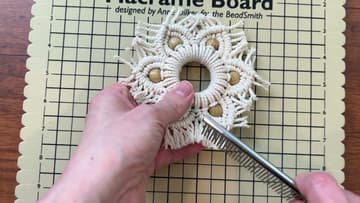
Use the fine side of a macrame comb to brush the fringe. With 2 mm cord you do not need to untwist it first; it brushes right out.
Tip: Hold the knots firmly with your other hand so the comb does not pull them loose.
10. Hang the Macrame Snowflake Ornament on the Tree
Slip an ornament hook through the knots at the top of one point. Be gentle so you do not pull a knot out.
Tip: Store finished snowflakes flat between tissue paper so the fringe stays fluffy next year.