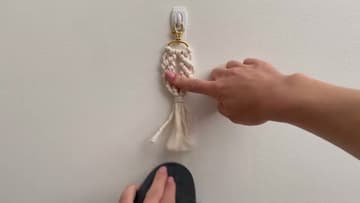
How to Make a Macrame Keychain - Easy Seashell Pattern for Beginners
Source: Soulful Notions • Full tutorial: www.craftingstepbystep.com/macrame/how-to-make-a-macrame-keychain
- Difficulty
- Easy
- Hands-on time
- About 30 minutes
- Cost
- About $2 to $5
- Makes
- 1 keychain

Tools
- sharp scissors
- pet comb or slicker brush
- wall hook or clipboard
- measuring tape
Materials
- 3mm single strand cotton cord
- 1 1/4 inch swivel clasp
Steps
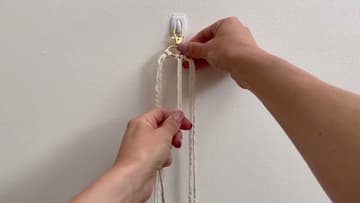
1. Attach the Cords to the Keychain Clasp With Reverse Lark's Head Knots
Hang the swivel clasp on a wall hook so both hands are free. Fold one 30 inch cord in half to find the centre.
Tip: Push the knots close together on the ring so the top of the shell stays neat.
2. Start the First Row of Hitch Knots on the Macrame Keychain
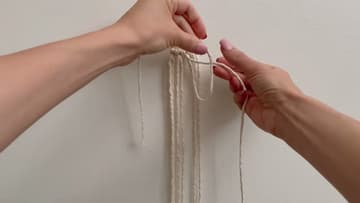
Divide the eight strands into two groups of four. On one side, take the fifth cord in and lay it across the other three at a gentle angle.
Tip: Keep the first row only slightly diagonal. It forms the top curve of the shell.
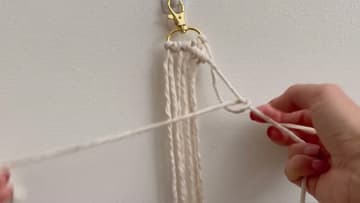
3. Tighten the First Diagonal Row of Hitch Knots
Work along the guide cord, tying each cord over it twice, until all three cords are knotted. Hold the guide cord taut and at the same angle the whole way.
Tip: If a knot looks loose, push it up before tying the next one. It is hard to fix later.
4. Mirror the Hitch Knot Row on the Other Side of the Keychain
Now do the same in the opposite direction. On the other group of four, take the fourth cord, point it across the others as the guide, and tie each cord over it: over, through and tighten, twice each, all the way to the end.
Tip: Compare both rows at eye level. Small differences are easier to spot that way.
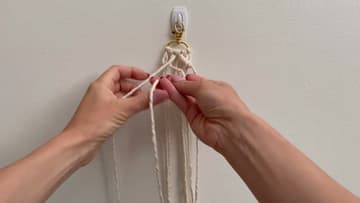
5. Tie the Second Row of Hitch Knots With a Little Space
For the second row, use the first cord that comes out on each side as the new guide and pull it down at an angle. This time, leave a little space.
Tip: Do not pull this row as tight as the first. The space gives the shell its shape.
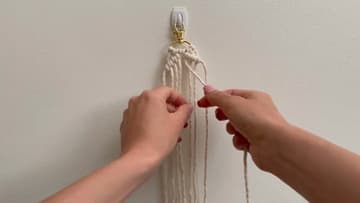
6. Add the Third Row to Build the Seashell Shape
Repeat the same steps for the third row, always starting with the very first cord on each side as the guide. Keep leaving a little space between this row and the one above.
Tip: Count your rows out loud. It is easy to lose track on a small piece.
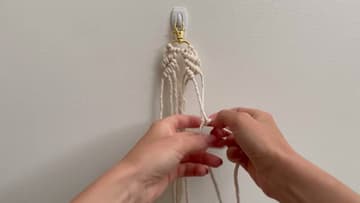
7. Close the Macrame Seashell With the Last Row
Tie the fourth and final row on each side the same way. This one can sit a little closer to the row above than the previous ones did, which helps the bottom of the shell taper in.
Tip: Pinch the bottom of the shell together while you move to the next step.
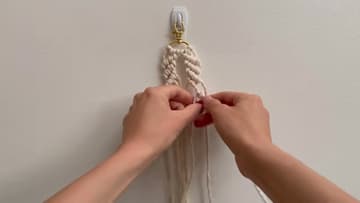
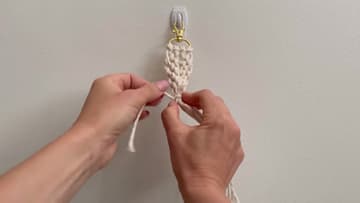
8. Wrap a Gathering Knot Below the Macrame Seashell
Take the short 10 inch cord and make a small loop pointing down, laid along the bundle below the shell. Wrap the long end around the bundle and the loop, starting right under the last knots.
Tip: Trim both tails close and tuck any ends that poke out back under the wraps.
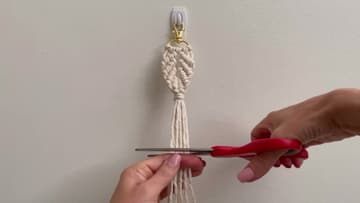
9. Cut the Macrame Keychain Fringe to Length
Decide how long you want the tassel. Soulful Notions goes about two inches below the gathering knot.
Tip: Cut a little long first. You can trim again after brushing, since brushing adds volume.
10. Brush Out the Macrame Keychain Fringe With a Pet Comb
Brush the fringe with a metal pet comb or slicker brush, working from the bottom up so the strands untwist into soft fibres. Hold the gathering knot with your other hand so you do not pull it loose.
Tip: Brush over a towel. Cotton cord sheds a lot of fluff as it untwists.