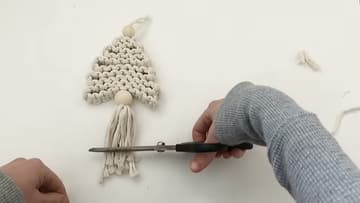
How to Make a Macrame Christmas Tree Ornament
Source: Soulful Notions • Full tutorial: www.craftingstepbystep.com/macrame/how-to-make-a-macrame-christmas-tree
- Difficulty
- Easy
- Hands-on time
- About 1 hour
- Wait time
- 30 minutes
- Cost
- About $3 to $6
- Makes
- 1 tree ornament

Tools
- large eye needle
- scissors
- clipboard or cork board
Materials
- 4mm single strand cotton macrame cord
- thin string or embroidery floss
- 2 wooden beads
- fabric glue
- tape
Steps
1. Fold the Macrame Cords for the Christmas Tree
Cut two pieces of 4 mm cotton cord to 15 feet each. Do not fold them in half.
Tip: Measure the inner 3 feet first, then let the rest fall where it falls.

2. Tie the First Square Knot Around the Filler Cords
Hold the two center filler cords straight. Bring the left working cord over the fillers and under the right cord.
Tip: Always start each square knot from the same side so the strip lies flat.

3. Tie a Long Sinnet of Macrame Square Knots
Anchor the top so you can pull against it. The video sets a big roll of rope on the loop, but a clipboard or cork board works too.
Tip: Even tension matters more than speed. Tight and loose knots make a wavy tree.

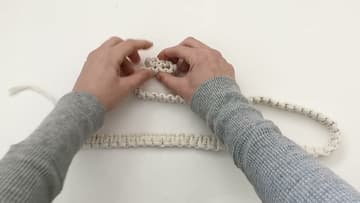
4. Fold the Square Knot Sinnet Into a Christmas Tree Shape
Lay the strip with the loose ends at the bottom. Start at the top and fold the strip back and forth like a ribbon.
Tip: Five or six rows gives a nicely tapered tree from this length.
5. Stitch the Macrame Tree Rows Together With a Needle
Thread a large eye needle with about 30 inches of thin string, yarn or embroidery floss. Push it sideways through the folded rows, going through the edge of each fold so the zigzag stays put.
Tip: Pick a string close to the cord color so the stitching disappears.

6. Shape the Stitched Macrame Christmas Tree
Tie a small knot in the string at the bottom and cut the excess, leaving the cord ends hanging. Now that the bottom is secure, gently pull the rows out and press the tree into an even triangle.
Tip: Lay the tree flat and press with your palms to even out the rows.

7. Add Wooden Beads to the Macrame Christmas Tree
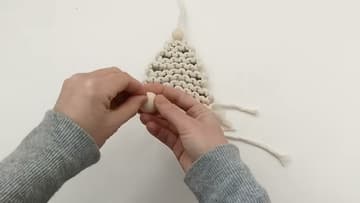
Slide a smaller wooden bead onto the cords at the top as a tree topper. Add a larger bead to the cords at the bottom for the base of the trunk.
Tip: Pick beads with a hole wide enough for two strands of your cord.
8. Tie a Tassel Trunk Under the Macrame Tree
Take ten 6 inch pieces of cord and find their center. Open the two cords under the bottom bead and tie them around the middle of the bundle.
Tip: Pull the tassel knot very tight before you trim anything.

9. Glue the Macrame Tree Tassel Knot
Trim the short ties under the bead down close to the knot. Then add a small dab of fabric glue where those ends come out.
Tip: Use clear-drying fabric glue so no shine shows on the cotton.

10. Trim the Macrame Christmas Tree Tassel
Brush the tassel cords straight with your fingers. Hold them together and cut across the bottom with sharp scissors to even them up.
Tip: Wet the tassel and let it hang to dry for extra straight strands.