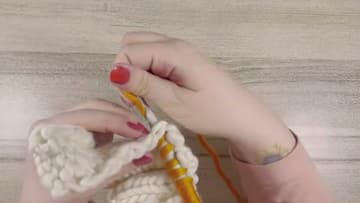
How to Pick Up Stitches Knitting a Neckband
Source: West Yorkshire Spinners • Full tutorial: www.craftingstepbystep.com/knitting/how-to-pick-up-stitches-knitting
- Difficulty
- Medium
- Hands-on time
- About 30 minutes

Tools
- Knitting needles
- Spare knitting needle
- Circular knitting needles
- Stitch holder
- Stitch markers
- Tapestry needle
- Row counter
- Scissors
Materials
- Chunky yarn in your garment color
- Contrast color yarn for practice
Steps
1. Lay the Neckline Flat with the Center Stitches on a Holder
Lay the piece flat with the right side facing you. A neckline is three sections: a curved edge running down from the left shoulder, a straight run of center stitches parked on a holder, and a second curve back up to the right shoulder.
Tip: Keep the right side facing you the whole way round. The little ridge you create sits on the wrong side, where nobody sees it.
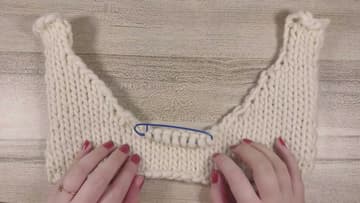
2. Find the Left Shoulder Seam at the Top of the Curved Edge
Start at the left shoulder seam. Put a finger on the edge one whole stitch in from the very end, not on the edge stitch itself.
Tip: If the pattern says 'pick up and knit', this is the move it means.
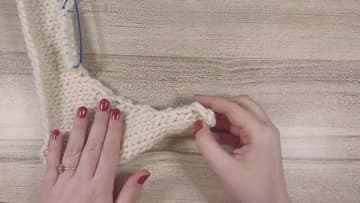
3. Wrap the Contrast Yarn Around the Needle Tip
Push the needle tip through the fabric one stitch in from the edge, front to back. Take your working yarn and lay it over the needle, leaving about 8 inches of tail loose so you have something to sew in later.
Tip: Use a contrast color for your first practice run the way the video does. Cream loops on cream fabric are hard to count, and counting is the part that matters.
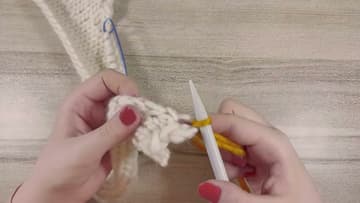
4. Pull a New Loop Through at Each Hole Down the Edge
Move down one hole and repeat: needle through, yarn over the needle, pull the loop out. Same distance in from the edge every time, so the line of new stitches runs dead straight down the fabric.
Tip: Work a few, then flip the piece over. The back should show a tidy little seam of yarn. If that seam is on the front instead, you have the wrong side facing you.
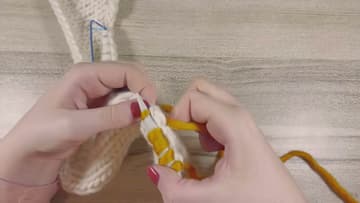
5. Count the Picked Up Stitches: 3 Stitches for Every 4 Rows
Stop and count. Your pattern asks for a set number of stitches down this curve, and it will be fewer than the number of rows you are working along.
Tip: Different rule on a bound-off edge. Across the back neck, or any horizontal edge, pick up one stitch for every stitch, straight across.
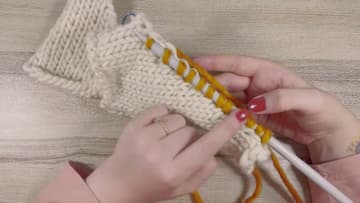
6. Slide the Held Center Stitches Off the Holder Onto a Needle
You have reached the center. Open the stitch holder and slide those live stitches onto a spare needle, one at a time, in the order they come off it.
Tip: No spare needle? A double-pointed needle or a smooth circular does the job.
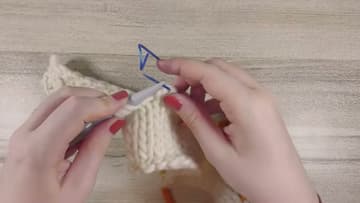
7. Knit Across the Center Stitches with a Needle in Each Hand
With a needle in each hand, knit across the center stitches using the same working yarn you have been picking up with. These stitches are already live, so they are knitted, not picked up.
Tip: Snug the first center stitch up tight. The join between picked-up stitches and held stitches is where a loose gap likes to open up.
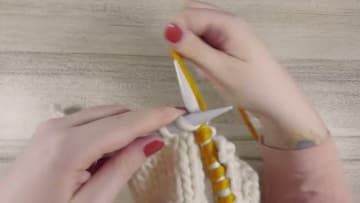
8. Work Back Up the Second Curve to the Right Shoulder
Turn to the second curve and work up it rather than down, going into the row above the one you used last each time. Stay one stitch in from the edge, right through the shaped decreases at the top.
Tip: The neckline looks bunched and odd with everything crowded onto one needle. That is normal. It flattens out as soon as you have worked a couple of rows of the band.