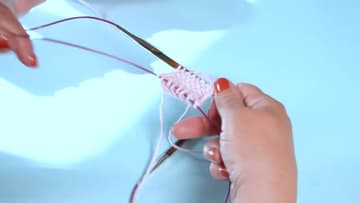
How to Knit Magic Loop
Source: LoveCrafts • Full tutorial: www.craftingstepbystep.com/knitting/how-to-knit-magic-loop
- Difficulty
- Easy
- Hands-on time
- About 25 minutes
- Cost
- About $8 to $15

Tools
- 32 inch circular knitting needles
- interchangeable circular knitting needle set
- knitting stitch markers
- blunt tapestry needle
- knitting row counter
- small scissors
Materials
- chunky weight knitting yarn
- sock weight knitting yarn
- scrap yarn for practice
Steps
1. Cast On Your Stitches With a Long Circular Needle
Cast on an even number of stitches with whichever method your pattern calls for. Merion uses 16 in chunky yarn, which is a sensible practice number because you can see every loop.
Tip: Practise in chunky or aran before you take this to sock yarn. Big stitches on a fat needle show you exactly what your hands are doing.
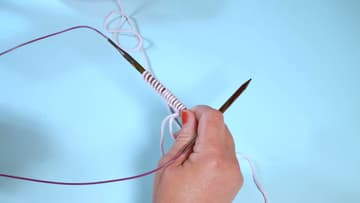
2. Count Off Half the Stitches on the Needle
Count halfway along the cast on row and pinch that spot. With 16 stitches you want 8 on each side of your fingers.
Tip: Drop a stitch marker in at the halfway point for your first few projects. Recounting 32 stitches with your nose an inch from the work gets old quickly.
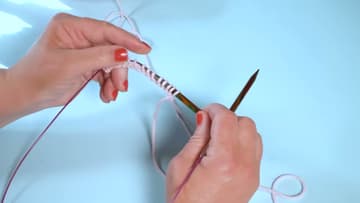
3. Pull the Cable Out Into a Loop to Split the Stitches
Hold the half that is resting on the cable, then bend the cable and draw it out sideways between the two groups. A wide open loop appears and the far half of the stitches slides onto the second needle tip.
Tip: Pull out more cable than looks necessary. A generous loop gives your hands room to work, while a stingy one drags on every stitch you make.
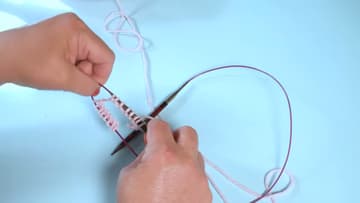
4. Line Up the Two Needle Tips With the Yarn at the Back
Square everything up before you knit a stitch. Both needle tips point to the right, the cable loop sits out to the left, and half the stitches wait on each needle.
Tip: Working yarn on the front needle instead of the back is the most common setup error in magic loop. It turns the tube inside out, and knitters tend not to spot it for three rounds.
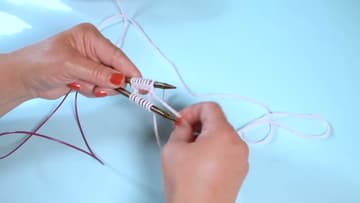
5. Slide the Back Needle Out and Bring It Round to the Front
Let go of the back needle and draw it straight out, so its stitches drop onto the cable and wait there. Swing that empty tip around to the right, alongside the front needle.
Tip: Run a thumb along the whole cast on edge, not only the part you can see from above. The bumps should all face the same direction.
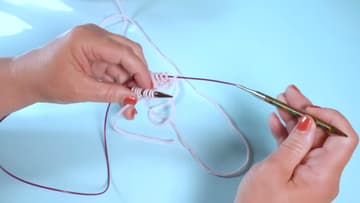
6. Knit the First Stitch Tight to Close the Round
Pick up the working yarn and knit the first stitch on the front needle. That stitch is what joins the two halves into a circle, so pull it snug rather than leaving it soft.
Tip: The first two rounds always look like a mess. Nobody has ever knitted a tidy magic loop join on round one, so keep going rather than ripping back.
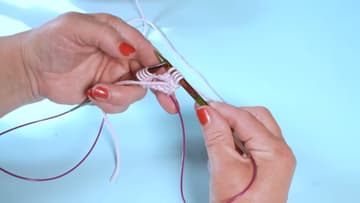
7. Turn the Work and Pull the Cable Loop Through
With the front needle empty, turn the whole piece around. Move the working yarn to the back again, then pull the cable so the waiting stitches travel along it and up onto the needle tip nearest you.
Tip: Say the sequence out loud for the first few rounds. Turn, yarn at the back, pull the cable, slide the stitches on, knit. Four moves and a knit row, over and over.
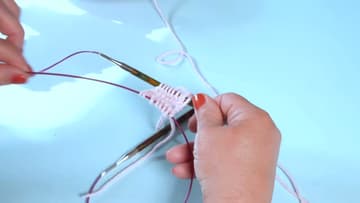
8. Repeat Until the Knitted Tube Grows Off the Needles
Work that sequence again and again. Around round four or five the scrappy flat thing in your hands becomes a small tube and the technique stops feeling abstract.
Tip: A loose column where the halves meet is a ladder. Tug the first stitch of each half firmly and knit the next two a shade tighter, and it tightens up within a few rounds.