How to Knit a Pillow Cover
Source: Kristabel • Full tutorial: www.craftingstepbystep.com/knitting/how-to-knit-a-pillow-cover
- Difficulty
- Easy

Tools
- size 17 (12mm) knitting needles
- crochet hook
- scissors
- sewing needle
- straight pins
- stitch markers
- measuring tape
Materials
- super bulky or chunky yarn, 2 balls (wool blend or acrylic)
- 16 x 16 inch pillow cover with zip
- 16 inch pillow form
- sewing thread to match the yarn
Steps
1. Make a Slip Knot in the Chunky Yarn
Leave a tail about 6 inches long. Make a loop in the yarn, then pull a second loop up through it and tighten it gently.
Tip: Pull the tail end, not the working yarn, if the loop is too big.

2. Knit Cast On 32 Stitches for the Pillow Cover Panel
Push the right needle up through the slip knot from the front. Wrap the yarn around the right needle, pull a new loop through, and place that loop on the left needle.
Tip: Keep the new loops loose. A tight cast on makes the first row hard work.

3. Knit Two Stitches on Row 1 of the Pillow Panel
Row 1 is knit 2, purl 2, all the way across. To knit, keep the yarn behind the work.
Tip: Say the pattern out loud as you go. It keeps you on track.
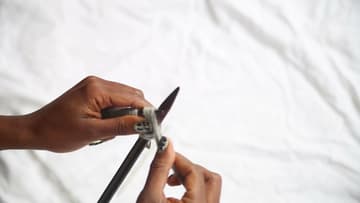
4. Purl Two Stitches to Finish the Row 1 Pattern
Bring the yarn between the needles to the front. Push the right needle into the front of the next stitch from right to left, wrap the yarn around, and pull the loop out through the back.
Tip: Forgot to move the yarn? You will see an extra loop on the needle. Drop it and redo the stitch.

5. Slip the First Stitch and Work Row 2 of the Pillow Panel
Turn the work. Slip the first stitch from the left needle to the right without knitting it.
Tip: Slip the stitch as if to purl so it does not twist.

6. Reverse the Knit and Purl Stitches on Rows 3 and 4
Now swap them to build the checkerboard. On row 3, slip the first stitch, purl the next, then knit 2, purl 2 across, ending with knit 2.
Tip: Use a stitch marker or a scrap of yarn to mark which row of the four you are on.
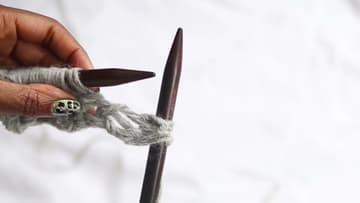
7. Repeat the Four Rows Until the Pillow Panel Is 16 Inches Tall
Keep repeating rows 1 to 4. After a few repeats you will see the pattern clearly.
Tip: Count your rows in groups of four so you always finish on a full repeat.
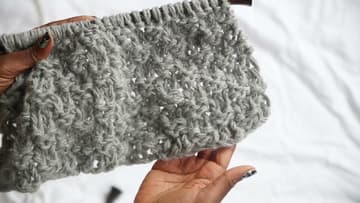
8. Bind Off the Top Edge of the Knitted Pillow Panel
Knit two stitches. With the left needle, lift the first stitch on the right needle over the second and off the end.
Tip: Bind off loosely so the top edge stretches as much as the bottom.

9. Weave In the Yarn Ends With a Crochet Hook
Two tails are left, one at the cast on and one at the bind off. Push a crochet hook through the edge stitches near a tail, catch the yarn, and pull it through.
Tip: Weave along the edge that gets sewn down, so no ends show on the front.

10. Sew the Knitted Panel Onto the Front of the Pillow Cover
Lay the cover flat with the closure underneath and set the panel on top. Pin the four corners first, then pin along each side so the knitting is spread evenly.
Tip: Keep one hand inside the cover so you never sew the front to the back.