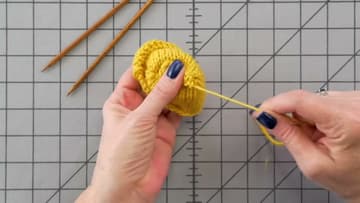
How to Do Kitchener Stitch
Source: VeryPink Knits • Full tutorial: www.craftingstepbystep.com/knitting/how-to-do-kitchener-stitch
- Difficulty
- Medium
- Hands-on time
- About 25 minutes

Tools
- double pointed knitting needles
- blunt tapestry needle
- small scissors
- knitting needle point protectors
Materials
- worsted weight wool yarn
- scrap yarn for practice
Steps
1. Hold both knitting needles parallel with the stitches at the tips
Split your live stitches evenly onto two needles and hold them parallel, front needle nearest you, wrong sides of the fabric together. Slide everything up close to the tips so the stitches are ready to work and nothing has to travel.
Tip: If the stitches slide around while you set up, cap the far ends of both needles with point protectors. A dropped live stitch at this stage is a miserable thing to chase.
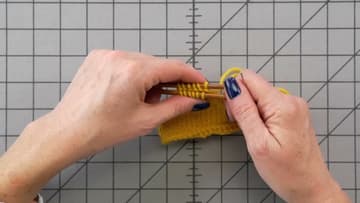
2. Thread the tail on a tapestry needle and go purlwise into the front stitch
Thread the long tail onto a blunt tapestry needle. Go into the first stitch on the front needle as if to purl, pull the yarn through, and leave that stitch sitting on the needle.
Tip: Cut the tail about three times the width of the seam. Berroco Vintage is the yarn in the video, and any smooth worsted behaves the same.
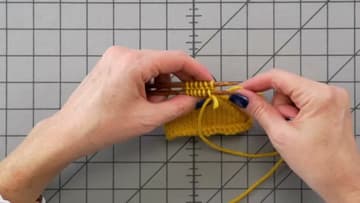
3. Go knitwise through the first stitch on the back knitting needle
Take the tapestry needle through the first stitch on the back needle as if to knit, draw the yarn through, and again leave the stitch on. That is both setup stitches done.
Tip: Setup happens once. Everything after this is the four move cycle repeating, so if you lose your place, look at which needle the yarn came out of last.
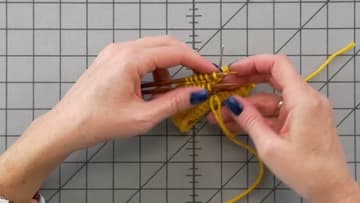
4. Slip the front stitch off knitwise, then go purlwise into the next stitch
Front needle, two moves. Go into the first stitch as if to knit, pull the yarn through and slide that stitch off the needle.
Tip: Pull the yarn through gently. A graft worked loose can be tightened later, but a graft worked tight cannot be loosened.
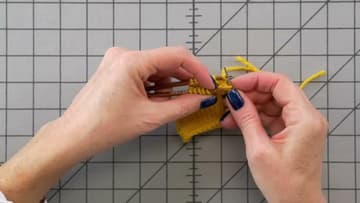
5. Slip the back stitch off purlwise, then go knitwise into the next stitch
Back needle, same two moves in reverse order. Into the first stitch as if to purl, yarn through, stitch off the needle.
Tip: Say it out loud while you work: knit off, purl on, purl off, knit on. Knitters who chant it stop losing their place.
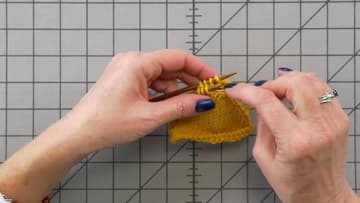
6. Draw the yarn tail through below the needles and tug the grafted row
Keep the tail travelling under both needles, never over the top. After each full cycle, give the yarn a tug and watch the new loops shrink down to the size of the knit stitches on either side.
Tip: Compare the grafted row to the knitting above and below it. If your new row is fatter, snug it again. If it is tighter, ease it back out with the tip of the needle.
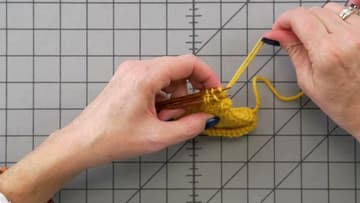
7. Work the last two stitches off both knitting needles
Two stitches left, one on each needle, and they get half a cycle between them. Knit off the front stitch, purl off the back stitch, and both needles are empty.
Tip: Trim nothing yet. You still need enough tail to weave in, and cutting close to a fresh graft is how a toe comes undone in the wash.
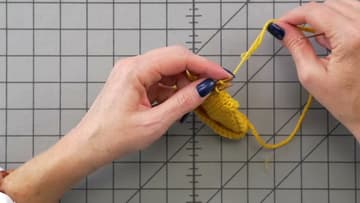
8. Pull the yarn tail to close the grafted sock toe
Set the knitting needles aside and pull steadily on the tail. Provided your yarn is strong enough to take it, that last pull closes any slack left in the row.
Tip: A graft that still looks uneven usually comes good on blocking. Pin the piece flat, damp it, and let it dry before you decide anything is wrong with it.