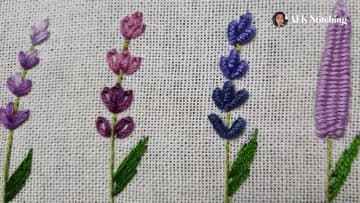
How to Embroider a Lavender Stem (Beginner, 2 Stitches)
Source: ALK Stitching • Full tutorial: www.craftingstepbystep.com/embroidery/how-to-embroider-lavender
- Difficulty
- Easy
- Hands-on time
- About 35 minutes
- Cost
- About $4 to $8
- Makes
- 1 embroidered lavender stem

Tools
- Embroidery hoop (4 inch or 6 inch)
- Embroidery needle (size 5 or 7)
- Embroidery scissors
- Water-soluble fabric pen
- Pencil
Materials
- Cream cotton or linen fabric (8x8 inch minimum)
- Embroidery floss - lavender purple (DMC 208 + 209)
- Embroidery floss - deep violet (DMC 333 or 550)
- Embroidery floss - sage green (DMC 581 or 988)
- Backing felt or fabric (optional, for finishing)
Steps
1. Transfer the Lavender Pattern
Trace the lavender shape onto cream cotton or linen with a water-soluble fabric pen. The pattern is simple - a single vertical line for the stem, a cluster of small bud shapes stacked at the top, and two small leaf shapes near the base.
Tip: If you do not own a water-soluble pen, a sharp pencil works for a single project.
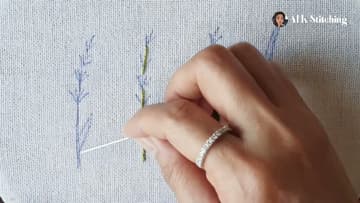
2. Hoop the Fabric and Thread the Needle
Drop the fabric into your embroidery hoop with the pattern centered, then tighten until the fabric is drum-tight. A taut surface is the difference between clean stitches and puckered ones.
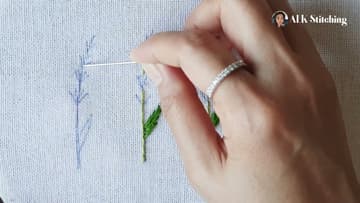
3. Stem Stitch the Main Stalk
Bring the needle up at the bottom of your stem line. Take a small forward stitch (about 3 to 4 mm) up the line, then bring the needle back up halfway along that first stitch, with the working thread looping out to one side of the needle.
Tip: Keep the thread on the right side of the needle for the entire stem and you get stem stitch. Keep it on the left and you get its mirror, outline stitch.
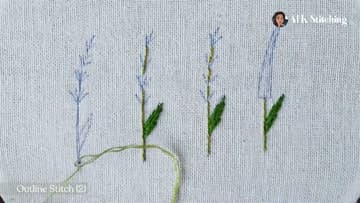
4. Stitch the Leaves at the Base
Switch to 3 strands of green floss for the leaves - the extra thread gives them more presence than the slim stem. Work parallel diagonal stitches across each leaf shape, packing them tight so no fabric peeks through.
Tip: If satin stitch feels intimidating, sub in long single straight stitches for each half of the leaf - one stroke from tip to base on each side.
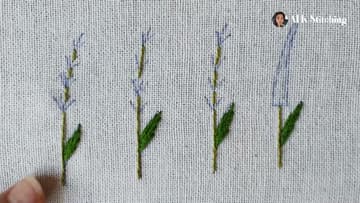
5. Start the First Lazy Daisy Bud
Switch to 6 strands of lavender purple floss - DMC 208 for a rich purple or 209 for a softer lilac. Six strands is right for lazy daisy because the loop needs body to read as a bud.
Tip: The trick is leaving enough slack in the loop to make a round bud, but not so much that the loop slumps to one side.
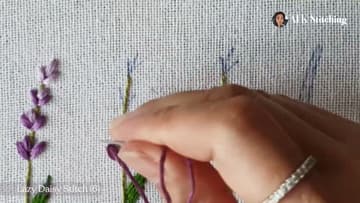
6. Cluster Lazy Daisies into a Full Bud Column
Work pairs of lazy daisy stitches up the stem, alternating left and right of the center line. Each pair makes one cluster - two small petals facing each other.
Tip: Real lavender has 4 to 7 bud clusters on a single stalk. Match that count for the most lifelike result. Five is a good default at hoop-art scale.
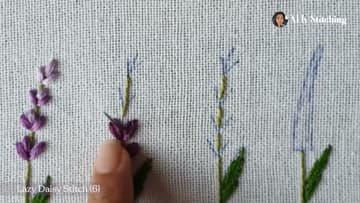
7. Add a Second Stem in a Deeper Shade
One lavender stem looks lonely; two looks like a bouquet. Repeat the full sequence - stem stitch up, leaves at the base, lazy-daisy buds up the column - in a deeper purple like DMC 333 or 550.
Tip: If you want all three featured colors on one hoop, the source video shows pink (DMC 3687) and dark blue (DMC 333) variations of the same stem-and-cluster pattern.
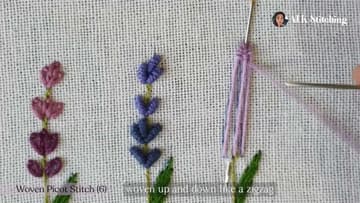
8. Finish and Display in the Hoop
On the back of the hoop, tie off each color by passing the needle under a few existing stitches and snipping the tail short. Knots on the back can show through as small bumps on the front, so weave-and-snip is cleaner.
Tip: For a more finished back, cut a circle of felt the size of the inner hoop and glue it over the folded fabric edge. Adds a clean white-or-cream backing that hides the construction.