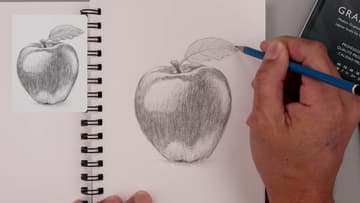
How to Draw an Apple
Source: Cartooning Club Focus • Full tutorial: www.craftingstepbystep.com/drawing/how-to-draw-an-apple
- Difficulty
- Easy
- Hands-on time
- About 30 minutes
- Makes
- 1 shaded pencil apple drawing

Tools
- graphite drawing pencil (2B)
- kneaded eraser
- blending stump
- pencil sharpener
Materials
- sketchbook or drawing paper
Steps
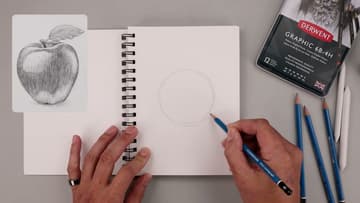
1. Sketch a Light Circle Guide for the Apple
Start in the middle of your page and sketch a circle. Begin at the very top and work your way around with light, loose strokes.
Tip: Press softly. A guide line you can barely see is easy to erase.
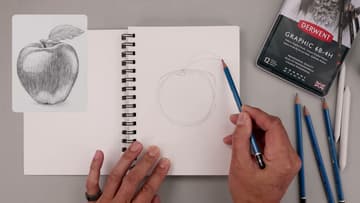
2. Shape the Apple Outline and Add the Stem and Leaf
Use the circle to find the real apple shape. An apple is wider along the top and narrower across the base.
Tip: Draw the leaf as one long curve along its center first. The edges hang off that line.
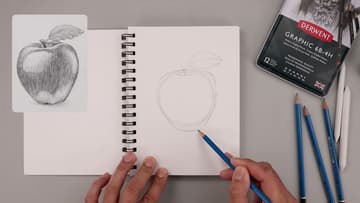
3. Pull In and Flatten the Bottom of the Apple
Now work on the base. Pull the outline in toward the bottom on both sides so the apple tapers.
Tip: A flat bottom tells the viewer the apple is resting on something.
4. Erase the Guides and Refine the Apple Stem and Leaf
Erase most of the circle underneath. Then add a fold across the top of the apple, where the skin curves down into the stem cavity.
Tip: A kneaded eraser lifts graphite without tearing the paper. Dab, don't scrub.
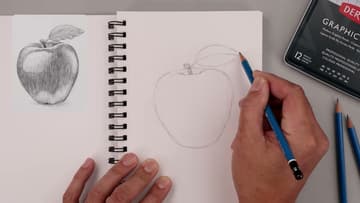
5. Draw the Bumpy Apple Silhouette Along the Bottom
Go around the whole silhouette and fix the details. Add a small bump on the back side where the outline tucks in.
Tip: Keep glancing at your reference. This step is all about observation.
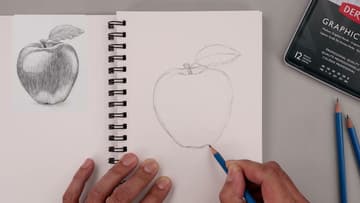
6. Outline the Highlight Shapes on the Apple
Time to plan the light. The light comes from the top left, so the big highlight sits on the upper left of the apple.
Tip: Highlights are shapes, not dots. Copy their exact outline from your reference.
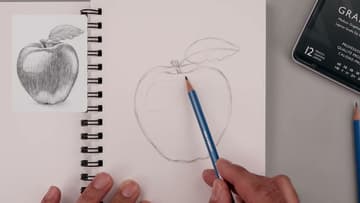
7. Shade the Base Layer of Shadow on the Apple
Switch to the side of your pencil. Shade around the highlights, darkest on the lower right where the core shadow sits, and lighter as you move toward the top.
Tip: Hold the pencil further back from the tip. You get softer, wider strokes.
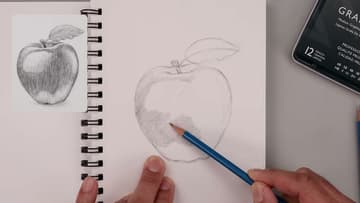
8. Darken the Bottom and Contact Shadow Under the Apple
Go around the outside edge and darken the back side, then fade it out. Along the bottom, darken the apple with vertical strokes and fade them up into the transition.
Tip: Leave a sliver of light between the bottom bumps and the shadow so the edge stays crisp.
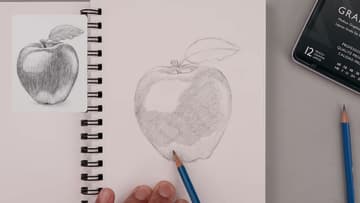
9. Add Vertical Texture Strokes Across the Apple
Darken the center area, starting on the left side and working up. Apple skin has streaks that run up and down, so use vertical strokes to build that texture.
Tip: Let your strokes follow the curve of the apple near the edges.
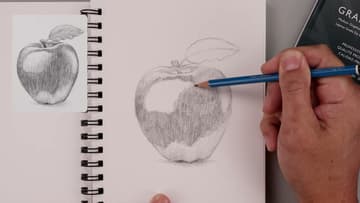
10. Shade the Apple Stem and Leaf and Draw the Leaf Veins
Darken the tone of the stem, leaving a lighter edge on one side. Then add a medium tone to the leaf.
Tip: Keep the leaf lighter than the darkest part of the apple so it doesn't steal the focus.