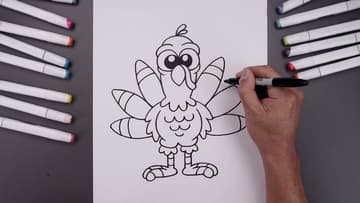
How to Draw a Turkey
Source: Cartooning Club Junior • Full tutorial: www.craftingstepbystep.com/drawing/how-to-draw-a-turkey
- Difficulty
- Easy
- Hands-on time
- About 15 minutes
- Cost
- About $5 to $10
- Makes
- 1 colored turkey drawing

Tools
- black fine point permanent marker
- pencil and eraser (optional)
Materials
- drawing paper or sketch pad
- washable markers or colored pencils
Steps
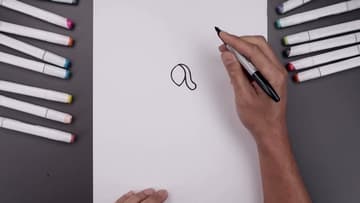
1. Draw the Turkey's Beak and Wattle in the Middle of the Page
Put your marker in the center of the page. Draw a point, then curve the left side of the beak out and back in toward the center.
Tip: Keep the beak small. It sets the size of the whole turkey, and a big beak leaves no room for the tail.
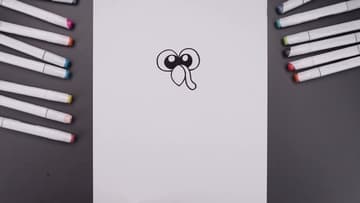
2. Draw Two Big Cartoon Turkey Eyes With Shiny Pupils
Go back to the top of the beak and draw two large circles for the eyes. Start in the middle, round up over the top, and come down to the side of the beak.
Tip: Leave the highlight white. That one small dot is what makes the eyes look alive.
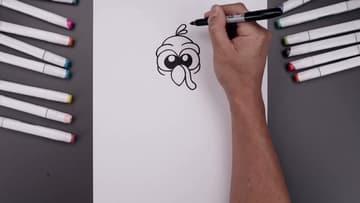
3. Add the Turkey's Eye Folds, Round Head and Head Feathers
Draw a curved fold under each eye and another along the top, so the eyes look tucked into the face. Close off the head with one big curve that goes up over the eyes and back down on the other side.
Tip: The head tuft is tiny but it matters. Without it, the head can read as an owl.
4. Draw the Turkey's Long Neck and Feather Ruff
From under the eyes, draw a curve down each side of the neck. On the right, tuck the line in behind the wattle.
Tip: Make the neck longer than feels right. Cartoon turkeys look funnier with a tall neck.
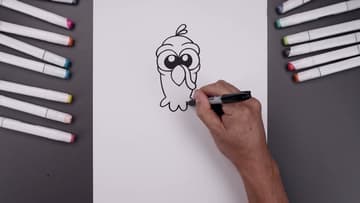
5. Draw the Round Turkey Body and Feathered Wings
Step down from the edge of the neck ruff and curve the side of the body out and down on each side. Leave the bottom open for now.
Tip: Draw the left wing, then the right, and compare. Match the number of feather bumps on both.
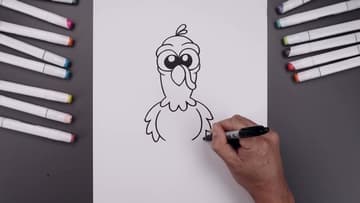
6. Draw the Fluffy Turkey Thigh Feathers Under the Body
Close the bottom of the body with a curve that dips up in the center, like a gentle heart shape. Under each side, draw a small feathery tuft for the top of the leg.
Tip: Keep the tufts short and wide. Long thighs make the turkey look like it is on stilts.
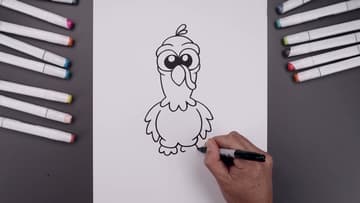
7. Draw the Turkey's Legs, Toes and Scaly Feet
From the inside of each thigh, draw two straight lines down for the leg. Round out the ankle and draw the first toe pointing outward.
Tip: Point the toes away from each other. It makes the turkey look planted and steady.
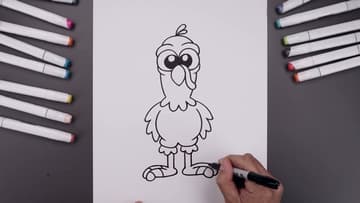
8. Add Scalloped Feathers Across the Turkey Belly
Start at the top center of the body and draw a half circle. Add another half circle to its left and one to its right.
Tip: Make each row a little smaller than the one above. It gives the belly a rounded look.
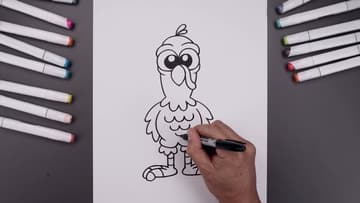
9. Draw the Fanned Turkey Tail Feathers Behind the Body
Start at the left side of the neck. Draw a long feather going up and out, round off the tip, and bring it back down behind the wing.
Tip: Stop each feather where it meets the body. The tail sits behind the turkey, so no line should cross the wings.
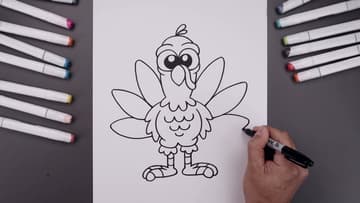
10. Add Stripes to the Turkey Tail Feathers and Color Your Turkey
Draw a curved stripe across the end of each tail feather. Step in and draw a second curve a little lower to make a thick band.
Tip: Color the stripes last with the lightest color. It keeps the dark brown from muddying them.