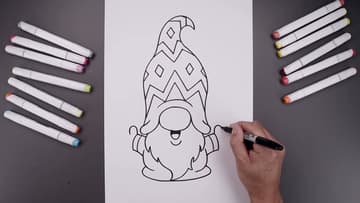
How to Draw a Gnome
Source: Cartooning Club Junior • Full tutorial: www.craftingstepbystep.com/drawing/how-to-draw-a-gnome
- Difficulty
- Easy
- Hands-on time
- About 30 minutes
- Makes
- 1 drawing of a gnome

Tools
- black fine point permanent marker
- pencil and eraser (optional)
Materials
- drawing paper
- washable markers or colored pencils
Steps
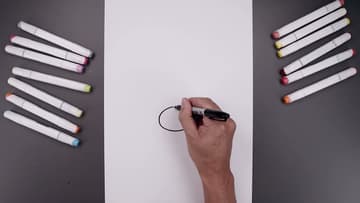
1. Draw an Oval Nose in the Middle of the Gnome Drawing
Start a little below the center of your page. Begin at the top of the nose and curve out to the left, down and back toward the middle.
Tip: Leave plenty of room above the nose. The hat is tall.
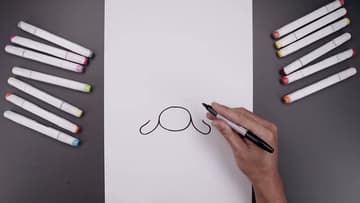
2. Drape the Gnome's Hat Brim Over the Nose
The hat sits right on top of the nose. On the left side, draw a line that bends down past the nose and curls out to the side.
Tip: Keep both curled ends at about the same height so the hat looks even.
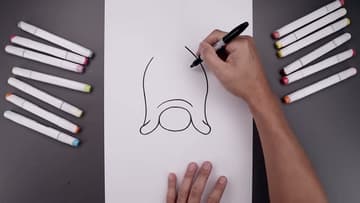
3. Draw the Tall Gnome Hat Up to a Bent Tip
From each end of the brim, draw the side of the hat going up. Let the lines bend in a little, then rise.
Tip: A bent tip looks floppy and fun. A straight point looks like a cone.
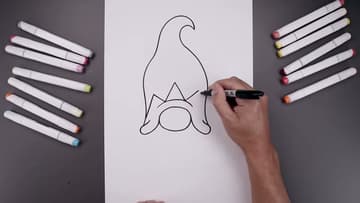
4. Add a Zigzag Pattern Across the Gnome Hat
Time for the hat pattern. In the center, above the brim, draw a point.
Tip: Count your points. Matching the number of points in each row keeps it tidy.
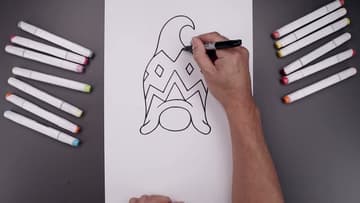
5. Draw Diamond Shapes and More Zigzags on the Gnome Hat
Above the first band, draw two small diamonds side by side. Add a half diamond at each edge where the hat cuts it off.
Tip: Pause the video after each row. Small diamonds are easier to keep even.
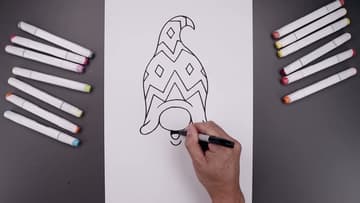
6. Draw the Gnome's Open Mouth Under the Nose
Move down under the nose. Draw a small half oval for the open mouth, like a smile.
Tip: Keep the mouth small. The beard grows all around it.
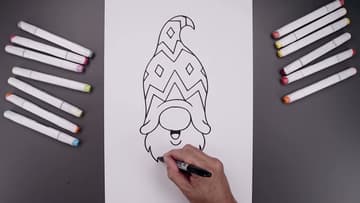
7. Draw the Gnome's Big Wavy Beard
Tuck the beard under the hat. On the left, start at the brim and draw a curve that swoops down and in, then flicks back up into a point.
Tip: Make the waves different sizes. A perfect pattern looks stiff.
8. Draw the Gnome's Round Body Behind the Beard
The body hides behind the beard. On each side, step out from the beard and curl a line around and down.
Tip: Keep the body short and wide. A long body makes him look like a wizard.
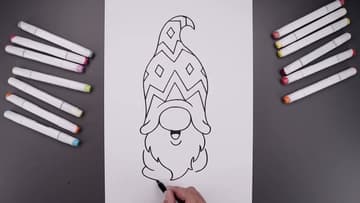
9. Add Arms and Mittens to Finish the Gnome Drawing
Start at the side of the beard and draw the arm going up and out to the wrist. Bend it back in to the body.
Tip: Raise both mittens up. It looks like he is cheering.