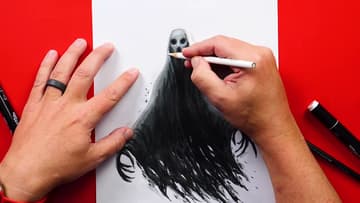
How to Draw a Ghost - Scary Shaded Ghost in 8 Steps
Source: Art Hub Plus • Full tutorial: www.craftingstepbystep.com/drawing/how-to-draw-a-ghost
- Difficulty
- Medium
- Hands-on time
- About 50 minutes
- Cost
- About $15 to $30
- Makes
- 1 shaded drawing of a ghost

Tools
- Drawing pencil (HB or 2H)
- Medium gray alcohol marker (CG5)
- Dark gray alcohol marker (CG9)
- Colourless blender marker
- Black coloured pencil
- White coloured pencil
Materials
- Marker paper or heavy drawing paper
Steps
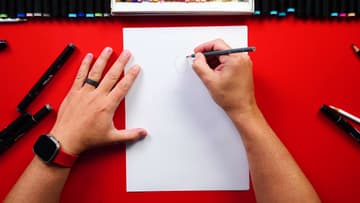
1. Sketch the Ghost's Head as a Light Pencil Oval
Near the top centre of the page, draw a loose oval in pencil, pressing lightly. This is only a guide and most of it will disappear under the sheet.
Tip: Use an HB or 2H pencil for the whole sketch stage. Marker will not cover dark graphite cleanly.
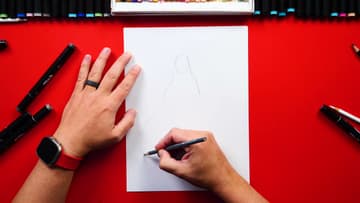
2. Add an Uneven Shoulder and a Long Reaching Arm
Draw one shoulder off the side of the head and bring an arm out from it, reaching forward. Make the two shoulders deliberately uneven.
Tip: Aim the arm slightly toward the viewer rather than straight sideways. It makes the ghost feel like it is coming out of the page.
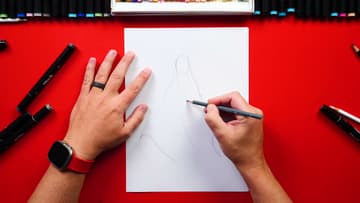
3. Draw the Sheet Flowing Down in Long Folds
From either side of the head, bring two long lines down the body and let them widen toward the bottom as if the fabric is caught in wind. Add a cuff of sheet falling off the wrist of the reaching arm, and a few long fold lines running down the body from the shoulders.
Tip: Let the two sides of the sheet be different lengths. Fabric in motion is never even.
4. Give It a Scary Skull Face with Hollow Eyes and Long Fingers
Inside the head, draw two hollow eye sockets and a shallow triangular nose hole, like a skull with no lower jaw. Then draw the hand: three or four long, thin fingers curling out from the cuff, with one pointing, and a thumb tucked behind.
Tip: Leave the mouth out entirely. A skull face with no jaw reads as far more unsettling than one with teeth.
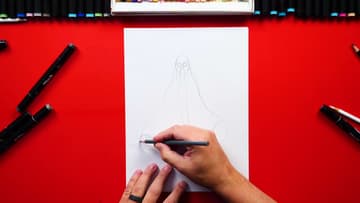
5. Lay the First Gray Marker and Tear the Sheet Hem
Switch to a medium gray marker (a CG5 or similar) and colour the whole ghost, working downward from the head. When you reach the bottom edge, take the marker off the paper in ragged points and shreds instead of following a clean curve, and leave a few gaps higher up the body as holes.
Tip: Work fast so the marker stays wet and blends. Streaks come from letting one stroke dry before the next lands beside it.
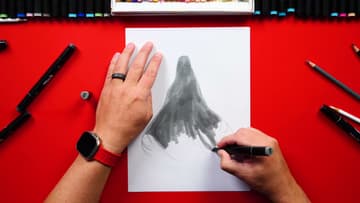
6. Shade a Darker Gray Layer and Leave the Highlights
Go back over most of the ghost with a darker gray (CG9), but leave the top of the head, the back shoulder and the face in the lighter first layer. Those untouched patches are your first highlights, and the second layer is what gives the sheet weight and folds.
Tip: Decide where the light is coming from before this layer and keep it consistent. Everything after this builds on that one decision.
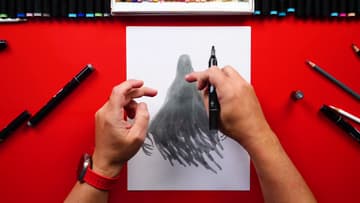
7. Press Black Pencil into the Hollow Eyes and Deep Folds
Switch to a black coloured pencil and press hard inside the eye sockets, the holes, and the long opening down the centre of the sheet. Run a band of shadow along the underside of the arm and into the deepest folds.
Tip: Sharpen the pencil for the holes and use the side of the lead for the broad shadows. One pencil, two textures.
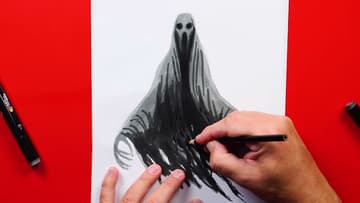
8. Blend the Shading and Add White Pencil Moonlight
Go over the pencil shading with a colourless blender marker to melt it into the gray, which softens the harsh edges and makes the whole thing look painted. Then take a white coloured pencil and pick out highlights: along the top of the head, the tops of both shoulders, the bridge of the nose, and down the ridges of...
Tip: Keep the highlights to the top surfaces only. White pencil in the folds flattens the drawing back out.