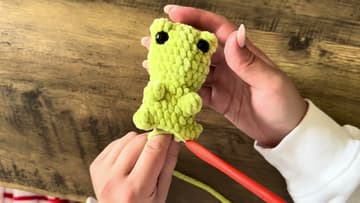
How to Crochet a Frog (Beginner Amigurumi Pattern)
Source: CrochetGrove • Full tutorial: www.craftingstepbystep.com/crochet/how-to-crochet-a-frog
- Difficulty
- Easy
- Hands-on time
- About 3 hours 30 minutes
- Cost
- About $10 to $18
- Makes
- 1 crochet frog

Tools
- 3.25 mm crochet hook
- Yarn needle (tapestry needle)
- Stitch marker
- Sharp scissors
- Hot glue gun (for the felt smile)
Materials
- Worsted-weight chenille yarn in green (Yarn Bee Dolce or similar)
- Two 12 mm black safety eyes
- Polyester fiberfill stuffing
- Small amount of pink yarn for blush (optional)
- Felt smile applique (or embroider one with black floss)
Steps
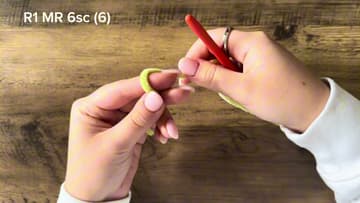
1. Start with a Magic Ring and 6 Single Crochets
Wrap the yarn around your two fingers and cross it into an X on top. Insert the hook under the front strand, grab the back strand, and pull it through.
Tip: New to magic rings? Our magic ring walkthrough shows the wrap-and-pull motion frame by frame.
2. Round 2 - Six Increases (12 Stitches)
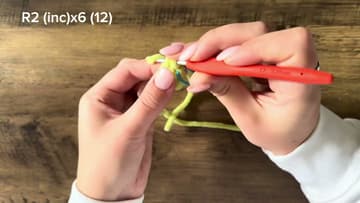
Round 2 doubles the stitch count. Place an increase (2 single crochets) in each of the 6 stitches from round 1.
Tip: If your stitches are leaning to one side, that's normal for a spiral. Don't try to correct it - amigurumi closes up beautifully when stuffed.
3. Round 3 - Single Crochet + Increase (18 Stitches)
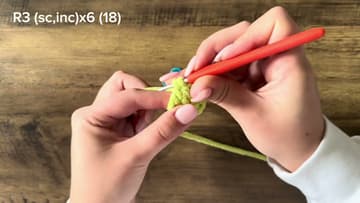
Round 3 is one single crochet, then one increase, repeated 6 times all the way around. That brings you to 18 stitches.
Tip: Move your stitch marker up to the first stitch of round 3 before you start.
4. Round 4 - Build the Eye Bobbles
Round 4 adds the signature frog eye bumps with bobble stitches. The full sequence: 2 sc, inc, 2 sc, inc, bobble, sc, inc, 2 sc, inc, bobble, sc, inc, 2 sc, inc.
Tip: If the bobble is sitting on the inside instead of the outside, you're working with the wrong side facing you.
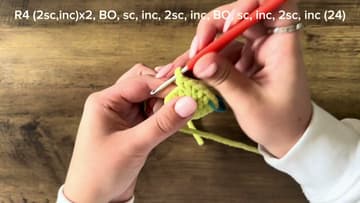
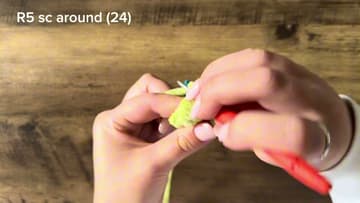
5. Rounds 5-8 - Single Crochet the Head
Now for the easy part. Rounds 5 through 8 are plain single crochet all the way around - 24 stitches per round for four rounds.
Tip: If you need to put the project down mid-round, slide the loop on your hook onto a stitch marker so it doesn't unravel.
6. Insert the Safety Eyes
Place each 12 mm safety eye between rounds 4 and 5, directly underneath one of the eye bobbles. Push the post through the fabric from the outside in.
Tip: If you push the post through a stitch instead of between stitches, it'll stretch the yarn and the eye will sit crooked.
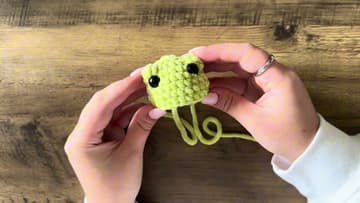
7. Shape the Body, Arms, and Legs
Round 9 starts the neck shaping: 2 sc, invisible dec, repeated around. Round 10 narrows further with 4 sc + 1 dec patterns.
Tip: If your arms or legs don't line up centered with the eyes, your tension is slightly different from Annabelle's - that's normal.
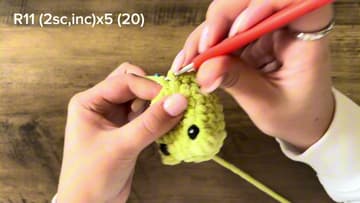
8. Stuff, Close, and Finish
Stuff the body firmly with polyfill - more than you think you need. Underfilled amigurumi sags within a few weeks.
Tip: If you skip the blush, the frog still reads as a frog. But the pink cheeks are what makes this design feel finished. They take less than a minute and use almost no yarn.