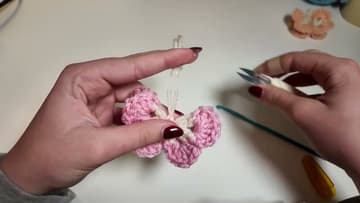
How to Crochet a Butterfly: Quick Beginner Project
Source: Maddy Marie • Full tutorial: www.craftingstepbystep.com/crochet/how-to-crochet-a-butterfly
- Difficulty
- Easy
- Hands-on time
- About 45 minutes
- Cost
- About $3 to $8
- Makes
- 1 crochet butterfly
Tools
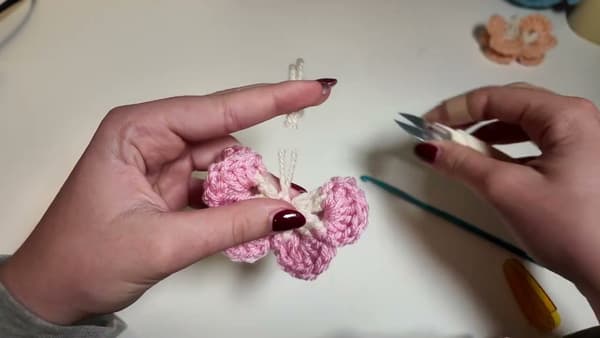
- 3.5 mm to 4.0 mm crochet hook (any hook that suits your yarn weight)
- Yarn needle (sometimes sold as a darning needle) for weaving in ends
- Sharp embroidery scissors
Materials
- Small amount of DK or sport-weight yarn in cream or your first color (for the center and antennae)
- Small amount of DK or sport-weight yarn in a second color (for the wings - pink in the demo)
Steps
1. Make a Slip Knot
Pick your first color (Maddy uses cream) and make a slip knot. Hold the short tail and the working strand in your left hand, cross the working yarn over the top to make a small loop, reach two fingers through the loop, grab the long working strand, and pull it through the loop.
Tip: If the slip knot feels too loose on the hook, pull the tail (not the working yarn) to tighten it. Pulling the working yarn unmakes the knot entirely.
2. Chain 6 and Slip Stitch Into a Ring
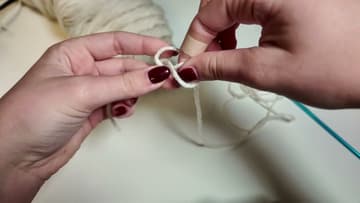
Yarn over and pull the wrap through the loop on the hook - that's one chain. Repeat five more times so you have six chains total.
Tip: Don't twist the chain before you slip stitch it closed. A twisted ring still works but the petals sit awkwardly on top of each other instead of fanning evenly.
3. Work Round 1 (Eight Chain-2 Spaces)
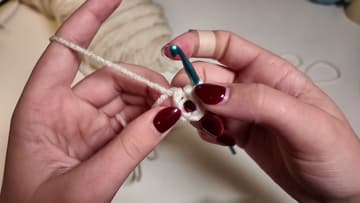
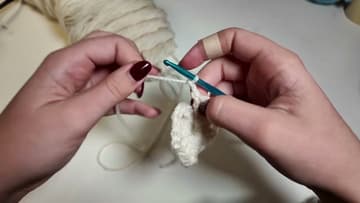
Chain 3 to start the round (this counts as your first double crochet ), then work one double crochet into the ring. Chain 2 to open the first chain-space.
Tip: The ring is small so your stitches will start crowding the center quickly.
4. Weave In Ends and Join the Wing Color
Thread the cream tails onto a yarn needle and weave each one through five or six stitches on the back of the round, then trim flush. Doing it now means you won't have a dozen tails to chase at the end.
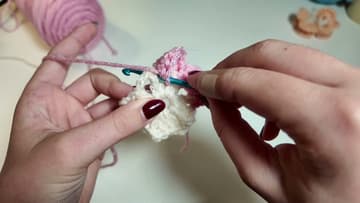
Tip: Join the new color between the double crochet pair, not in the chain-2 space. Joining in the chain-2 space leaves a visible knot right where a wing should be smooth.
5. Work Round 2 (Six Double Crochets Per Wing)
Working with the pink yarn, put six double crochets into the very first chain-2 space (the big gap next to where you joined the color). Then slip stitch into the next gap between a pair of double crochets in the cream round to anchor the wing flat.
Tip: If the wings are bunching up, your slip stitches between clusters are probably going into the chain-2 space instead of the gap between the cream double crochets.
6. Fold and Cinch the Butterfly Body
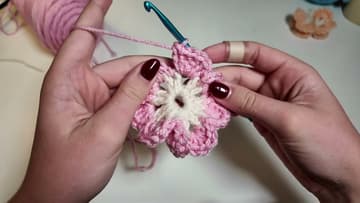
After the last cluster of six, slip stitch back into the gap where you originally joined the pink yarn. Then chain 8 in pink - those eight chains become the body wrap.
Tip: Make sure the chain-8 wrap sits in the middle of the fold, not off to one side.
7. Add the Antennae and Finish
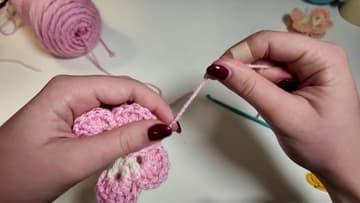
Cut a piece of cream yarn about four inches long and fold it in half so you have a small loop at the top and two tails at the bottom. Watch this part of the video.
Tip: Shorter antennae read clean and modern; longer ones lean cottagecore. Trim them a touch longer than you think you want - you can always snip more, but you can't add length back.