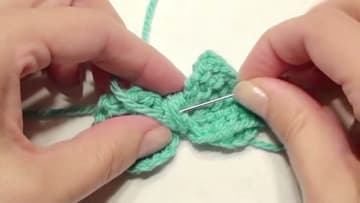
How to Crochet a Bow
Source: Crochet Jewel • Full tutorial: www.craftingstepbystep.com/crochet/how-to-crochet-a-bow
- Difficulty
- Easy
- Hands-on time
- About 30 minutes
- Cost
- About $3 to $8
- Makes
- 1 crochet bow

Tools
- F (3.75 mm) or G (4 mm) crochet hook
- yarn needle
- small scissors
- stitch marker
Materials
- worsted weight yarn
- fabric stiffener (optional)
- hair clips or glue (optional)
Steps
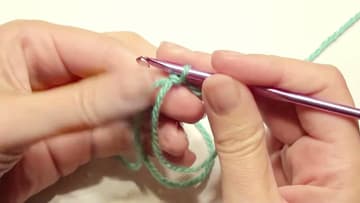
1. Make a Magic Circle With Worsted Yarn and a Crochet Hook
Wrap the yarn round two fingers to make a loose loop, with the tail crossing over the working yarn. Slide the hook under the loop, grab the working yarn and pull it through.
Tip: Leave a tail about 6 inches long so you have something to pull on later.
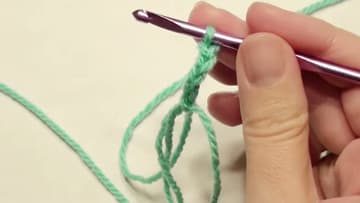
2. Chain 5 Crochet Stitches Up From the Magic Ring
Yarn over and pull through the loop on your hook five times. That gives you a chain of five standing up off the magic circle.
Tip: Hold the ring between your thumb and middle finger so it does not spin.
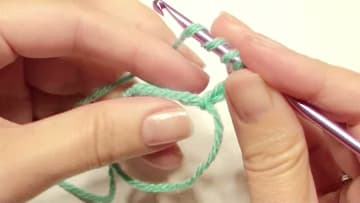
3. Wrap the Yarn Three Times for a Double Treble Crochet Stitch
Yarn over three times so you have three wraps on the hook. Push the hook into the center of the magic circle, grab the yarn and pull up a loop.
Tip: Count out loud: wrap, wrap, wrap, then two, two, two, two.
4. Work Six Double Treble Stitches to Fan Out the First Bow Wing
Work five more double trebles into the same ring, for six in total. They fan out side by side and start to look like one rounded half of a bow.
Tip: Clip a stitch marker into the first double treble so you can count to six without losing track.
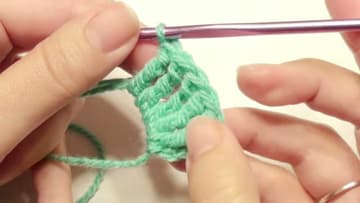
5. Chain 5 and Slip Stitch Into the Ring to Close the First Bow Wing
Chain five again, then put the hook into the magic circle and slip stitch. This closes the first wing of the bow.
Tip: If the wing looks crowded, slide the stitches along the ring before you go on.
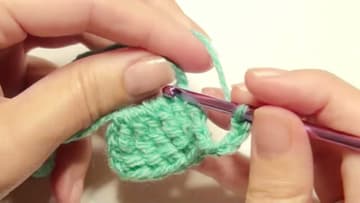
6. Crochet the Second Bow Wing to Match the First
Chain five, then work six double trebles into the ring, the same as the first side. Finish with another chain of five and a slip stitch into the ring.
Tip: Lay the two wings side by side before the slip stitch and compare them.
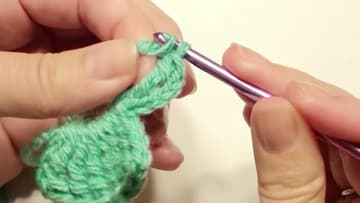
7. Pull the Magic Circle Tight to Pinch the Crochet Bow Together
Pull the starting tail as hard as you can. The ring closes and the two wings fold toward each other into a bow shape.
Tip: Tug the tail a second time after it looks closed. A little more always gives.
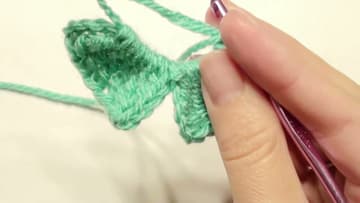
8. Wrap the Yarn Tail Around the Center of the Bow
Pinch the middle of the bow and wrap the long tail round it, five to eight times. Pull each wrap snug so it squeezes the center and puffs the wings out.
Tip: More wraps give a fatter center knot. Stop when it looks right to you.
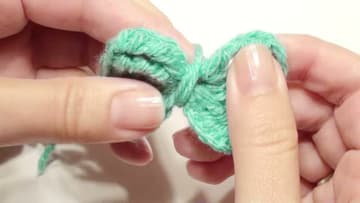
9. Weave In the Ends on the Back of the Crochet Bow
Thread both tails onto a yarn needle. Run them under the wraps on the back of the bow, then back the other way, so they cannot pull out.
Tip: Leave one tail long if you plan to tie the bow onto a gift or tree branch.