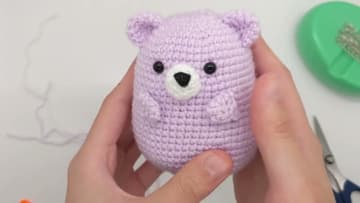
How to Crochet a Bear (Easy Beginner Amigurumi Pattern)
Source: Little World of Whimsy • Full tutorial: www.craftingstepbystep.com/crochet/how-to-crochet-a-bear
- Difficulty
- Easy
- Hands-on time
- About 5 hours
- Cost
- About $10 to $20
- Makes
- 1 crochet teddy bear

Tools
- 3.25 mm crochet hook (size D)
- Tapestry needle
- Embroidery needle
- Stitch markers
- Sharp scissors
- Sewing pins
Materials
- Sport-weight yarn in your main bear color (lavender, brown, white, or black)
- Small amount of white sport-weight yarn for the muzzle
- Two 6.0 mm safety eyes
- Black embroidery thread for the nose
- Polyester fiberfill stuffing
Steps
1. Gather Your Yarn, Hook, and Safety Eyes
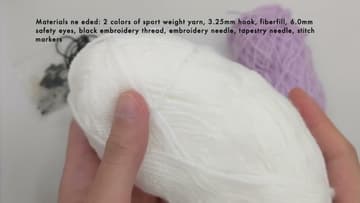
Lay out everything before you start. You need two colors of sport-weight yarn (the main color for the body and ears, plus white for the muzzle), a 3.25 mm hook, 6 mm safety eyes, polyester fiberfill, stitch markers, scissors, black embroidery thread for the nose, and a tapestry needle for sewing the pieces together.
Tip: Skip the safety eyes if this bear is going to a child under three - the post can come loose with enough chewing. Embroider French knots or stitch on small felt circles instead.
2. Start with a Chain-7 Foundation
This bear doesn't start with a magic ring like most amigurumi. It starts with a foundation chain that builds an oval instead of a circle, which is what gives the body its slightly stretched, tubby shape.
Tip: If you've only ever made magic rings, this is a good time to bookmark our magic ring walkthrough - you'll need it for the arms, ears, and muzzle later in this pattern.
3. Work Rounds 1-6 to Build the Base Oval
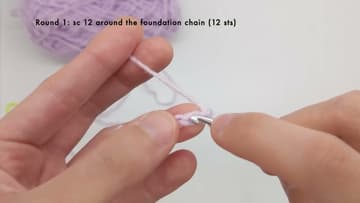
Round 1 turns the chain into a 12-stitch oval. Skip the first chain from the hook and work 5 single crochets along one side of the chain.
Tip: The shape will look hexagonal at the end of round 6 - that's normal. It smooths out once you stop increasing and the fabric starts curving upward.
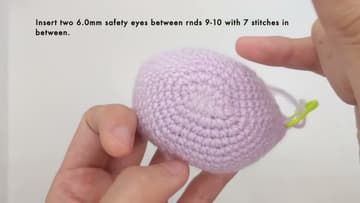
4. Insert the Safety Eyes Between Rounds 9 and 10
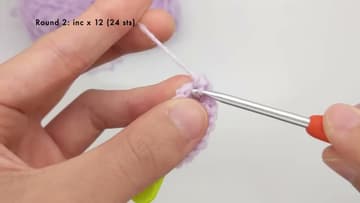
Work four more plain single- crochet rounds (still 48 stitches each), then place the eyes between rounds 9 and 10. Count down from the top of the work - the foundation chain is round 1, the first 12-stitch round, then round 2 (24 sts), and so on.
Tip: If the post goes through a stitch instead of between two, it'll pull the yarn and the eye will sit crooked. Spread the fabric gently with your hook tip to find the gap.
5. Shape the Body with One More Increase Round and Then Decreases
After placing the eyes, work one more increase round: 7 sc + inc repeated 6 times (54 stitches). Then 8 plain rounds of single crochet all around at 54 stitches each.
Tip: The shape will start curving in noticeably during the decreases. That's the bottom of the bear forming.
6. Stuff the Body Firmly Before It Closes
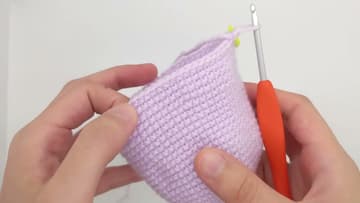
Once the opening narrows to around 24 stitches, pause and stuff. Pull the fiberfill into small chunks (about the size of a walnut) and push them in one at a time from the bottom up.
Tip: If the stuffing shows through the stitches, your tension is too loose. Drop down half a hook size on your next amigurumi and the fabric will close up.

7. Close the Top with the Final Decreases and Cinch
The last few rounds close the body fast: 1 sc + dec x8 (16 sts), then dec x8 (8 sts), then dec x4 to close the final ring. Switch from the invisible decrease to a regular decrease here - the stitches get too small to fit your hook through both front loops.
Tip: If a small gap remains after cinching, push the tip of your tapestry needle through it and pull the inside of the cinch tighter.
8. Make Two Arms and Two Ears with Magic Rings
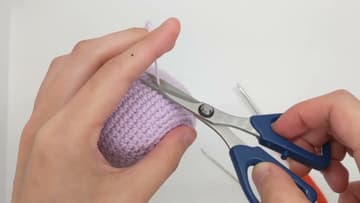
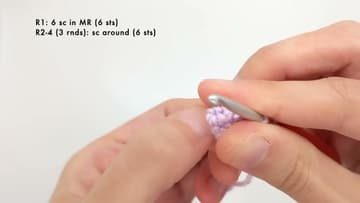
Each arm is tiny: start with a magic ring, work 6 sc inside it, then 3 more rounds of plain sc all around (still 6 stitches each round). Finish off with a 10-inch tail, fold the arm flat, and tuck the starting tail inside.
Tip: These pieces are small. Hold the magic ring tight against your finger as you work - if you let it slip, the stitches won't seat.
9. Crochet the White Muzzle and Embroider the Nose
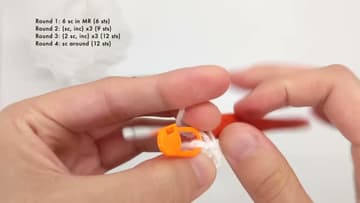
Switch to white yarn for the muzzle. Magic ring with 6 sc, then round 2: 1 sc + inc repeated 3 times (9 sts).
Tip: White yarn is the hardest to count stitches on because the loops blur together.
10. Sew the Ears, Muzzle, and Arms onto the Body
Pin every piece in place before sewing. The muzzle goes centered on the face with its top edge level with the top of the safety eyes.
Tip: Want a panda instead? Use black yarn for the main body, white for the muzzle and a small white circle on each ear, and add black patches around the eyes.