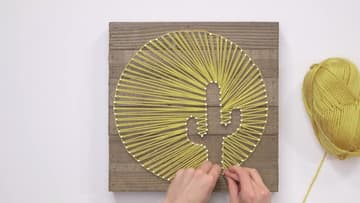
How to Make String Art: Silhouette, Negative Space and Sunburst
Source: Hobby Lobby • Full tutorial: www.craftingstepbystep.com/crafts/how-to-make-string-art
- Difficulty
- Easy
- Hands-on time
- About 1 hour
- Cost
- About $10 to $25
- Makes
- 1 string art sign

Tools
- small hammer
- needle nose pliers
- scissors
- tape
Materials
- wood slice or board
- nails with heads
- yarn or embroidery floss
- paper template
Steps
1. Tape the String Art Template to the Wood
Cut out your template and lay it where you want the design on the wood. Tape it down at several points so it cannot shift while you hammer.
Tip: Lightly trace around the template in pencil too, in case it tears partway through.
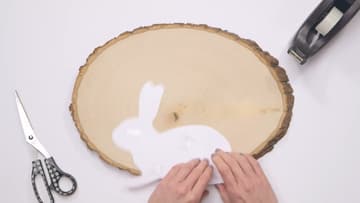
2. Hammer Nails Around the String Art Outline
Tap nails in right along the edge of the template, spaced evenly. Use nails with heads, which stop the string slipping off later.
Tip: Tap lightly and check the depth often so no nail punches out the back of the board.
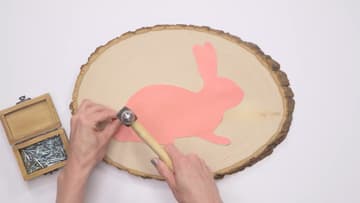
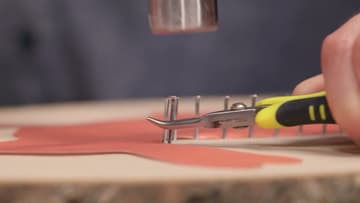
3. Hold String Art Nails Steady With Pliers
In tight spots, grip each nail with needle nose pliers while you hammer. The pliers keep it straight and keep your fingers out of the way.
Tip: Lay the pliers flat on the template to set the same nail height every time.
4. Wrap the Yarn Around the String Art Outline
Tie the yarn to any nail, leaving a short tail you can tuck in later. Work all the way around the outline, looping the string once around every nail.
Tip: Pick whichever edge you like. Neither is wrong, but stay consistent.
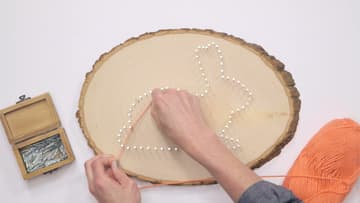
5. Crisscross the Yarn to Fill the String Art Shape
With the outline done, stretch the yarn from nail to nail across the shape, crisscrossing in every direction. Use each nail as many times as you like.
Tip: Step back now and then to spot thin areas, then cross those a few more times.
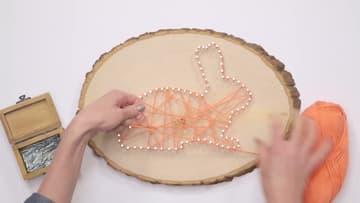
6. Tie Off and Finish the String Art Bunny
When the shape is filled, tie the yarn around a nail with a double knot. Trim the end and tuck the tail into the design so it disappears, and do the same with the starting tail.
Tip: A dab of clear glue on the knot keeps it from working loose over time.
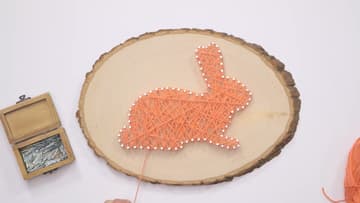
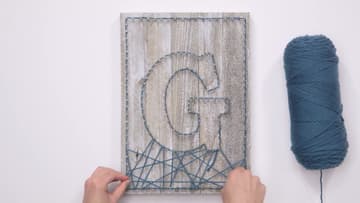
7. Nail a Border and Letter for Negative Space String Art
For the negative space style, the string fills the area around your shape. Leave the letter template whole and nail straight through the paper around the outline.
Tip: Letters read best when they are big. Aim to fill at least two thirds of the board.
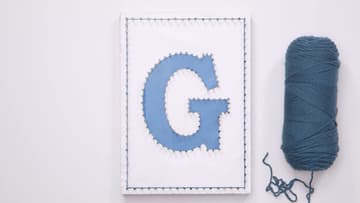
8. Fill the Background of the Negative Space String Art
Outline the letter and the border with yarn, the same way as the bunny. Then crisscross the yarn between the letter's outline and the border, filling the background.
Tip: A whitewashed or painted board makes the bare letter stand out even more.
9. String Straight Rays for Focal Point String Art
The focal point style uses straight, even lines from an outer border to an inner shape, like sun rays. Do not start at any old nail.
Tip: Keep every ray straight and parallel to its neighbors. That is what makes the pattern pop.
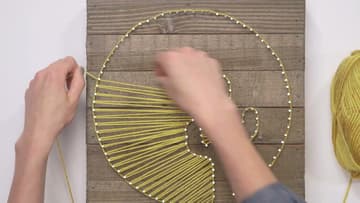
10. Double Up Nails and Tie Off the Focal Point String Art
The cactus has fewer nails than the outer circle. To keep the rays evenly spaced, wrap two or three times around some cactus nails while wrapping each outside nail only once.
Tip: Count the nails on both outlines first, so you can plan where to double up.