How to Make Concrete Letters for Garden Decor
Source: Travis DeRose • Full tutorial: www.craftingstepbystep.com/crafts/how-to-make-concrete-letters
- Difficulty
- Easy
- Hands-on time
- About 1 hour
- Wait time
- 48 hours
- Cost
- About $20 to $40
- Makes
- 1 set of 4 letters

Tools
- craft knife
- 5 gallon bucket
- margin trowel or small shovel
- hot glue gun (optional)
- work gloves
- dust mask
Materials
- cardboard papier mache letters
- concrete mix or sand mix
- water
- newspaper
- coupling nuts (optional)
- clear concrete sealer (optional)
Steps
1. Gather Cardboard Letters and Concrete Mix for Concrete Letters
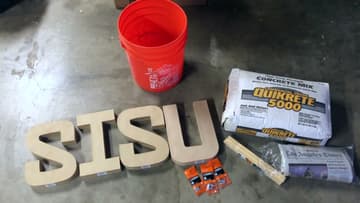
Pick up cardboard papier mache letters for your word. Craft stores carry them, and online shops have the larger sizes.
Tip: Buy one spare letter. It is good for a test pour.
2. Cut the Top Off Each Cardboard Letter to Make a Mold
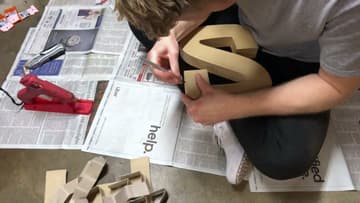
Use a craft knife to cut around the edge of one flat face of each letter, then peel that face away. What is left is an open tray shaped like the letter.
Tip: Cut a little inside the edge so the side walls stay firm.
3. Hot Glue Coupling Nuts Inside the Letter Molds (Optional)
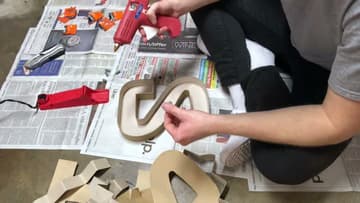
If you want to stand the concrete letters up in the lawn, hot glue a threaded coupling nut to the inside edge of each mold. The nut sets into the concrete.
Tip: Tape over the open end of each nut so no concrete gets in the threads.
4. Mix the Concrete in a Bucket
Lay the open molds flat on newspaper. Put on gloves, pour the dry mix into a bucket and add water a little at a time, following the bag directions.
Tip: Aim for thick oatmeal. Too wet and the letters weaken. Too dry and they crumble.
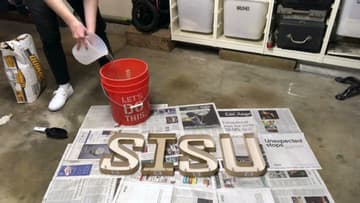
5. Scoop Concrete Into the Cardboard Letter Molds
Spoon the wet concrete into each letter mold with a trowel. Push it into every corner and along the thin strokes.
Tip: Keep a damp rag nearby to wipe spills off the outside of the molds.
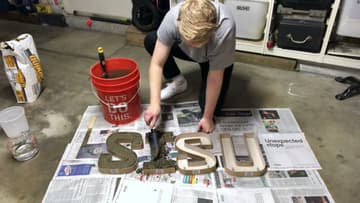
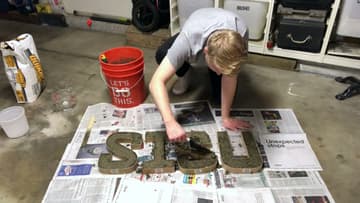
6. Press and Smooth the Concrete in Each Letter
Press the concrete down firmly with the trowel, then gently tap or jiggle each mold to bring air bubbles to the surface. Smooth the top as flat as you can.
Tip: Tap the floor around the mold with a rubber mallet to settle the mix.
7. Peel the Cardboard Mold Off the Cured Concrete Letters
Let the concrete cure for at least 48 hours. Waiting a full week is even better, because the cardboard dries out and lets go more easily.
Tip: Keep the letters out of hard sun and mist them with water while they cure.
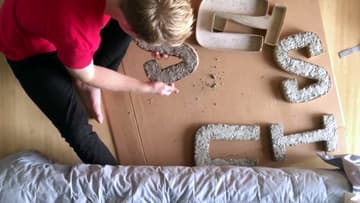
8. Make a Second Batch for Smoother Concrete Letters
Travis's first set came out rough because the mix had started to set. He mixed a second batch the right way, poured it straight away and got a much smoother finish.
Tip: Sand rough edges with a rubbing stone or coarse sandpaper once fully cured.
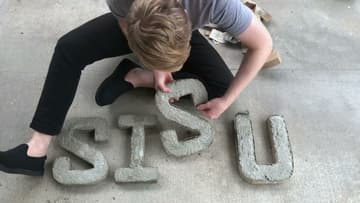
9. Set the Finished Concrete Letters in the Garden
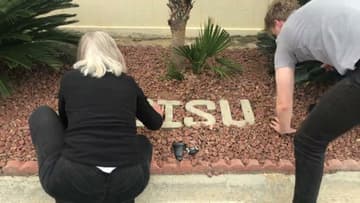
Choose where your letters will live. Here they are pressed into red landscape rock like stepping stones, spelling SISU along the front yard.
Tip: A coat of clear concrete sealer keeps them looking fresh outdoors.