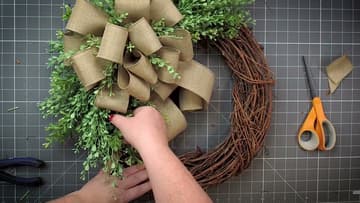
How to Make a Wreath
Source: Deco Exchange • Full tutorial: www.craftingstepbystep.com/crafts/how-to-make-a-wreath
- Difficulty
- Easy
- Hands-on time
- About 1 hour 15 minutes
- Cost
- About $20 to $40
- Makes
- 1 wreath

Tools
- Hot glue gun
- Wire cutters
- Craft scissors
Materials
- Grapevine wreath form
- Wired burlap ribbon
- Faux greenery stems
- Pipe cleaners
- Floral wire
- Glue sticks
- Wreath hanger
Steps
1. Lay Out the Base, the Ribbon and the Greenery
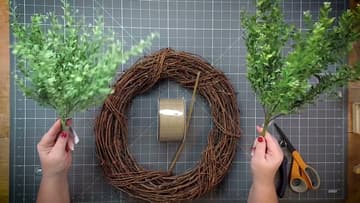
A grapevine wreath is the easiest base to start on. The twigs grab hold of wire and glue, and the bare parts still look like they belong, so you do not have to cover every inch of it.
Tip: Wired ribbon holds a loop on its own. Unwired ribbon collapses and you will spend the whole build fighting it.
2. Cut a Dovetail Into the Ribbon End
Fold the end of the ribbon in half lengthwise, then cut at an angle from the folded edge out to the open corner. Open it back up and you have a clean V.
Tip: Cut the dovetail before you build the bow, not after. Once the loops are stacked in your fist you cannot get scissors in there cleanly.
3. Make the Centre Loop and Find the Right Side
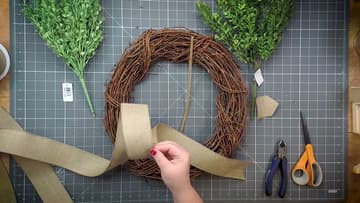
Make one small loop in the middle of the ribbon and pinch it closed between your thumb and finger. Everything else builds off this loop, so keep it tight and keep it under four inches across.
Tip: Pinch with your non-dominant hand and keep it pinched. Every loop from here gets added into the same pinch point.
4. Pinch, Twist, Loop - Over and Over
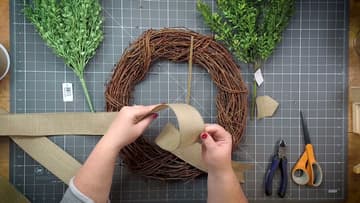
The whole bow is three moves repeated. Twist the ribbon at the pinch point so the good side comes back up.
Tip: Say it out loud while you work - pinch, twist, loop. It sounds daft and it stops you losing your place.
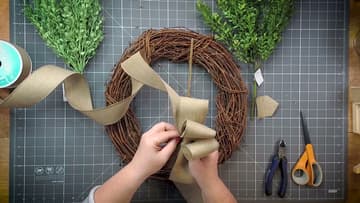
5. Grow the Loops as You Go
Start small in the middle and make each pair of loops a little wider than the last. That is what turns a flat stack of ribbon into something that reads like a layered flower.
Tip: Ten yards of ribbon makes a generous wreath bow with tails left over. Five yards is tight.
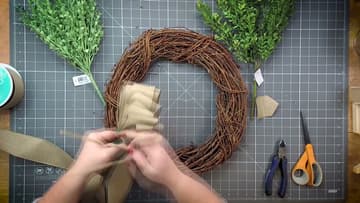
6. Wire the Centre With a Pipe Cleaner
Dovetail the loose end the same way you did the first one, so both tails match. Then, still gripping the bow, wrap a pipe cleaner around the pinched centre and twist it once behind the bow to lock the whole stack together.
Tip: Twist the wire at the back, not the front. A twist on the front shows through the middle of the finished bow.
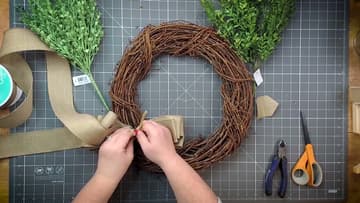
7. Push the Wire Through the Grapevine From the Front
Decide where the bow sits before you attach anything. Off to one side, roughly where four or eight o'clock would be, looks better than dead centre on a round wreath.
Tip: Hold the wreath up at arm's length before you twist the wire tight. It is much easier to move the bow now than after.
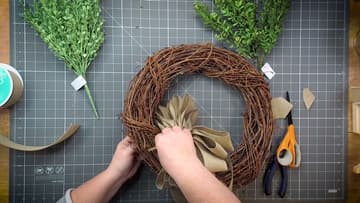
8. Fluff the Bow Into Shape
This is the step that decides whether the wreath looks good, and it takes longer than you expect. A bow straight off the hand looks flat and a bit sad.
Tip: Step back and look at it from four feet away. Flat spots that are invisible up close are obvious from across the room.
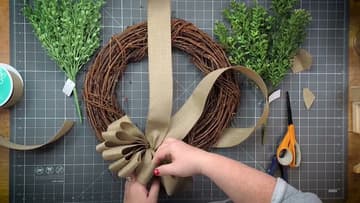
9. Break the Greenery Down and Glue It In
Pull each greenery stem apart at the joints so one long spray becomes four or five short sprigs. Short pieces are far easier to place than a whole branch, and they let you build the shape gradually instead of committing all at once.
Tip: Glue the sprigs so they point away from the bow, following the curve of the wreath. Greenery pointing straight out looks stuck on.
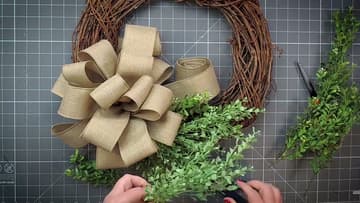
10. Tuck Greenery Through the Bow and Drop the Tails
Slip a few of the smallest sprigs in between the loops of the bow itself. This is a small move with a big payoff - it is what stops the bow and the greenery looking like two separate things stuck to the same ring.
Tip: Swap the ribbon and the greenery for seasonal versions and the same base carries you through the year. The build never changes.