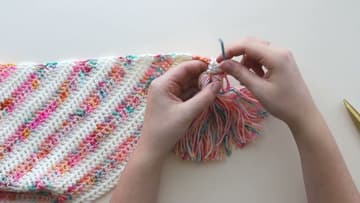
How to Make a Tassel and Attach It to Any Project
Source: Sewrella • Full tutorial: www.craftingstepbystep.com/crafts/how-to-make-a-tassel
- Difficulty
- Easy
- Hands-on time
- About 15 minutes
- Makes
- 1 tassel

Tools
- Small hardback book, stiff cardboard, or a tassel maker
- Sharp scissors
- Yarn needle with a large eye
- Crochet hook
Materials
- DK or worsted weight yarn
- Two 2-foot scrap strands of the same yarn for the ties
Steps
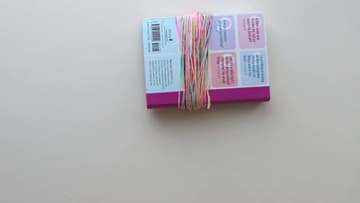
1. Wrap the Yarn Around a Small Book
Find something rigid to wrap around. A small hardback book works because the cover width sets the tassel length for you, and there is always one on the shelf.
Tip: Wrap the short width of the book rather than the tall height. A tall wrap makes a long skinny tassel and it fights you when you try to slide it off.
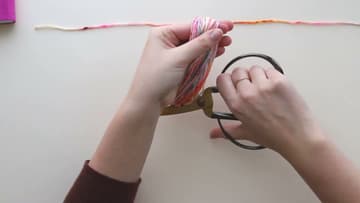
2. Cut Across the Bottom of the Loop With Sharp Scissors
Snip the yarn free of the ball, then work the loop off the book with your thumbs pushed inside it. Keep the oval shape as it comes off.
Tip: Use scissors you keep away from paper. Cutting 75 strands at once with a dull pair chews the ends ragged, and no amount of trimming later gets them even again.
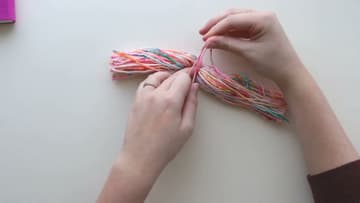
3. Tie a Scrap Strand Around the Middle of the Bundle
Spread the bundle on the table so the strands lie side by side rather than twisted into a rope. Lay one of your two-foot strands across the middle at a right angle, bring the ends up, and double knot them down hard.
Tip: Leave both tails of this tie at least a foot long. They are what threads onto the yarn needle at the end, and short tails are miserable to work with.
4. Pull a Second Strand Tight Around the Neck of the Tassel
Fold the bundle in half at the middle tie so every strand falls the same way and the tie points up. Give it a shake to settle the strands.
Tip: An inch is the number worth remembering. It is the whole difference between a tassel with a proper round head and a bunch of yarn with a string on it.
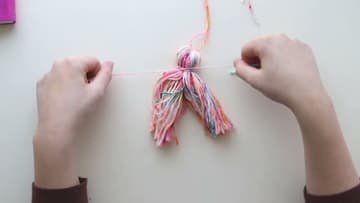
5. Wind the Tie Tails Around the Neck to Make a Collar
Take the two tails hanging off the neck knot and wind them around the neck a few times. Keep the wraps snug and side by side so they sit like a collar.
Tip: Wrap in the same direction the whole way around. Crossing back over yourself makes a lumpy collar that catches the light and shows from across the room.
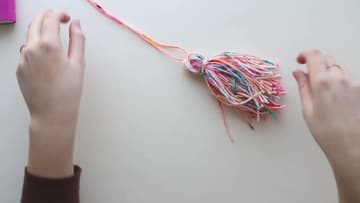
6. Trim the Ends of the Tassel Flat With Sharp Scissors
Shake the tassel out and comb both sides with your fingers until the strands hang straight. However carefully you wrapped and cut, the ends are nowhere near level at this point.
Tip: Trim with the tassel hanging rather than lying on the table. Gravity shows you the true length, and a tassel cut flat on a surface comes out shorter on one side.
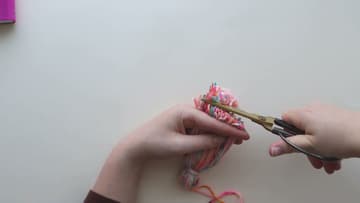
7. Take the Yarn Needle Through the Corner Stitch of Your Project
Trim the two hanging ties level with each other and thread them both onto a yarn needle. You want a big eye here, wide enough for both strands at once, so reach for a darning needle or the largest tapestry needle in the pack.
Tip: Anchor into a whole stitch, not the gap between two stitches. A tassel hung off a hole works the fabric open over time and leaves a gap that never closes.
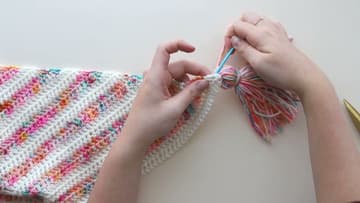
8. Weave the Needle Into the Head of the Tassel
Take one back stitch into the fabric a row in from the edge, then come down through the edge stitch again. Two anchor points beat one, and a chunky tassel is heavy enough to need both.
Tip: Do not trim the last tail flush with the head. Send it out through the bottom of the skirt first so the cut end sits among the other strands where nobody will pick it out.