How to Make a Propagation Station With Test Tubes
Source: Techplant • Full tutorial: www.craftingstepbystep.com/crafts/how-to-make-a-propagation-station
- Difficulty
- Medium
- Hands-on time
- About 2 hours
- Cost
- About $15 to $30
- Makes
- 1 five-tube propagation station

Tools
- drill
- 1 inch Forstner bit
- 9/64 inch drill bit
- wire cutters
- round nose pliers
- clamp
- tape measure
- painters tape
Materials
- pine board, 1 x 2 inch
- glass test tubes
- 1/8 inch bare copper wire
Steps
1. Gather the Pine Board, Copper Wire and Test Tubes
You need three main supplies. A piece of lumber 1 inch thick and 2 inches wide, cut to the length you want.
Tip: Buy the test tubes first so you can match the hole size to them.
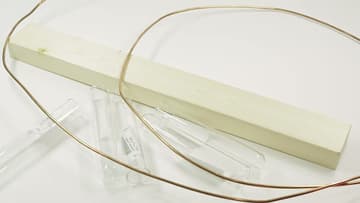
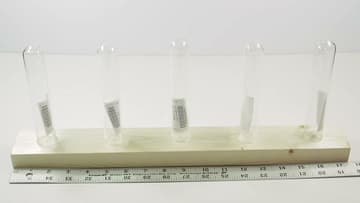
2. Space the Test Tubes Along the Propagation Station Board
Stand the test tubes along the board to work out the spacing before you drill. Give each one plenty of room.
Tip: Measure from the middle of the board outward so the end gaps match.
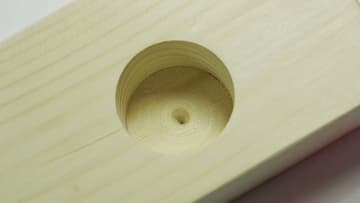
3. Drill a 1 Inch Hole for Each Test Tube
Clamp the board down and drill a 1 inch hole at each mark. The board is only an inch tall, so stop at about three quarters of an inch deep.
Tip: Wrap a band of tape around the bit at 3/4 inch as a depth guide.
4. Bend the Copper Wire Into a Ring for the Test Tube
Find a round object about the same width as your test tube, like a tool handle or a marker. Wrap the copper wire around it to form a ring, then bend both ends straight down so they become two long prongs.
Tip: Make the ring a little smaller than the tube's lip so the tube cannot drop through.
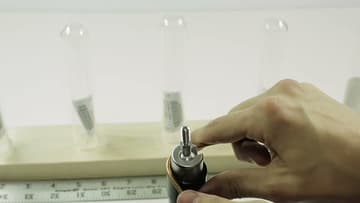
5. Check the Copper Wire Holder Against a Test Tube
Lay a finished holder on the table and slide a test tube into the ring. The lip at the top of the tube should rest on the ring, with the prongs running down beside the glass.
Tip: Bend all the holders before drilling so you can match their prongs.
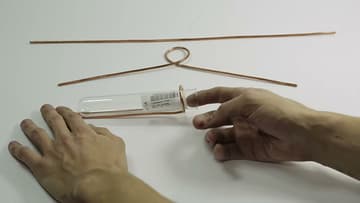
6. Drill Two Small Prong Holes Behind Each Test Tube Hole
Using the gaps you measured, mark two small holes behind each big hole, side by side. Drill them with a bit a hair wider than the wire.
Tip: Drill the small holes about as deep as the big ones so the math stays simple.
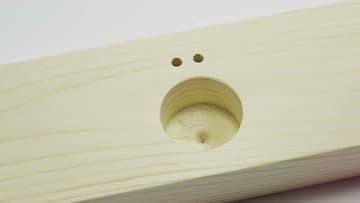
7. Mark the Ring Height on the Copper Wire Prongs and Cut
Decide how high you want each ring to sit around its tube. Because both holes are the same depth, you can lay the holder next to a tube and mark the prongs where they line up with the bottom of the glass.
Tip: Cut one holder, test it, then use it as a pattern for the rest.
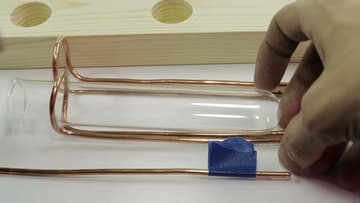
8. Set the Copper Wire Holders Into the Propagation Station
Push each holder's two prongs into their small holes so the rings stand in a row above the big holes. You can leave them dry fit like this if they feel snug.
Tip: Straighten any ring that leans before adding the tubes.
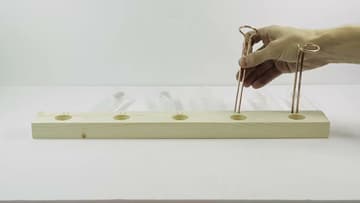
9. Fill the Test Tubes With Water
Slide each test tube down through its ring and into its hole. Then pour in water.
Tip: A small funnel or a squeeze bottle makes filling the narrow tubes tidy.
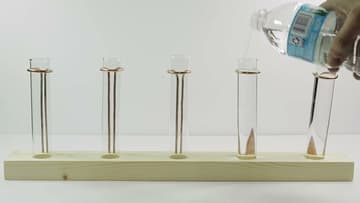
10. Add Plant Cuttings to the Propagation Station
Drop a cutting into each tube so the stem sits in the water and the leaves rest above the ring. The slender tubes keep small cuttings from falling in or flopping to the side, which is the whole reason to use them over jars.
Tip: Change the water once a week to keep it clear and fresh.