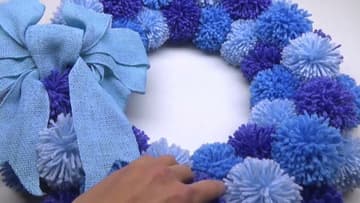
How to Make a Pom Pom Wreath (Easy Yarn Wreath)
Source: naztazia • Full tutorial: www.craftingstepbystep.com/crafts/how-to-make-a-pom-pom-wreath
- Difficulty
- Easy
- Hands-on time
- About 4 hours
- Cost
- About $20 to $40
- Makes
- 1 wreath

Tools
- pom pom maker
- sharp scissors
- hot glue gun
- paint brush
Materials
- 14 or 16 inch foam wreath form
- about 600 yards of yarn
- acrylic craft paint
- hot glue sticks
- ribbon or ready made bow
Steps
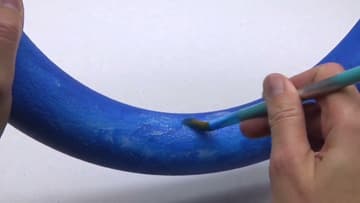
1. Paint the Foam Wreath Form
Pick a 14 or 16 inch wreath form. Donna likes a foam one because it takes paint.
Tip: Paint the back too if the wreath will hang on a glass door.
2. Wrap Yarn Around the Pom Pom Maker
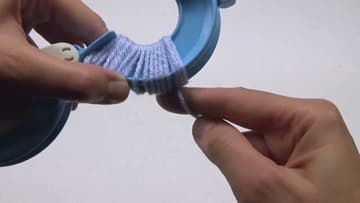
Pull the pom pom maker apart so the two U shaped arms on one side swing open. Hold them together and wrap your yarn around them.
Tip: Wrap toward the middle of the arms so the pom pom ends up round.
3. Close the First Side of the Pom Pom Maker and Wrap the Second
When you reach 100 wraps, cut the yarn and fold that side of the tool closed. Open the arms on the other side and wrap another 100 times the same way.
Tip: Use a matching color for the tie strand so it disappears in the finished pom pom.
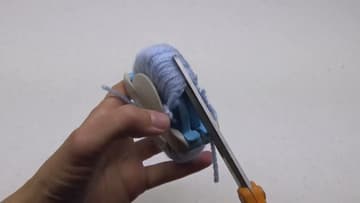
4. Cut the Yarn Along the Pom Pom Maker Groove
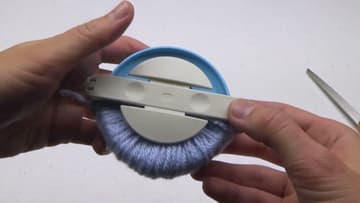
Slide the tip of your scissors into the groove between the two halves of the tool, right in the middle of the wrapped yarn. Cut all the way along one side, then turn the tool over and cut the other side.
Tip: Small, pointed scissors fit the groove better than big shears.
5. Tie the Center of the Pom Pom Tight
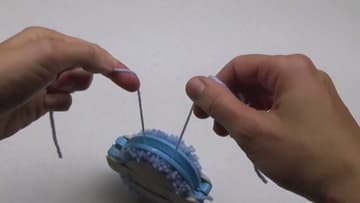
Take the strand you cut earlier and slide it into the center groove, all the way around the tool. Bring the two ends together and tie them in a knot, pulling as tight as you can.
Tip: Pull the knot tight, then wrap the strand around once more and knot again.
6. Release and Trim the Yarn Pom Pom
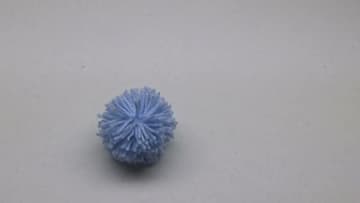
Open the arms and pull the two halves of the tool apart. Your pom pom pops out.
Tip: Keep finished pom poms in a basket so they stay clean while you work.
7. Spread Hot Glue on the Wreath Form
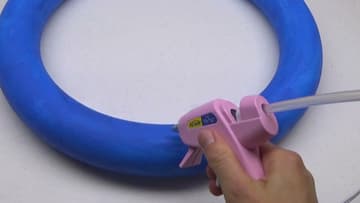
Lay your pom poms around the wreath first to see what looks good and to spread the colors evenly. Then pick one up, heat your glue gun and spread a line of glue on the front of the wreath form where it will sit.
Tip: A low temperature glue gun is gentler on foam and fingers.
8. Press the Pom Poms Into the Hot Glue
Before the glue cools, press the pom pom down into it and hold it for a few seconds. Put the next pom pom right beside it, snug against the first, and glue it the same way.
Tip: Push the tie knot side down into the glue so it is hidden.
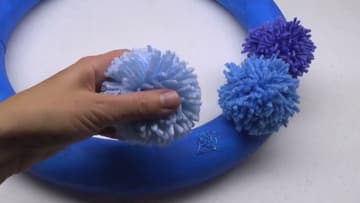
9. Fill the Outer Edge of the Pom Pom Wreath
Once the front ring is done, add another layer of pom poms around the outer edge of the form with more hot glue. You can space them evenly or place them at random.
Tip: Hang it up and look at it from across the room before you call it finished.
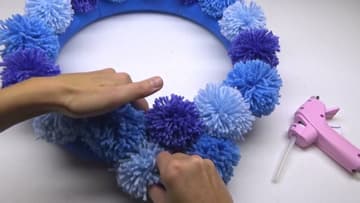
10. Glue a Bow on the Pom Pom Wreath
Finish with a bow. Donna uses a light blue burlap bow, but a ready made bow works as well.
Tip: Wired ribbon holds its shape on a door far better than plain ribbon.