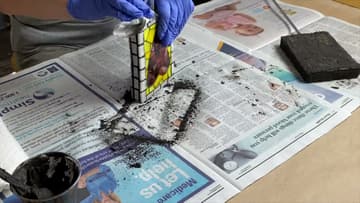
How to Make a Mosaic Garden Stake
Source: Julie Weilbacher • Full tutorial: www.craftingstepbystep.com/crafts/how-to-make-a-mosaic-garden-stake
- Difficulty
- Medium
- Hands-on time
- About 2 hours 30 minutes
- Wait time
- 48 hours
- Cost
- About $15 to $30
- Makes
- 1 garden stake

Tools
- wheeled glass nippers
- tile nippers
- plastic putty knife
- tweezers
- scissors
- disposable gloves
- chalk
Materials
- foam core backer board
- self-adhesive fiberglass mesh tape
- aluminum rod
- fortified thin-set mortar
- stained glass
- white glass mosaic tiles
- fortified sanded grout
- paper towels
Steps
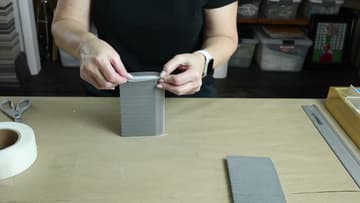
1. Tape the Foam Edges of the Mosaic Garden Stake Board
Start with your backer board cut to size. The cut edges show bare blue foam, and those need covering.
Tip: Cut the tape a little long and trim the overhang so the corners stay neat.
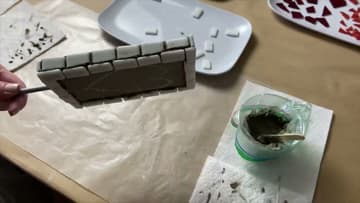
2. Push the Metal Rod Into the Garden Stake Foam Core
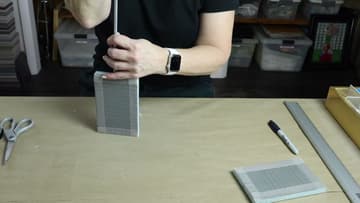
Push the rod into the foam core at the bottom edge, or the side, depending on your design. You may need to snip a small hole in the mesh tape first because its adhesive grips the foam hard.
Tip: Twist the rod gently as you push. It slides in more easily than a straight shove.
3. Coat the Garden Stake Board With Thin-Set Mortar
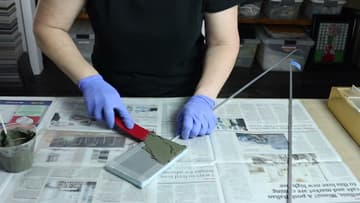
Spread a thin coat of thin-set mortar over the front, back and sides of the board with a plastic putty knife. Cover the mesh tape and the spot where the rod enters the foam.
Tip: Match the thin-set color to your grout. Use gray under dark grout, white under light.
4. Nip the White Border Tiles for the Mosaic Garden Stake
Sketch your design straight onto the cured board with chalk. Then prepare the border.
Tip: Nip over a tray or a paper bag. Glass chips fly farther than you expect.
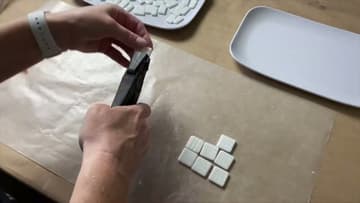
5. Set the White Tile Border Around the Garden Stake
Butter the back of each tile with a little thin-set and press it in place around the edge of the board. Keep the gaps between tiles even so the grout lines look tidy.
Tip: Wipe any mortar that squeezes up onto the tile face before it hardens.
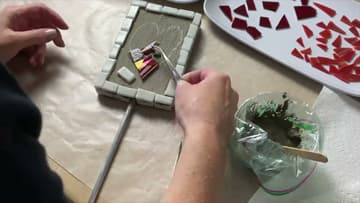
6. Fill the Chalk Heart With Red Stained Glass
Now the fun part. Work inside the chalk outline with red stained glass pieces.
Tip: Tweezers help you place small pieces without smearing mortar across the glass.
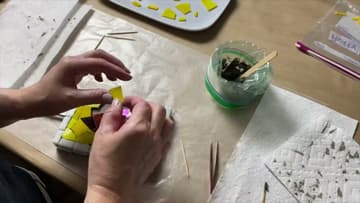
7. Add the Yellow Background Around the Mosaic Heart
Once the heart is filled, cut yellow stained glass to fill the space between the heart and the white border. Fit the pieces like a puzzle, keeping the gaps about the same width.
Tip: A wheeled glass nipper gives cleaner curves along the heart's edge than tile nippers.
8. Grout the Mosaic Garden Stake
Mix fortified grout, or use a latex additive instead of water, and let it rest a few minutes. Wearing gloves, spread it over the tiled face and push it into every gap with small clockwise and counterclockwise circles.
Tip: Do the sides last. They are easier once the face is grouted and you can tip the stake.
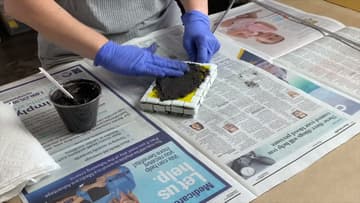
9. Wipe the Grout Off the Mosaic Heart With a Dry Paper Towel
Once the grout firms up, wipe the face with a dry paper towel, using the same circular motions. Dry towels pull off the haze without adding water that can weaken the grout lines.
Tip: Keep turning the towel to a clean side so you do not smear grout back on.
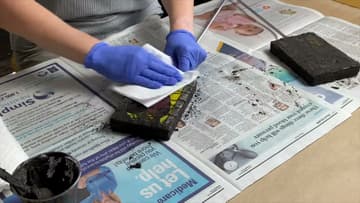
10. Clean the Edges and Seal the Mosaic Garden Stake
Stand the stake on its edge and wipe the side tiles the same way, then the back. Check the corners and around the rod for any gaps you missed.
Tip: Bring the stake inside before a hard freeze to keep the tiles tight for years.