How to Make a Fairy Garden - Easy DIY Treehouse Fairy Garden
Source: Country Lily DIY Decor • Full tutorial: www.craftingstepbystep.com/crafts/how-to-make-a-fairy-garden
- Difficulty
- Easy
- Hands-on time
- About 1 hour 30 minutes
- Wait time
- 1 hour
- Cost
- About $15 to $30
- Makes
- 1 fairy garden

Tools
- hot glue gun
- paintbrushes
- miter shears or strong scissors
- metal square or ruler
- sandpaper
Materials
- 12 inch wood panel or shallow tray
- brown acrylic paint
- mini terracotta pot
- reindeer moss
- tacky glue
- fairy treehouse
- faux succulents in mini pots
- fairy gate
- decorative stones
- craft sticks
- fairy garden miniatures
- E6000 glue (for outdoor gardens)
Steps
1. Stain the Wood Panel Base for the Fairy Garden
Start with a 12 inch wood panel or shallow tray. For a darker, woodsy look, thin some brown acrylic paint with water and brush it over the whole piece, edges included.
Tip: Paint the underside too if the garden will sit on a table you want to keep clean.

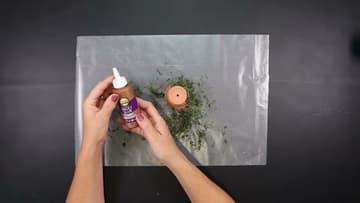
2. Cover a Mini Terracotta Pot in Moss for the Fairy House
Turn a mini terracotta pot upside down. This becomes a mossy stump that lifts the fairy house up.
Tip: Work over foil or wax paper. Moss sheds everywhere.
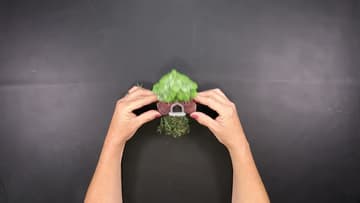
3. Set the Fairy Treehouse on Its Moss Pot
Take your fairy treehouse and set it on top of the mossy pot. Check that it sits level before you glue, then attach it with a good amount of hot glue.
Tip: Hold the house still for a minute while the glue sets so it does not lean.
4. Build a Tiny Craft Stick Ladder for the Fairy House
Cut the rounded ends off two craft sticks and trim each to 3 inches for the rails. Cut three 1 inch pieces from a third stick for the rungs.
Tip: Strong kitchen scissors can cut craft sticks if you do not have miter shears.

5. Glue the Fairy Treehouse to the Back of the Base
Once the paint and glue are dry, it is time to assemble. Put the treehouse in a back corner of the panel, where it will be the focal point.
Tip: Lay all the pieces out loose first to plan the layout before anything is glued.

6. Add Faux Succulents Beside the Fairy Treehouse
Frame the house with a small plant on each side. These mini potted faux succulents came from a craft store for under a dollar each.
Tip: Real succulent cuttings work in a planter version, but never glue living plants.
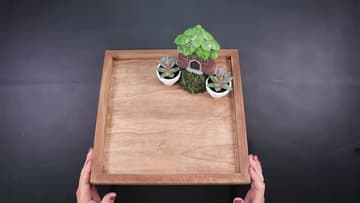
7. Glue the Gate and Start the Fairy Garden Path
Glue a small fairy gate to the centre of the front edge. Now link the gate to the house with a path.
Tip: Mix stone sizes and colours so the path looks like it grew there.

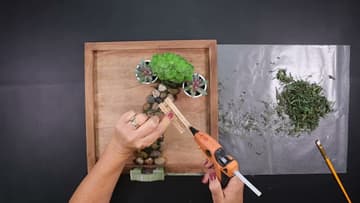
8. Fill the Fairy Garden Path With Moss
Make the path wider wherever it looks thin by adding more stones. Then dab tacky glue between the rocks and press small pinches of reindeer moss into the gaps.
Tip: Tweezers help push moss into the tight spots between stones.

9. Attach the Ladder to the Fairy Treehouse Door
Take the painted craft stick ladder and lean it from the end of the pebble path up to the treehouse door. When the angle looks right, fix both ends with hot glue.
Tip: Glue the bottom first, then the top, so the ladder does not slide while it sets.
10. Add Miniatures to Finish the Fairy Garden
Now for the fun part. Add your miniatures: a wishing well, a bird bath, a wheelbarrow, a tiny beehive and a welcome sign.
Tip: Step back after every few pieces. Fewer, well placed minis look better than a crowd.