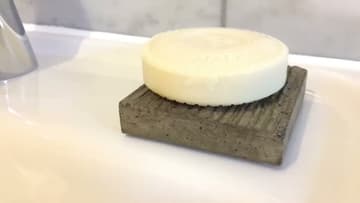
How to Make a Concrete Soap Dish (Modern DIY, Step by Step)
Source: Julian Do It • Full tutorial: www.craftingstepbystep.com/crafts/how-to-make-a-concrete-soap-dish
- Difficulty
- Easy
- Hands-on time
- About 45 minutes
- Wait time
- 8 hours
- Cost
- About $8 to $15
- Makes
- 1 concrete soap dish

Tools
- hand saw
- chisel
- sandpaper
- small hammer
- mixing bucket
- stir stick
- brush
- craft knife
- adhesive tape
- nitrile gloves
Materials
- leftover wood for the mold
- fast-setting concrete mix
- water
- household oil (mold release)
- small feet (hot-glue stick cuttings or felt pads)
- glue
- concrete sealer
- a bar of soap
Steps
1. Cut the Wood Mold Pieces
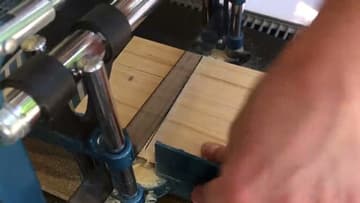
Julian measures the packaging of his soap bar, marks a square on a piece of leftover wood, and cuts a base plus four side strips with a hand saw. His base ran about 8 by 8 cm, but any size that fits your soap works.
Tip: Watch this step Cut the four side strips a touch taller than your soap is thick. That gives the concrete room and leaves a comfortable lip around the finished dish.
2. Chisel the Drainage Grooves
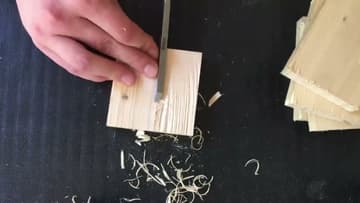
Here is the trick that gives this dish its look. Julian holds a sharp chisel at a low angle and shaves grooves along the grain of the base piece, working out the raised wood fibers.
Tip: Watch this step A freshly sharpened chisel makes clean grooves with far less force. If the wood tears instead of slicing, hone the edge before you carry on.
3. Sand and Tape the Mold Together
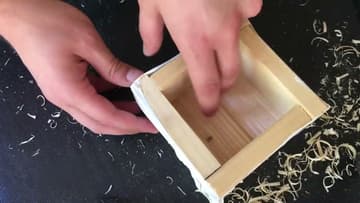
A quick rub with sandpaper knocks off the loose fibers the chisel left standing, so the grooves cast crisp. Then Julian stands the four side strips up around the carved base to build the open box.
Tip: Watch this step Run a couple of wraps of tape around the outside and press it hard into the corners. A tight mold now saves you a lot of edge cleanup later.
4. Oil the Mold for a Clean Release
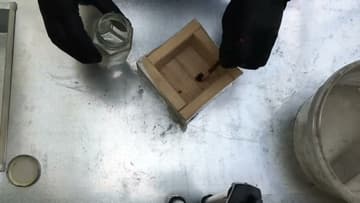
Before any concrete goes in, Julian brushes plain household oil over the inside of the wood mold. This is your release coat.
Tip: Watch this step Any cheap cooking oil or leftover vegetable oil works fine as a release. Brush it thin - you want a film, not a puddle sitting in the grooves.
5. Mix and Pour the Concrete
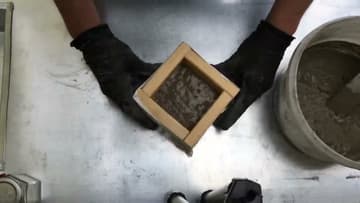
Julian mixes a fast-setting concrete in a bucket, shaking and stirring it well to work the air bubbles out. Then he fills the taped mold and levels the top with a stick.
Tip: Watch this step Wear gloves - wet concrete is caustic and dries out your skin fast. Mix to a thick milkshake, not soup, so it holds the grooves instead of slumping flat.
6. Cure and Demold the Dish
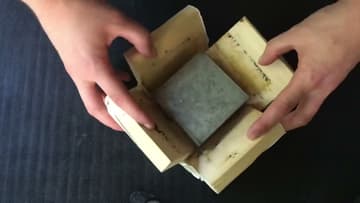
Julian covers the mold with plastic and parks it in a shady spot so it cures slowly and does not crack. Once it has set, he peels off the tape and runs a craft knife along each side strip to break it free.
Tip: Watch this step Do not rush the cure. A full day under plastic gives a stronger cast than a fast dry, and a rushed pour is where hairline cracks show up.
7. Add Feet and Seal the Concrete
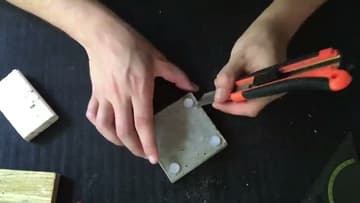
Raw concrete can scratch a sink or countertop, so Julian glues four small feet to the underside - he used cut-off pieces of hot-glue stick, but felt pads or rubber bumpers work too. He wipes away the squeezed-out glue for a clean bottom.
Tip: Watch this step Sand the sharp cast edges lightly before sealing. A quick pass with fine sandpaper softens them so the dish feels finished, not raw.
8. Style It in the Bathroom
The dish goes on the sink with a fresh bar of soap set into the grooves. Those carved ridges hold the bar up off the flat so water drains into the channels and the soap dries out between washes.
Tip: Watch this step Give the finished dish a rinse and a re-seal every few months if it lives by a busy sink.