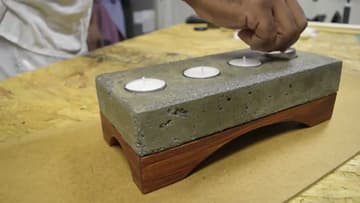
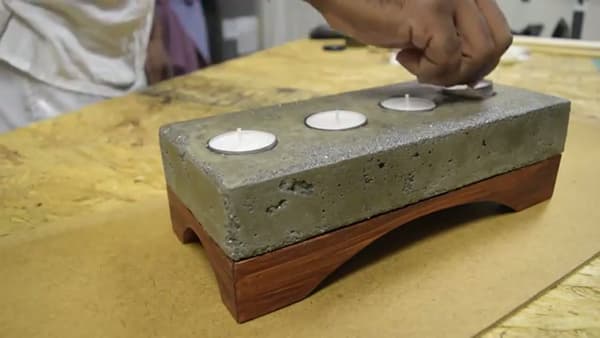
How to Make a Concrete Candle Holder
Source: DIY Creators • Full tutorial: www.craftingstepbystep.com/crafts/how-to-make-a-concrete-candle-holder
- Difficulty
- Medium
- Hands-on time
- About 1 hour 30 minutes
- Wait time
- 48 hours
- Cost
- About $15 to $25
- Makes
- 1 concrete candle holder with a wood base
Tools
- mixing bucket or tub
- stir stick
- hot glue gun
- putty knife
- sandpaper
- paint brush
- band saw
- belt sander
- pin nailer
- drill
Materials
- concrete mix
- scrap wood for the mold
- tea light candles
- concrete lacquer or sealer
- 1x2 pine
- wood glue
- gel stain
- epoxy
- cabinet bumpers
Steps
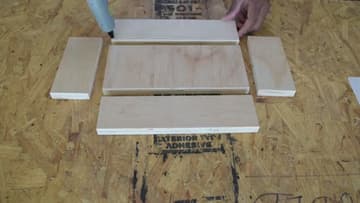
1. Build the Mold Box
Cut a few flat pieces of scrap wood to size and hot glue them into an open box. Glenn uses hot glue on purpose here.
Tip: Hot glue is the trick that makes this beginner friendly. No clamps, no screws, and the box comes apart in seconds later.
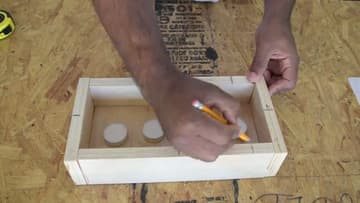
2. Mark the Candle Spots
Lay out where each tea light will sit. Glenn draws reference lines on the mold floor and centers the candle marks so the holes come out evenly spaced.
Tip: Space the marks so the tea lights are not too close to the edges. You want solid concrete around each hole.
3. Mix the Concrete
Dump your concrete mix into a bucket and add water a little at a time. Stir until it is thick and spreadable, about the texture of oatmeal.
Tip: Add water slowly. It is easy to go too wet and hard to go back. A stiffer mix cures faster and stronger.
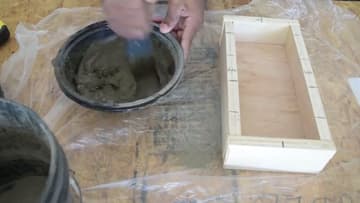
4. Pour and Set the Candles
Scoop the concrete into the mold and level the top. While it is still wet, press a tea light into each of your marked spots to form the candle holes.
Tip: Check the openings after a couple hours. If a candle does not drop in easily, scrape out a little extra concrete while it is still soft.
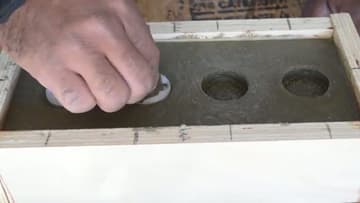
5. Demold the Block
Once the concrete is firm enough to hold its own shape, peel the wood form away. Three sides usually come off easy.
Tip: Want a smooth face instead of the raw concrete look? Wipe it with a wet sponge right after demolding to close up the surface holes.
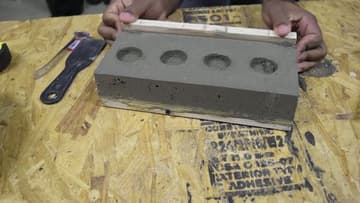
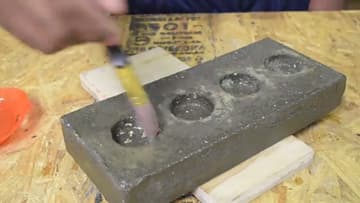
6. Sand and Seal
Give the block a quick sand to knock off the rough edges and any loose grit. Then brush on a concrete lacquer.
Tip: Wet-look lacquer deepens the color and makes the concrete pop. Dry-look sealer keeps that raw industrial gray. Pick the vibe you want.
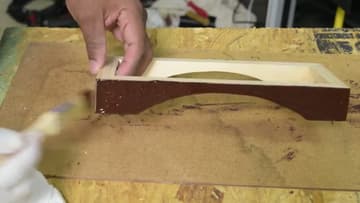
7. Build and Stain the Base
Cut a frame from 1x2 pine and miter the corners. Use a bucket rim or any curved object to trace an arch on the bottom edge, then cut it out on a band saw.
Tip: Gel stain is forgiving. Brush it on, wait a minute, wipe it back. The arch cut is what makes the whole piece look intentional.
8. Attach and Finish
Drill a small hole in each corner of the base and press in cabinet bumpers so the piece does not scratch your table. Mix up some epoxy and spread it on the inner part of the base, keeping it away from the edges so it does not squeeze out.
Tip: Epoxy is the right glue for bonding concrete to wood. Keep it toward the center so nothing oozes out the sides when you press down.