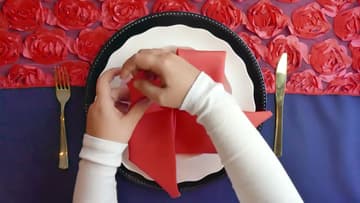
How to Fold Napkins: 3 Easy Napkin Folds
Source: BalsaCircle.com • Full tutorial: www.craftingstepbystep.com/crafts/how-to-fold-napkins
- Difficulty
- Easy
- Hands-on time
- About 20 minutes
- Cost
- About $10 to $20
- Makes
- 3 folded napkin styles: waffle cone, bow and pinwheel

Tools
- iron
- napkin rings
Materials
- 20 x 20 inch cloth dinner napkins
- spray starch
- silk flowers (optional)
Steps
1. Fold the Napkin Into a Triangle, Then a Diamond for the Waffle Cone Fold
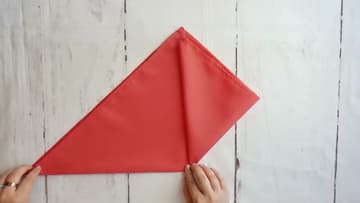
Lay the napkin flat as a diamond in front of you. Bring the bottom corner up to meet the top corner so you have a big triangle.
Tip: Run your hand along each new edge to set the crease before you move on.
2. Pull the Inside Edges Out to Shape the Waffle Cone Napkin
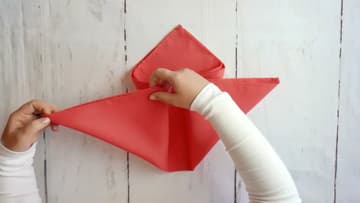
This is the tricky part of the waffle cone fold. Find the inner edge of the right flap, near the middle of the diamond.
Tip: Go slowly. If the fabric bunches, smooth it flat and pull the edge again.
3. Fold the Flaps Back and Add the Napkin Ring to the Waffle Cone Fold
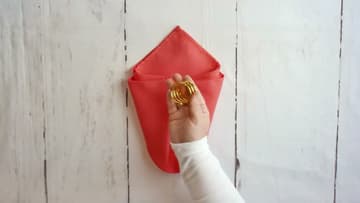
You could stop here and slide the napkin through a ring. For the full waffle cone look, fold both side points back behind the napkin.
Tip: Tuck a small flower or a sprig of greenery into the top of the cone for a finishing touch.
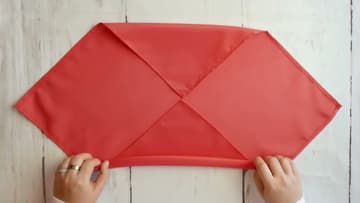
4. Fold Two Napkin Corners to the Center for the Napkin Bow
Start again with the napkin as a diamond in front of you. Fold the top corner down to the center.
Tip: Keep the two folded edges straight and parallel. That makes rolling easier.
5. Roll the Napkin Into a Long Rope for the Bow Fold
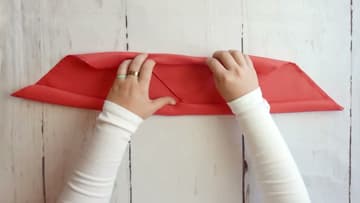
Starting from the top and bottom folded edges, roll both sides toward each other. Stop when the two rolls meet in the middle.
Tip: Roll with flat palms, not fingertips. You get a smoother, even tube.
6. Slide on the Napkin Ring and Loop the Ends to Make the Napkin Bow
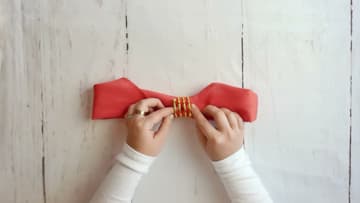
Slide a napkin ring onto the rope and move it to the middle. It does not need to be exact.
Tip: Set the bow on a small plate stacked on a dinner plate so it stays visible.
7. Fold All Four Napkin Corners to the Center for the Pinwheel Fold
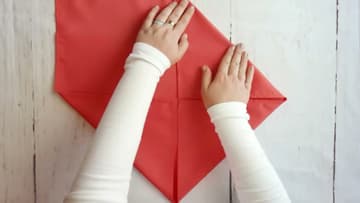
Lay the napkin flat as a square. Fold each of the four corners into the center so the points meet.
Tip: Spray starch helps most on this fold. Press the creases with an iron if they slide open.
8. Fold the Pinwheel Napkin Into a Rectangle, Then a Small Square
Turn the square slightly so it sits straight in front of you. Fold the top edge down to the middle, then fold the bottom edge up to the middle.
Tip: If the pinwheel goes wrong later, come back to this small square and start the next step again.
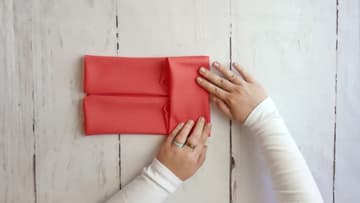
9. Pull Out the Points to Open the Pinwheel Napkin
Reach into the folds near the middle and pull out the hidden corners. Each one slides out to make a point.
Tip: Follow one direction all the way around. Switching direction twists the points.
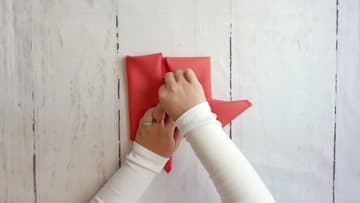
10. Fold Back the Pinwheel Napkin Flaps and Add a Silk Flower
Set the pinwheel on the plate. Fold each of the four points back underneath the napkin.
Tip: Fold the flaps back on the plate, not the table. Moving the finished square can loosen it.