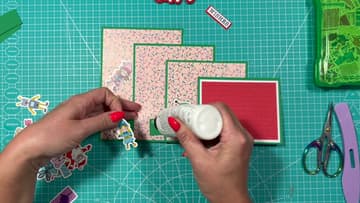
How to Make a Tiered Wiper Card (No Dies Needed)
Source: Sam Calcott UK - Mixed Up Craft • Full tutorial: www.craftingstepbystep.com/card-making/how-to-make-a-tiered-wiper-card
- Difficulty
- Medium
- Hands-on time
- About 1 hour
- Cost
- About $2 to $5
- Makes
- 1 card

Tools
- scoring board
- bone folder
- metal ruler
- paper trimmer or scissors
- embossing folder and die cutting machine (optional)
Materials
- cardstock (220-230 gsm)
- patterned paper
- craft glue
- foam pads
- die cut images or stamped characters
- 5x7 envelope
Steps
1. Cut, Mat and Emboss the Tiered Wiper Card Panels
Cut four 5 inch wide panels from cardstock: 5x7, 5x6, 5x5 and 5x4. Mat the first three with patterned paper 1/4 inch smaller on each side.
Tip: Make the panels in contrasting colors so the tiers stand out.
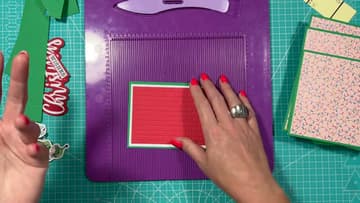
2. Make a Template for the Wiper Card Mechanism
Cut a scrap strip 6-1/2 x 1-1/2 inches. Along the long side, mark score lines at 1, 2-3/4, 3-3/4 and 5-1/2 inches, plus a small dent at 4-3/4.
Tip: Store the template in a clear pocket for the next time.
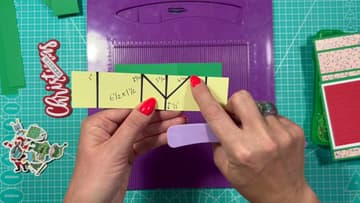
3. Score the Wiper Mechanism Strip on a Scoring Board
Cut three strips of cardstock 6-1/2 x 1-1/2 inches, one for each tier. Lay a strip on the scoring board along the long side and score at 1, 2-3/4, 3-3/4 and 5-1/2 inches.
Tip: Only want one pop-out? Make one strip. It still works.
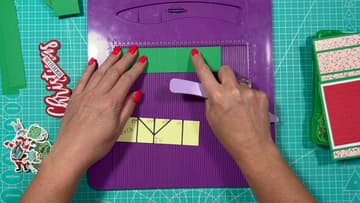
4. Score the Diagonal Lines on the Wiper Mechanism
Lay a metal ruler from the top of the second score line down to the 1/2 inch dent and score that line with a bone folder. Then score from the same point up to the 4-3/4 inch dent.
Tip: Score lightly. A heavy diagonal can split the card at the point.
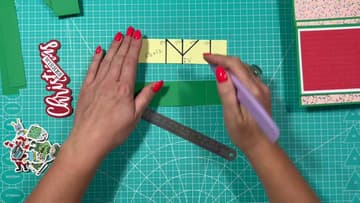
5. Fold the Scored Strip Into the Wiper Mechanism
Fold along every score line and burnish each one well. Fold the diagonals down to the 1/2 inch mark on both sides.
Tip: Trimming a sliver is easier than chasing an odd measurement.
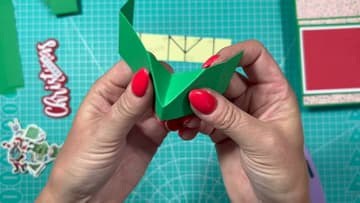
6. Glue the Wiper Mechanism Into a Tube
Add a little glue to the end flap and fold it over to close the shape. You now have a small rectangular tube with a folded pocket in it.
Tip: Let the glue grab for a minute before you handle the tube.
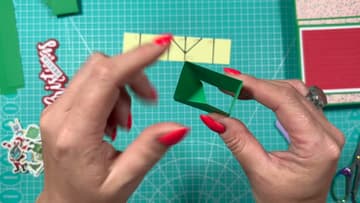
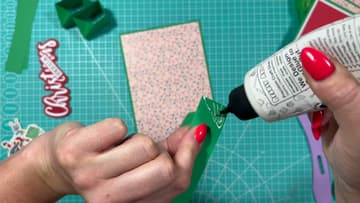
7. Glue the Wiper Mechanism Into the Corner of the Card Panel
Fold a mechanism so the sloped section faces you. Cover the square back section and the slope behind it with glue.
Tip: Use a clear, quick-grab craft glue so nothing shows at the edges.
8. Slide the Lever Into the Wiper Card Mechanism
Cut three levers 1 inch wide: 6, 5-1/2 and 5 inches long. Take the longest.
Tip: Do a trial run on scrap card if this is your first one.
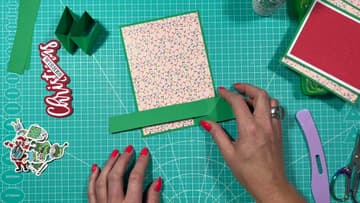
9. Stack the Next Tier on the Wiper Card Mechanism
Put glue on the sloped section only. Never glue the edge you see when the card is open.
Tip: Check every tier slides freely before the glue sets.
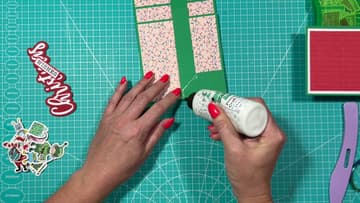
10. Attach the Pop-Out Characters to the Wiper Card Levers
Pull the card open and glue a small image to the end of each lever, as close to the edge as you can. Sam used three elves for this Christmas card.
Tip: Write your message on the back of the 5x7 panel.