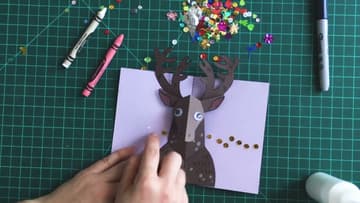
How to Make a Reindeer Christmas Card
Source: Matthew Reinhart (Pop-ups, crafts & more) • Full tutorial: www.craftingstepbystep.com/card-making/how-to-make-a-reindeer-christmas-card
- Difficulty
- Easy

Tools
- scissors
- metal ruler
- paper clip or bone folder
- printer
Materials
- brown cardstock
- pale cardstock for the card base
- white craft glue
- white gel pen
- black fine point marker
- gold sequins
- googly eyes
- envelope
Steps
1. Print the Reindeer Pop-Up Template on Brown Cardstock
Download the free reindeer template from the link in Matthew's video description. Print page one, the base card, on a pale sheet of cardstock.
Tip: Feed cardstock one sheet at a time so it does not jam.
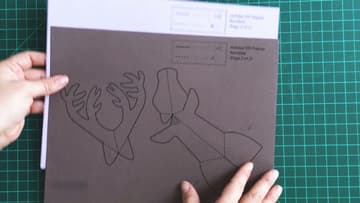
2. Score the Reindeer Template Dotted Lines With a Ruler
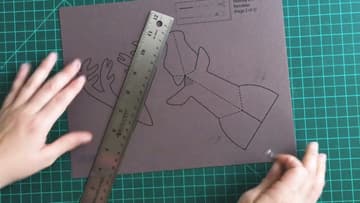
Every black dotted line on both pages is a fold. Lay a metal ruler along each one and rub the edge of a paper clip down the line, pressing firmly.
Tip: Tilt the sheet toward a lamp to check you have not missed a line.
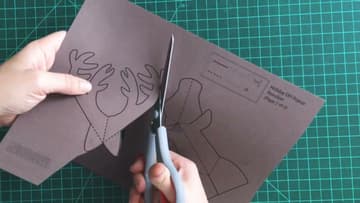
3. Cut Out the Reindeer Head and Antler Pieces
Solid black lines are cut lines. Cut out the reindeer head and the antler piece, and trim the base card to its outline.
Tip: Cut away the big waste areas first, then come back for the detail.
4. Pre-Fold the Reindeer Antlers and Head Along the Score Lines
Fold along every scored line now, before any glue goes on. Fold the antler piece in half down its center, then fold the little tabs.
Tip: Lay the pieces on the base card to see where each one will go.
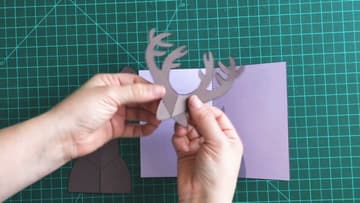
5. Glue the Tab Behind the Reindeer Head
Find the small tab up by the reindeer's head. Paint a thin layer of white craft glue on the grey spot that matches it and press the tab into place.
Tip: Spread glue with a toothpick or a scrap of card for a neat edge.
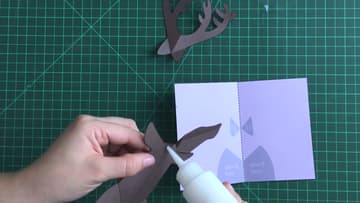
6. Glue the Reindeer Antlers Onto the Card Base Page
Look for the two small grey spaces near the top of the base card. Paint a little glue on each, not too much, or the paper gets sticky and warps.
Tip: Close the card gently once to check the antlers fold flat before the glue dries.
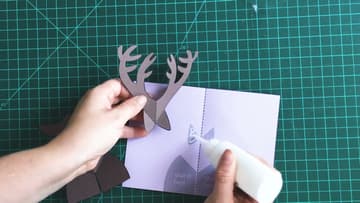
7. Glue the Reindeer Body Tabs to the Pop-Up Card
The body has two tabs at the bottom, and their shapes match the grey spaces on the base card. Paint glue on the left grey space and press the left tab down, keeping the head's center fold on the card's center fold.
Tip: Let it dry with the card open so the tabs set in the right spot.
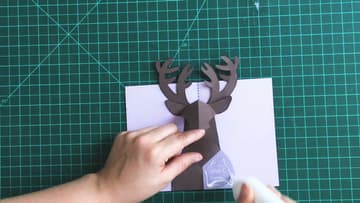
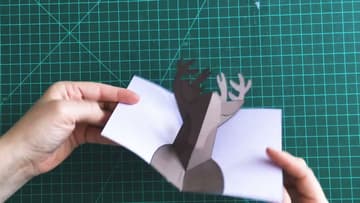
8. Test the Pop-Up Reindeer Christmas Card Opening and Closing
Once the glue is dry, close the card slowly and open it again. The reindeer should fold down flat inside, then stand up with its antlers spread as the card opens.
Tip: Open and close it a few times. The hinges loosen up and move more smoothly.
9. Draw Spots and Details on the Pop-Up Reindeer
Now the fun part. Add little white dots down the reindeer's body with a white gel pen or paint pen, and draw fur marks and ear details with a fine black marker.
Tip: Test your pen on a scrap of the same brown cardstock first.
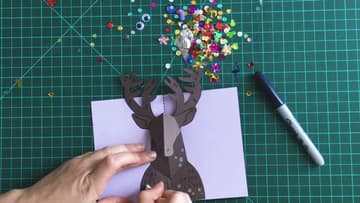
10. Add Sequin Christmas Lights and Googly Eyes to the Reindeer Card
Stick on two googly eyes and a red nose if you want Rudolph. Then dot glue in a gentle swag across the card and press on gold sequins, so it looks like a string of Christmas lights.
Tip: Pick up sequins with a damp fingertip or the tip of a toothpick.