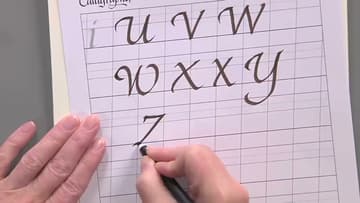
How to Write Italic Capital Letters
Source: Sakura of America • Full tutorial: www.craftingstepbystep.com/calligraphy/how-to-write-italic-capital-letters
- Difficulty
- Medium
- Hands-on time
- About 30 minutes

Tools
- Pigma Calligrapher pen, 3mm
- ruler
- 3mm italic lettering guide
Materials
- smooth marker paper
- calligraphy practice pad
Steps
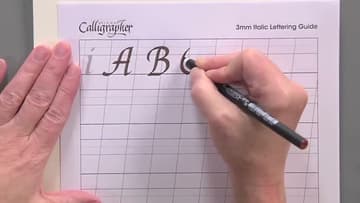
1. Write Italic Capital Letters A and B With a Swash Entry Stroke
Print the 3mm italic lettering guide and slip it under a sheet of smooth paper, or write straight on it. Hold the 3mm Pigma Calligrapher pen at the same angle you use for lowercase italic and keep it there.
Tip: Steady the paper with your other hand flat on the sheet, the way Joanne does. Paper that shifts makes the slant wander.
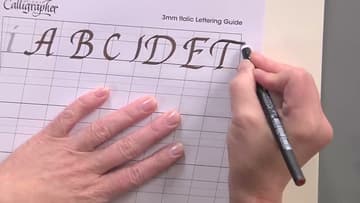
2. Write Italic Capitals C, D, E and F With Matching Thin Starts
The straight-stemmed capitals share one stroke. Start on a thin, pull down at the slant, and end on a thin.
Tip: Consistency matters more than flourish here. If the stems of B, D, E and F match, the row looks right even with plain swashes.
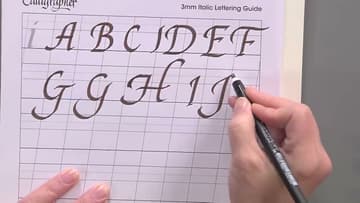
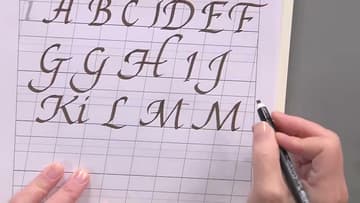
3. Write Italic Capital Letters G, H, I and J
The G is a long elliptical shape that ends on a thin. Joanne shows two versions: one with a swash that drops well below the line, and one that looks more like a lowercase g.
Tip: Leave room under this row. The G and J tails need space so they do not run into the next line.
4. Write Italic Capitals K, L and M With Even Counter Spaces
The K swash curves down and comes right back up to the line. That way a lowercase letter can follow it, which is why Joanne writes Ki.
Tip: Write the M twice, one wrong on purpose with uneven shoulders. Seeing the difference fixes it faster than any rule.
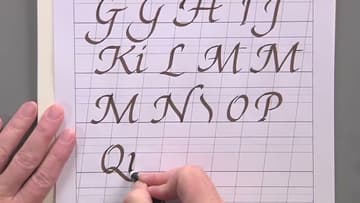
5. Write Italic Capital Letters N, O, P and Q
The N shares the M's curve. A small hook on the final stroke stops you from making the N too wide, and the diagonal should come in tight.
Tip: Test the Q by writing a lowercase u after it. If the tail crowds the u, start the tail lower.
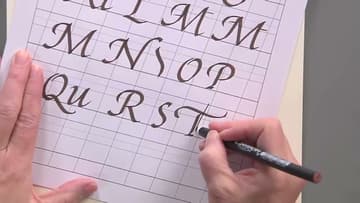
6. Write Italic Capitals R, S and T With a Long Swash Crossbar
The R starts like the K, takes a bowl like the P, and finishes with the K's downstroke. Start and end the S slightly below where your other letters sit, and keep it plain.
Tip: Practice the long T crossbar on scrap first. A confident, quick stroke looks smoother than a slow, careful one.
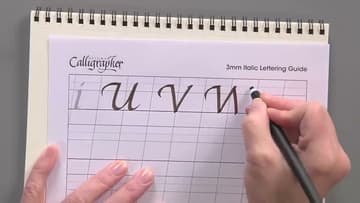
7. Write Italic Capital Letters U, V and W
The U opens with the same branch you saw on the earlier letters and otherwise stays simple. The V has that branch too.
Tip: Write each diagonal letter three times in a row. Compare the thick strokes and keep the version where they match best.
8. Write Italic Capitals X, Y and Z to Finish the Alphabet
Keep the X plain. It is another letter that looks better without a flourish, and if it comes out too wide, write it again narrower.
Tip: When the alphabet is done, write a few names with one swash capital and lowercase italic after it. That is how you will use these letters for real.